Introduction – Вступ
Sculpt Mode is similar to Edit Mode in that it is used to alter the shape of a drawing, but Sculpt Mode uses a very different workflow: Instead of dealing with individual elements (points and edit lines), an area of the model is altered using a brush. In other words, instead of selecting a group of points, Sculpt Mode manipulates the drawing in the brush region of influence.
Sculpt Mode – Режим Ліплення

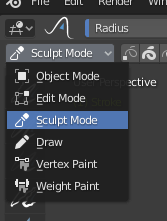
3D Viewport Mode selector: Sculpt Mode.
Sculpt Mode is selected from the Mode menu in the 3D Viewport header. Once Sculpt Mode is activated, the Toolbar of the 3D Viewport will change to Sculpt Mode specific panels. A red circle will appear and follow the location of the cursor in the 3D Viewport.
Опції Ліплення – Sculpting Options

General sculpting options.
- Маска Вибранням – Selection Mask
Sculpt Mode in Grease Pencil allows you to select points or strokes to restrict the effect of the sculpting tools to only a certain areas of your drawing.
You can use the selection tools in the Toolbar for a quick selection. You can restrict sculpting only on the selected points or strokes with the Selection mode buttons.
- Багатокадр – Multiframe
Інколи вам можливо знадобиться модифікувати кілька кадрів одночасно за допомогою засобів ліплення.
You can activate multiframe edition with the Multiframe button next to the modes selector (faded lines icon). See Multiframe for more information.
Auto-Masking
Reference – Довідка
- Menu – Меню:
- Shortcut – Шоткат:
Shift-Alt-A

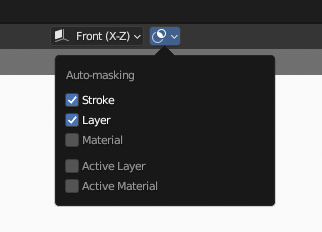
Auto-Masking settings.
These properties automatically mask geometry based on stroke, layers and materials under the cursor. It’s an quick alternative to frequent manual masking. These masks are initialized on every new tool usage. They are also never visible as an overlay.
These properties can be accessed via a Pie Menus – Кругові Меню by pressing Shift-Alt-A.
All auto-masking modes can be combined, which makes the generated auto-mask more specific. For example it’s possible to auto-mask strokes that use specific layer and material while excluding others.
- Штрихи – Strokes
Only strokes that are under the cursor when you started the tool are affected.
- Layer – Шар
Only strokes on the same layers that are under the cursor when you started the tool are affected.
- Material – Матеріал
Only materials with the same material that are under the cursor when you started the tool are affected.
- Активний Шар – Active Layer
Only the strokes on the active layer are affected.
- Active Material
Only the strokes with the active material are affected.
Keyboard Shortcuts – Клавіатурні Шоткати
Перемикач інвертування штриха Ctrl
Change active material U