旋绕
参考
| 模式: | 编辑模式 |
|---|---|
| 面板: | |
| 快捷键: | Alt-R |
旋绕 工具绕特定点和轴向旋转,挤出(当选中项为流形时复制)选中元素。
使用 旋绕 工具来生成类似车床做出的结果(因为这个原因,该工具常被称做"旋转"或"扫掠" )。事实上,它确实是以3D游标为中心,并且围绕着垂直于工作视图的轴向,生成选中元素的某种环状挤出。
- 观察点决定挤出围绕的轴向。
- 3D游标的位置将是旋绕的中心。
选项
- 步数
- 指定"扫掠"后挤出的复制体数量。
- Duplicate
- 选中时,原始结构与旋绕结果是分开的独立结构(即与旋绕挤出的结果断开)。
- 角度
- 指定旋绕"扫过"的角度,单位度(比如,180表示半圈)。
- Auto Merge
- Automatically merges the first a last duplicates, if they make a full revolution which results in overlapping geometry.
- Flip Normals
- Reverses the normal's direction for any resulting geometry.
- 中心
- 指定旋绕的中心,默认使用3D游标位置。
- 轴向
- 指定旋绕表示轴向的向量,默认使用当前视角轴向(视图)。
范例
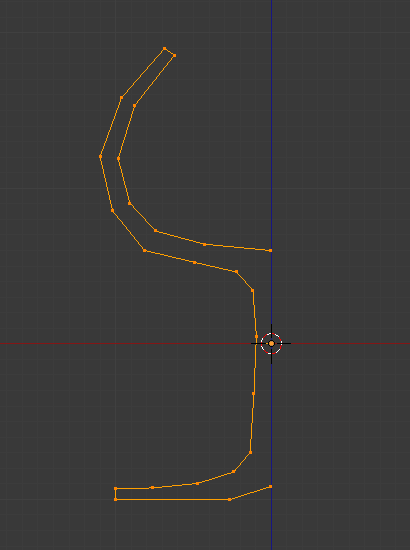
杯子轮廓。
首先,为物体创建表示轮廓的网格。如果需要建模的是中空物体,对轮廓线直接加厚也不错。图 杯子轮廓。 展示了我们即将演示建模过程的酒杯的轮廓。
进入 编辑模式,按下 A 全选轮廓的所有顶点。
我们将在顶视图围绕3D游标旋绕这个对象,因此按下 Numpad7 切换到顶视图。
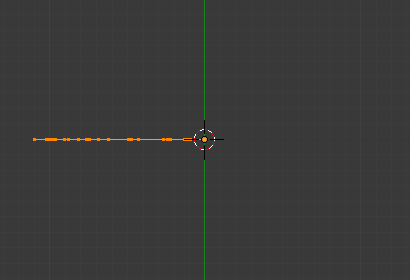
旋绕之前,编辑模式下杯子轮廓的顶视图。
沿中心线选择一个顶点,再使用 将3D游标吸附到选中点的位置,这样将游标置于轮廓的中心。(图 旋绕之前,编辑模式下杯子轮廓的顶视图。)显示了顶视图下的酒杯轮廓,游标已放置到正确位置。
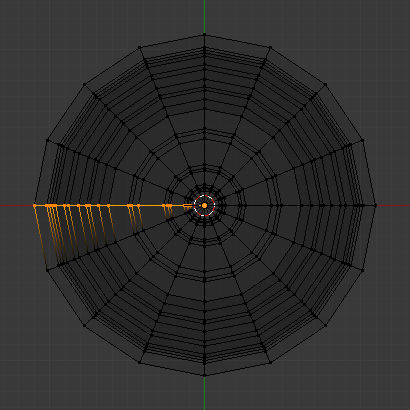
点击 旋绕 按钮。若打开的3D视图不只1个,光标将变成带问号的箭头,需要在顶视图所在区域单击方可继续。若你只打开了1个3D视图,旋绕操作将立即进行。图 旋绕后的轮廓。 显示了成功旋绕的结果。
Duplicate
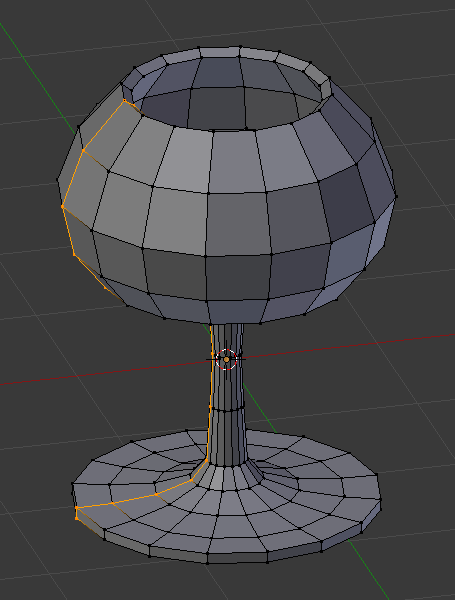
旋绕操作的结果。 |
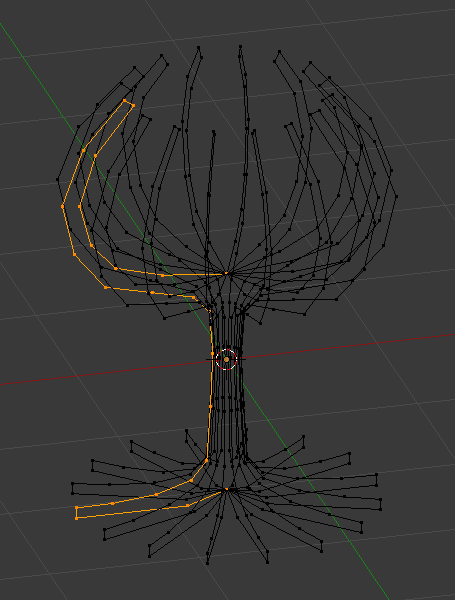
勾选复制的结果。 |
合并重叠点
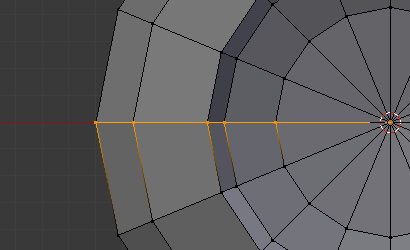
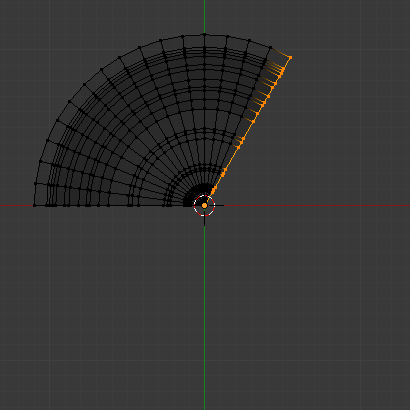
重叠点。
The spin operation leaves duplicate vertices along the profile. You can select all vertices at the seam with Box select B (shown in Fig. 重叠点。) and perform a Merge by Distance operation.
Notice the selected vertex count before and after the Merge by Distance operation
Vertex count after removing doubles. If all goes well, the final vertex count
(38 in this example) should match the number of the original profile noted in
.
If not, some vertices were missed and you will need to weld them manually.
Or, worse, too many vertices will have been merged.
Note
合并两个顶点为一个
To merge (weld) two vertices together, select both of them by Shift-RMB clicking on them. Press S to start scaling and hold down Ctrl while scaling to scale the points down to 0 units in the X, Y and Z axis. LMB to complete the scaling operation and click the Merge by Distance button in the Toolbar in Edit Mode (also available with ).
另外,还可以在专用项菜单选择 (或快捷键 Alt-M)。然后,在弹出菜单中,选择合并的顶点位于选中点的中心还是在3D游标处。在本例中第一个选择更好!
重新计算法线
现在就只剩下全选所有顶点,按下 Ctrl-N ,在弹出菜单中选择 向外重算法线方向。