Timeline
The Timeline editor, identified by a clock icon, is used for manipulating keyframes and scrubbing the playhead.

O editor Linha do tempo.
The Timeline gives the user a broad overview of a scene’s animation, by showing the current frame, the keyframes of the active object, the start and end frames of your animation sequence, as well as markers set by the user.
The Timeline includes Transport Controls, to play, pause, and skip through an animation sequence.
It also includes tools for manipulating Keyframes, Keying Sets, and Markers.
Visão principal
A região principal do editor Linha do tempo mostra os quadros de animação sobre um intervalo de tempo.

Here you can see the Keyframes (diamond shapes), Playhead (blue handle), Scrollbar (along the bottom).
Ajustando a visualização
O editor Linha do tempo pode ter seu panorama de visualização movido mantendo pressionado BMM, e então arrastando a área para esquerda ou para a direita.
Você pode ampliar a visualização do editor Linha do tempo através da utilização do Ctrl-BMM, usando a Roda do mouse, ou pressionando Tecl. Num. - ou Tecl. Num. +.
You can also use the scrollbars, located at the bottom or the right of the editor, to pan and zoom the view.
Playhead
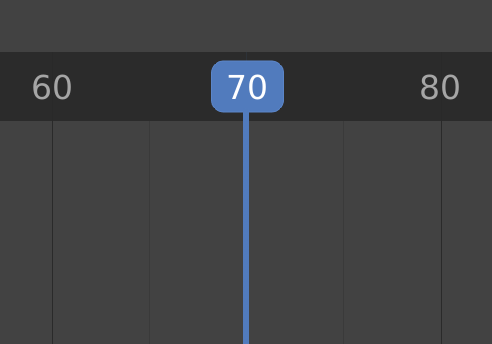
The Playhead is the blue vertical line with the current frame number at the top.
Playhead.
The Playhead can be set or moved to a new position by pressing or holding LMB in scrubbing area at the top of the timeline.
The Playhead can be moved in single-frame increments by pressing Left or Right, or you can jump to the beginning or end frame by pressing Shift-Left or Shift-Right.
Frame Range
By default, the Frame Range is set to start at frame 1 and end at frame 250. You can change the frame range in the top right of the Timeline header, or in the Output Properties.
Quadros-chave
For the active and selected objects, keyframes are displayed as diamond shapes.
You can click to select one at a time, or select several by holding Shift, or by dragging a box around the keyframes. You can then move single keys by dragging them, and you can move multiple keys by pressing G and scale them with S.
Only Selected Channels can be enabled. . For Armatures, this will display the object keyframes, and the keyframes for the active and selected pose bones.
Marcadores
veja a página sobre os Marcadores para mais informações.
Cabeçalho
Popovers
Playback Popover
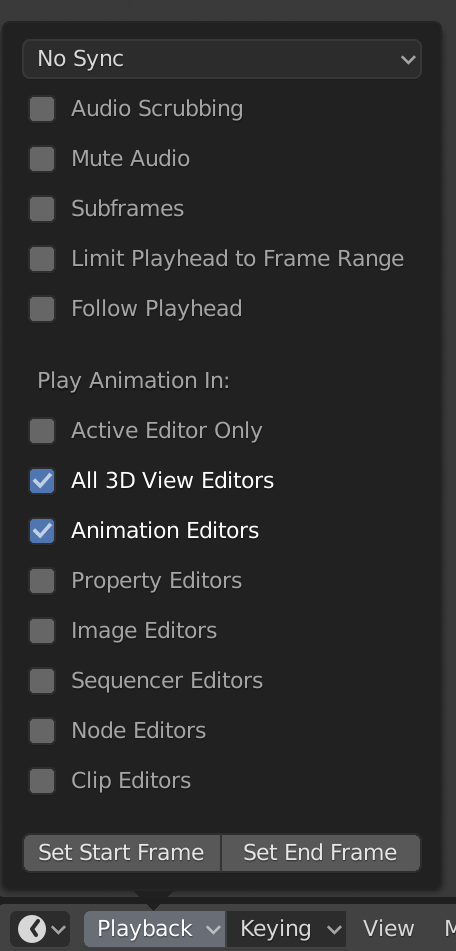
The Playback popover contains options controlling the animation playback.
- Sync Mode
-
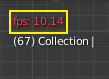
When you play an animation, the frame rate is displayed at the top left of the 3D View. If the scene is detailed and playback is slower than the set Frame Rate (see Painel dimensões), these options are used to synchronize the playback.
- Sem sincronização
Não sincroniza, reproduz cada quadro.
- Descarte de quadros
Drop frames if playback is too slow.
- Sincronismo de áudio e vídeo
(Audio/Video Synchronization). Sync to audio clock, dropping frames if playback is slow.
- Reproduzir áudio ao reposicionar
If your animation has sound, this option plays bits of the sound wave while you move the playhead with LMB or keyboard arrows (like a moving playhead).
- Mute Audio
Mute the sound from any audio source.
- Subframes
Display and allow changing the current scene sub-frame.
- Limit Playhead to Frame Range
Don’t allow selecting frames outside of the playback range using the mouse.
- Follow Playhead
Animation editors can be setup to always follow the time indicator as animation is being played back. Following will be done when animating and changing frame. When the cursor reaches the end of the screen, the next range of frames of the same width will be displayed.
- Active Editor Only
While playing, updates the Timeline, if Animation Editors and All 3D Viewports disabled.
- All 3D Viewports
Ao reproduzir, atualiza a Janela de visualização 3D e a Linha do tempo.
- Editores de animação
While playing, updates the Timeline, Dope Sheet, Graph Editor, Video Sequencer.
- Editores de propriedade
Quando a animação está sendo reproduzida, isto irá atualizar os valores das propriedades dentro da interface de usuário.
- Editores de imagem
The Image editor in Mask mode.
- Editores de sequência
While playing, updates the Video Sequencer.
- Editores de nós
While playing, updates the Node properties for the node editors.
- Editores de clipe
Ao reproduzir, atualiza o Editor de clipes de filme.
Keying Popover
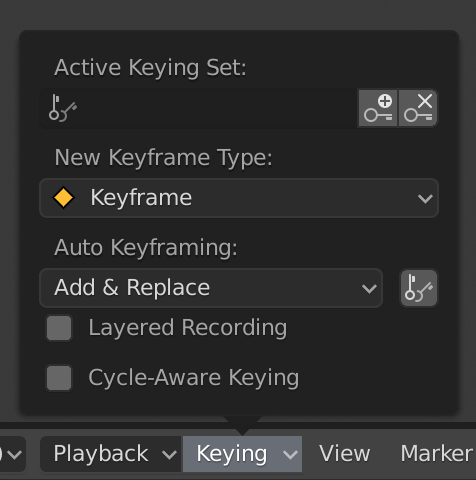
The Keying popover contains options that affect keyframe insertion.
- Conjunto de inserção de chaves ativo
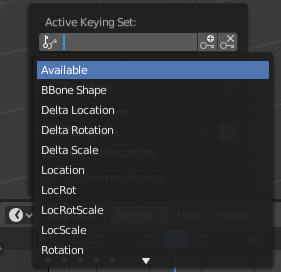
Os conjuntos de inserção de chaves para o editor Linha do tempo.
Keying Sets are a set of keyframe channels in one. They are made so the user can record multiple properties at the same time. With a keying set selected, when you insert a keyframe, Blender will add keyframes for the properties in the active Keying Set. There are some built-in keying sets, LocRotScale, and also custom keying sets. Custom keying sets can be defined in the panels .
- Insert Keyframes (plus icon)
Insere quadros-chave no quadro atual para as propriedades presentes no Conjunto de inserção de chaves ativo.
- Delete Keyframes (minus icon)
Apaga os quadros-chave no quadro atual para as propriedades presentes no Conjunto de inserção de chaves ativo.
- New Keyframe Type
Especifica o Tipos de quadros-chave durante as inserções.
- Modo de inserção automático de chaves
This controls how the auto keyframe mode works. Only one mode can be used at a time.
- Adicionar e Substituir
Add or replace existing keyframes.
- Substituir
Only replace existing keyframes.
- Auto Keying Set (two keys icon)
Quando habilitada, a opção Inserção de quadros-chave automáticos irá inserir novos quadros-chave para as propriedades dentro do Conjunto de inserção de chaves ativo.
- Layered Recording
Adiciona uma nova trilha de animação não linear e uma faixa para cada ciclo ou passo feito sobre a animação para permitir ajustes não destrutivos.
- Cycle-Aware Keying
When inserting keyframes into trivially cyclic curves, special handling is applied to preserve the cycle integrity (most useful while tweaking an established cycle):
If a key insertion is attempted outside of the main time range of the cycle, it is remapped back inside the range.
When overwriting one of the end keys, the other one is updated appropriately.
Menus
O menu Visualizar
O menu Visualizar controla o que você vê, e com o que isso se parecerá.
- Mostrar segundos Ctrl-T
Whether to show the time in the X axis and the Playhead as frames (based on the FPS) or as seconds.
- Bloquear o tempo para outras janelas
It synchronizes the horizontal panning and scale of the current editor with the other editors (Graph, Dope Sheet, NLA) when this option is set. That way you always have these editors showing an identical part of the time you work on.
- Show Markers
Shows the markers region. When disabled, the Markers Menu is also hidden and markers operators are not available in this editor.
- Somente os quadro-chave a partir dos canais selecionados
For Armatures, this will display the object keyframes, and the keyframes for the active and selected pose bones.
- Cache
- Mostrar o cache
Mostra todos os tipos habilitados.
Soft Body, Particles, Cloth, Smoke, Dynamic Paint, Rigid Body.
Cache da linha do tempo.
- Visualizar tudo Home
Maximiza a área com base no intervalo de animação.
- Visualizar quadro Tecl. Num. 0
Centers the Timeline to the Playhead.
- Atrelar câmera aos marcadores Ctrl-B
This is used to switch cameras during animation. It binds the active camera to the selected markers. First select a camera. Then select the marker(s). Then use the tool.
Markers Menu
Markers are used to denote frames with key points or significant events within an animation. Like with most animation editors, markers are shown at the bottom of the editor.
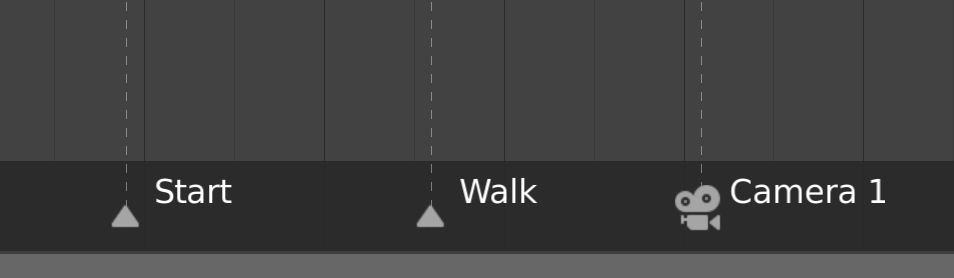
Markers in animation editor.
For descriptions of the different marker tools see Editing Markers.
Controles do cabeçalho
Os controles do cabeçalho da Linha do tempo.

Controles do cabeçalho da Linha do tempo.
1. Popovers for Playback and Keying, 2. Transport Controls, 3.Frame Controls
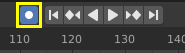
Transport Controls
These buttons are used to set, play, rewind, the Playhead.
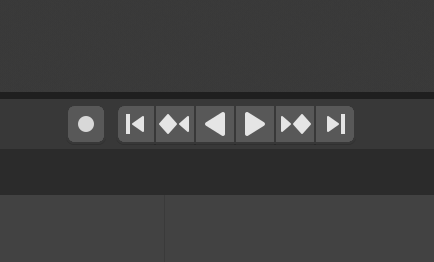
Transport controls.
- Saltar para o início (⏮) Shift-Ctrl-Seta p/ baixo ou Shift-Seta p/ esquerda
Isto define o cursor para o início do intervalo de quadros.
- Saltar para o quadro-chave anterior (⏪︎) Seta p/ baixo
Isto define o cursor para o quadro-chave anterior.
- Rewind (◀) Shift-Ctrl-Spacebar
Isto reproduz a sequência de animação de maneira reversa. Durante as reproduções, este botão alternará para um botão de pausa.
- Play (▶) Spacebar
Isto reproduz a sequência de animação. Durante as reproduções, este botão alternará para um botão de pausa.
- Saltar para o próximo quadro-chave (⏩︎) Up
Isto define o cursor para o próximo quadro-chave.
- Saltar para o final (⏭) Shift-Ctrl-Seta p/ cima ou Shift-Seta p/ direita
Isto define o cursor para o final do intervalo de quadros.
- Pause (⏸) Spacebar
Isto interrompe a animação.
Frame Controls
- Quadro atual Alt-Roda do mouse
The current frame of the animation/playback range. Also the position of the Playhead.
- Preview Range (clock icon)
This is a temporary frame range used for previewing a smaller part of the full range. The preview range only affects the viewport, not the rendered output. See Espaço de previsão.
- Início
O quadro inicial do intervalo da animação ou reprodução.
- Fim
O quadro final do intervalo de animação ou reprodução.
Controles de quadros-chave
- Inserção de quadros-chave automáticos
Insere quadros-chave automáticos a partir da linha do tempo.
The record button enables Auto Keyframe: It will add and/or replace existing keyframes for the active object when you transform it in the 3D View.
For example, when enabled, first set the Playhead to the desired frame, then move an object in the 3D View, or set a new value for a property in the UI.
When you set a new value for the properties, Blender will add keyframes on the current frame for the transform properties. Other use cases are Fly/Walk Mode to record the walk/flight path and Lock Camera to View to record the navigation in camera view.
Nota
Note que a opção Inserção de quadros-chave automática funciona somente para as propriedades de transformação (para objetos e ossos), nas vistas do editor Janela de visualização 3D (ou seja, você não poderá utilizá-lo para por exemplo, animar as cores de um material dentro do editor Janela de propriedades)….