Вступ
A UV texture is a picture (image, sequence or movie) that is used to color the surface of a mesh. The UV texture is mapped to the mesh through one or more UV maps. There are three ways to establish the image used by the UV texture:
- Paint a flat image in the Image Editor onto the currently selected UV texture, using its UV map to transfer the colors to the faces of the mesh.
- Paint the mesh in the 3D View, and let Blender use the currently selected UV map to update the UV texture (see Projection Painting).
- Use any image editing program to create an image. In the Image Editor, select the UV texture and load the image. Blender will then use that texture’s UV map to transfer the colors to the faces of the mesh.
Blender features a built-in paint mode called Texture Paint which is designed specifically to help you edit your UV textures and images quickly and easily in either the Image Editor or the 3D Viewport. Since a UV texture is just a special-purpose image, you can also use any external paint program, like GIMP or Krita.
Since a mesh can have layers of UV textures, there may be many images that color the mesh. However, each UV texture only has one image.
Texture Paint works in both a 3D View and the Image Editor. In the 3D View in Texture Paint Mode, you paint directly on the mesh by projecting onto the UVs.
Почин
Once you have unwrapped your model to a UV map, you can begin the texturing process. You cannot paint on a mesh in Texture Paint Mode without first unwrapping your mesh, and doing one of the following steps. Either:
See: Applying Image.
Після того, як ви використали один з цих способів, ви можете модифікувати зображення за допомогою режиму Малювання Текстур – Texture Paint Mode:

Вмикання режиму малювання.
- Activate the Texture Paint workspace. Here the 3D View has the Texture Paint Mode enabled and the Image Editor is already switched to Paint mode.
- У 3D Огляді – 3D View виберіть режим «Малювання Текстур» – Texture Paint Mode за допомогою вибірника режимів у заголовку й можете малювати безпосередньо на сіті.
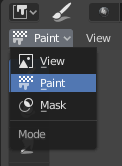
- In the Image Editor, switch the mode to Paint (shown to the right).
Примітка
Квадратний Степінь Двійки – Square Power of Two
Texture Paint is very fast and responsive when working in the 3D View and when your image is sized as a square where the side lengths are a power of two, e.g. 256×256, 512×512, 1024×1024, etc.
Після вмикання вами Малювання Текстур – Texture Painting вказівник миші набуває вигляду пензля. Для роботи з UV розставою (наприклад, для пересуву координат) ви повинні повертатися у режим «Огляд» – «View».
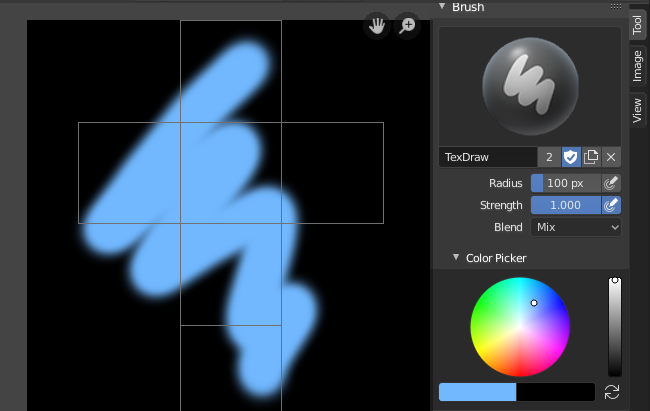
As soon as you enable Texture Painting or switch to Texture Paint Mode, brush settings become available in the Toolbar.
In the Image Editor, you paint on a flat canvas that is wrapped around the mesh using UV coordinates. Any changes made in the Image Editor show up immediately in the 3D View, and vice versa.
A full complement of brushes and colors can be selected from the Sidebar region in the Image Editor. Brush changes made in either panel are immediately reflected in the other panel. However, the modified texture will not be saved automatically; you must explicitly do so by .
Відсутні Дані – Missing Data
When no UV layers or texture slots can be detected, the system will display a warning and a few controls to add the relevant data in the Toolbar. You will not be able to paint until all missing data have been added.
- Додати Прості UV-ти – Add Simple UVs
- Команда Add Simple UVs здійснює просте розгортання моделі на основі упакування світлокарт. Все-таки рекомендується здійснити власне розгортання користувачем.
- Додати Гніздо Малювання – Add Paint Slot
- Add a material (if missing) and/or a texture slot. (Todo 2.72)
Передогляд Текстури – Texture Preview
Якщо ваша текстура веж використовується для карт кольорів, вигинів, зміщень, альфа-прозорості тощо, на поверхні моделі у вашій сцені (іншими технічними словами, є розкладеною по певних аспектах текстури через канал текстури використовуючи UV як карту уводу), то ви можете бачити ефекти від вашого малювання у контексті вашої сцени при малюванні вами.
To do this, set up side-by-side areas, one Area in 3D View set to Texture shading option, and in the second Area the Image Editor loaded with your image. Position the 3D View to show the object that is UV-mapped to the loaded image. In the image to the right, the texture being painted is mapped to the «Normal» attribute, and is called «bump mapping», where the grayscale image is used to make the flat surface appear bumpy. See Texture Mapping Output for more information on bump mapping.
Збереження – Saving
If the header menu item Image has an asterisk next to it means that the image has been changed, but not saved. Use the option to save your work with a different name or overwrite the original image.
Примітка
UV Текстури – UV Textures
Since images used as UV textures are functionally different from other images, you should keep them in a directory separate from other images.
The image format for saving is independent of the format for rendering.
The format for saving a UV image is selected in the header of the File Browser,
and defaults to PNG (.png).
If Packing is enabled in the File Browser’s header, or if you manually , saving your images to a separate file is not necessary.
Використання зовнішнього редактора зображень
If you use an external program to edit your UV texture, you must:
- Run that paint program (GIMP, Krita, Photoshop® , etc.).
- Load the image or create a new one.
- Change the image.
- And re-save it within that program.
- Back in Blender, you reload the image in the Image Editor.
Ви схочете використовувати зовнішню програму, якщо ви маєте команди людей, що використовують різні програми для розроблення UV текстур, або якщо ви хочете застосувати якість спеціальні ефекти, які наразі немає функція Малювання Текстур, або якщо ви більш знайомі з іншою вашою улюбленою програмою малювання.
Відомі обмеження
Перекриття UV
Загалом, перекривні UV-ти не підтримуються (як і для запікання текстур).
Проте, це тільки проблема тоді, коли одиничний штрих пензля намальований на одночасно кількох гранях, що мають спільну текстуру.
Огляд перспективи та грані позаду цього огляду
When painting onto a face which is partially behind the view (in perspective mode), the face cannot be painted on. To avoid this, zoom out or use an orthographic viewport.
Огляд перспективи та низько полігональні поверхні
When painting onto a face in perspective mode onto a low-poly object with normals pointing away from the view, painting may fail; to workaround disable the Normal option in the paint panel.
Типово це стається при малюванні на боці куба (дивіться Bug report T34665).
