Конфігурування периферійних пристроїв – Configuring Peripherals
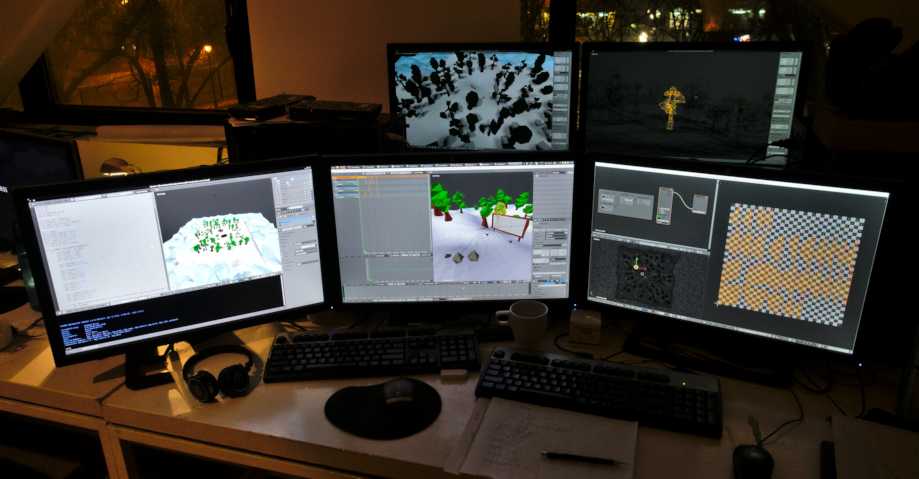
Показ – Displays
Повний HD показу або вище рекомендується. Багато-моніторні уклади підтримуються, і робпростори можуть бути сконфігуровані для простягання на кілька моніторів.

Приклад підтримки Blender’ом кількох одночасно моніторів.
Пристрої Уводу – Input Devices
Blender підтримує різні типи пристроїв уводу:
Клавіатура (рекомендовано: клавіатура з цифровою частиною справа, Англійська розстава працює найкраще)
Миша (рекомендовано: миша з трьома кнопками та коліщам прокрутки)
Пристрій NDOF (відомий також як 3D Миша)
Графічний Планшет – Graphic Tablet
Примітка
If you are missing an input device such as a mouse or numpad you can change Blender’s keymap to emulate these devices. Settings to enable this can be found in the Input Preferences.
Миша – Mouse
Емуляція кнопок миші – Mouse Button Emulation
Якщо ви не маєте миші з 3 кнопками, то вам необхідно буде емулювати її, увімкнувши опцію в Уподобаннях – Preferences.
Таблиця нижче показує використовувані комбінації:
3-кнопкова Миша |
LMB |
MMB |
RMB |
|---|---|---|---|
2-кнопкова Миша |
LMB |
Alt-LMB |
RMB |
Клавіатура – Keyboard
Емуляція Цифроблоку – Numpad Emulation
Якщо ви не маєте справа на вашій клавіатурі цифрової частини – Numpad, то ви можете емулювати її клавіші (використовує цифрові клавіші на звичайній клавіатурі натомість, проте, вилучає швидкий доступ до видимості шарів).
Дивись також
Читайте більше про Емуляцію Цифроблоку у секції про Уподобання – Preferences.
Клавіатура з Не-Англійською розставою – Non-English Keyboards
Якщо ви використовуєте клавіатуру з не-Англійською розставою клавіш, ви все ще можете скористатися вашим комп’ютером, перемкнувшись на цей час роботи з Blender’ом на розставу UK або US.
Примітка
Ви можете також змінити стандартну розкладку клавіш або стандартні скорочення з Уподобань – Preferences, проте, цей довідник припускає, що ви використовуєте стандартну розкладку клавіш.
Графічний Планшет – Graphic Tablet
Графічні планшети можуть використовуватися для забезпечення більш традиційного методу керування вказівником миші за допомогою пера. Це може допомогти забезпечити більш знайомий спосіб для митців, котрі використовують подібні засоби для малювання і рисування, а також надати додаткові керувальники, такі як чутливість натиску.
Примітка
Якщо ви використовуєте графічний планшет замість миші й чутливість натиску не працює правильно, спробуйте навести вказівник миші на вікно Blender’а і від’єднати та приєднати ваш графічний планшет. Це має допомогти.
3D Маніпулятор (3D Миша) – NDOF (3D Mouse)
3D mice or NDOF devices are hardware that you can use to navigate a scene in Blender. Currently only devices made by 3Dconnexion are supported. These devices allow you to explore a scene, as well as making Fly/Walk Navigation easier to control. The NDOF device can be configured in the Preference. These settings can also be accessed using the NDOFMenu button on the NDOF device to open a pop-up menu to adjust the settings directly from the viewport.
Дивись також
Детальніше дивіться Input Preference щодо конфігурування периферій.
Head-Mounted Displays (Virtual Reality)
HMDs make it possible to place users in an interactive, virtual environment. Attached to the head, they track head movements to project a seemingly surrounding world onto small screens in front of the user’s eyes. If the system works well, they experience the virtual environment as if they were really inside of it.
Supported Platforms
Virtual reality support in Blender is implemented through the multi-platform OpenXR standard. This standard is new and therefore support for it is still limited.
Platform |
Operating System |
Notes |
|---|---|---|
GNU/Linux |
Not recommended for general use yet. |
|
Oculus (Rift and Quest) |
Windows |
Prototype Release, Oculus Link required for Quest. |
Windows, GNU/Linux |
||
Windows |
Requires Windows 10 May 2019 Update (1903). |
Getting Started
The following subsections describe how an HMD can be set up for usage with the supported platforms. If this is not done, Blender will report an error when trying to start a virtual reality session.
Oculus
Oculus provides prototype OpenXR support. To use it, Blender has to be started in a special way, as described below.
Download and install the Oculus Rift software.
Start Blender by double clicking the
blender_oculusscript inside the installation directory. It will open a command-line window with further information.Enable the VR Scene Inspection add-on in Blender.
SteamVR
OpenXR support in SteamVR is a developer preview. It requires SteamVR beta features.
Launch SteamVR. It should show a prompt for making SteamVR the default OpenXR runtime. Click
Set as default.Enable the VR Scene Inspection add-on in Blender.
Windows Mixed Reality
To check if a PC meets the requirements to run Windows Mixed Reality, Microsoft offers the Windows Mixed Reality PC Check application.
Make sure the Windows 10 May 2019 Update (1903) is installed.
If the system meets all requirements, the Mixed Reality Portal should already be installed. It is also available in the Microsoft Store.
Launch the Mixed Reality Portal. Click the menu button
...in the lower left corner. In the menu it opens, select the Set up OpenXR.Enable the VR Scene Inspection add-on in Blender.
For more information, refer to Windows“ Getting Started Guide for OpenXR.
Monado
Monado is a free and open source XR platform for Linux. It is not yet ready for production usage and should only be used for testing purposes.
Packages are available for the following distributions:
Ubuntu (Eoan, Focal)
For other systems, it has to be compiled from source, which in this case is not recommended for people with little experience in compiling software. Follow the Getting Started Guides from Monado to do so nevertheless.