Смужки «Фільм» – Movie Strips
Для додання фільму (з або без аудіо) виберіть файл(и) фільму у Браузері Файлів, наприклад, у форматі Audio-Video Interleaved (*.avi файл).
Примітка
Кліпи можуть бути Величезними
Трихвилинний файл Quicktime .mov може займати 140 МБ. Завантаження його, навіть через високо-швидкісну LAN може зайняти деякий час. Не вважайте. що ваш комп’ютер або Blender заблокувався, якщо у цей час нічого не відбувається.
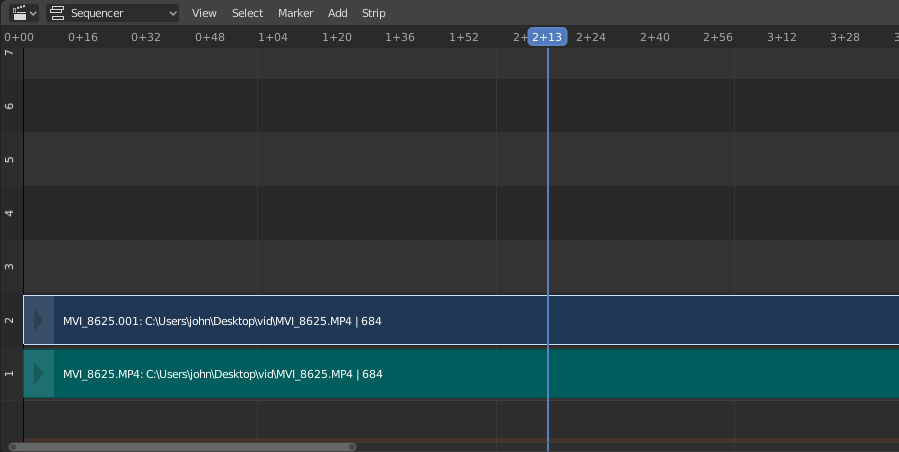
Add Movie Strip
Reference
- Menu
- Relative Path
Store the location of the image file relative to the blend-file.
- Start Frame
The Start Frame to place the left handle of the strip.
- Channel
The Channel to place the strip.
- Replace Selection
Replaces the currently selected strips with the new strip.
- Fit Method
Determines how images with an aspect ratio different than the Scene’s are scaled to fit inside the render area.
- Scale to Fit
Adjusts the strips Scale Transforms so the visual contents of the strip to fit exactly within the project’s Dimensions while maintaining the original aspect ratio.
This may mean that the transparent areas may be added along the content’s border to fit the content in the rendered area.
- Scale to Fill
Adjusts the strips Scale Transforms so the visual contents of the strip to span the project’s Dimensions while maintaining the original aspect ratio.
This may mean that portions of the original image no longer fit the content inside the rendered area.
- Stretch to Fill
Adjusts the strips Scale Transforms so the visual contents of the strip to fill the project’s Dimensions. Note, unlike the other two methods described above, Stretch to Fill does not maintaining the original aspect ratio.
This may mean that the original image becomes distorted to fit the content inside the rendered area.
- Sound
Add a Sound Strip that contains the movie’s audio track.
- Use Movie Frame Rate
Sets the Scene Frame Rate to the frame rate encoded in the movie file.
Смужки «Зображення/Послідовність» – Image/Sequence Strips
Одиничне Зображення – Single Image
Коли ви додаєте одиничне статичне зображення (*.jpg, *.png, тощо), то Blender створює смужку тривалістю 25 кадрів, з повторним показом цього зображення упродовж цієї тривалості.
Послідовність Зображень – Image Sequence
У випадку (нумерованих) послідовностей зображень (наприклад, *-0001.jpg, *-0002.jpg, *-0003.jpg тощо будь-якого формату) ви можете визначати вміст смужки на вибір:
- Діапазон – Range
Перейдіть у їх каталог та LMB клацніть та натягніть рамку над діапазоном потрібних імен для підсвічення потрібних файлів зображень. Ви можете прокручувати вниз та продовжувати з Shift-LMB додавати у цей вибрання.
- Пакет – Batch
Shift-LMB клацком вибрати не-пов’язані порядком зображення для пакетної обробки; кожне зображення буде додане як один кадр у порядку додання і може бути різного формату (
jpg,png,exr,тощо).- All – Усе
Натисніть A для вибору/зневибору усіх файлів у каталозі.
Порада
Випадок з Різними Розмірами
Справа з різними розмірами зображень та різними розмірами виводів є дещо заплутаною. Якщо ви маєте невідповідність між розміром увідного зображення та розміром вивідного рендера, то VSE буде намагатися авто-масштабувати зображення, щоб воно припасувалося у вивід. Це може призвести до відсікання частин увідного зображення. Якщо ви не хочете цього, використовуйте устави опцій «Обрізка» – Crop та/або «Зсув» – Offset на панелі «Увід Смужки» – Strip Input для переміщення та вибору регіону зображення, що буде подане на вивід. Коли ви використовуєте опції Crop або Offset, то авто-масштабування вимикається, і ви можете вручну змінити масштаб зображення за допомогою додання ефекту «Трансформа» – Transform.
Додання Смужки Зображення – Add Image Strip
Reference
- Menu
- Relative Path
Store the location of the image file relative to the blend-file.
- Start Frame
The Start Frame to place the left handle of the strip.
- End Frame
The end frame to place the right handle of the strip.
Порада
Subtract the Start Frame from the End Frame to get the strip’s duration.
- Channel
The Channel to place the strip.
- Replace Selection
Replaces the currently selected strips with the new strip.
- Fit Method
Determines how images with an aspect ratio different than the Scene’s are scaled to fit inside the render area.
- Scale to Fit
Adjusts the strips Scale Transforms so the visual contents of the strip to fit exactly within the project’s Dimensions while maintaining the original aspect ratio.
This may mean that the transparent areas may be added along the content’s border to fit the content in the rendered area.
- Scale to Fill
Adjusts the strips Scale Transforms so the visual contents of the strip to span the project’s Dimensions while maintaining the original aspect ratio.
This may mean that portions of the original image no longer fit the content inside the rendered area.
- Stretch to Fill
Adjusts the strips Scale Transforms so the visual contents of the strip to fill the project’s Dimensions. Note, unlike the other two methods described above, Stretch to Fill does not maintaining the original aspect ratio.
This may mean that the original image becomes distorted to fit the content inside the rendered area.
- Use Placeholders
Image sequences can use placeholder files. This works by enabling Use placeholders checkbox when adding an image strip. The option detects the frame range of opened images using Blender’s frame naming scheme (
filename + frame number + .extension) and makes an image sequence with all files in between even if they are missing. This allows you to render an image sequence with a few frames missing and still the image strip will have the correct range to account for the missing frames displayed as black.When the missing frames are rendered or placed in the same folder, you can refresh the Sequencer and get the missing frames in the strip. The option is also available when using the Change Data/File operator and allows you to add more images to the range.