Introduction
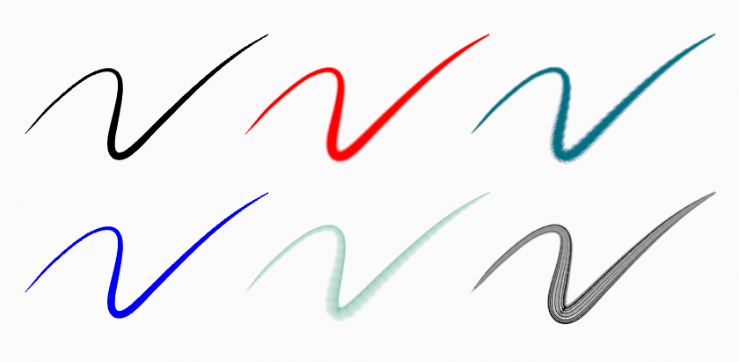
Materials control the appearance of the Grease Pencil object. They define the color and texture of the strokes and filled areas.
There is always only one active material in the list (the selected one). When you draw, the new strokes use the active material.
The material always remains linked to the strokes, this means that any change in a material will change the look of already drawn strokes.

Same stroke linked to different materials.
Setting up Materials
Grease Pencil Materials can be created in the Material properties as any other materials in Blender. See Material assignment for more information.
The 3D Viewport can be set to LookDev or Rendered shading, to interactively preview how the material looks in the scene.
Grease Pencil Materials are data-blocks that can be assigned to one or more objects, and different materials can be assigned to different strokes.
In Grease Pencil the brush settings together with the material used will define the look and feel of the final strokes.
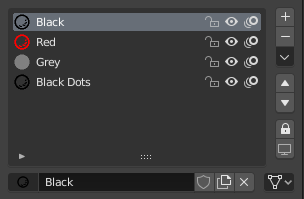
Grease Pencil Materials slots in the List view also have some extra controls that help to work with materials while drawing or editing lines.
Common Settings

Grease Pencil material slots panel.
Next to the material name there are three icons buttons that control common properties of the material:
- Lock (padlock icon)
- Toggle material from being editable.
- Viewport/Render Visibility (eye icon)
- Toggle material visibility in the viewport and in render.
- Onion Skinning (onion skin icon)
- Toggle the use of the material for Onion Skinning.
Specials
- Show All
- Turns on the visibility of every material in the list.
- Hide Others
- Turns off the visibility of every material in the list except the active one.
- Lock All
- Locks edition of all the materials in the list.
- Unlock All
- Unlocks edition of all the materials in the list.
Lock and Visibility General Controls
- Lock (padlock icon)
- Toggle whether the active material is the only one that can be edited.
- Visibility (screen icon)
- Toggle whether the active material is the only one that can be edited and is visible.