Shading
Shade Smooth
Reference
- Mode:
Object Mode
- 選單:
Sets an entire object as smooth or faceted. This forces the assignment of the "smoothing" attribute to each face in the mesh, including when you add or delete geometry.
This operator will also remove any Smooth By Angle Modifiers
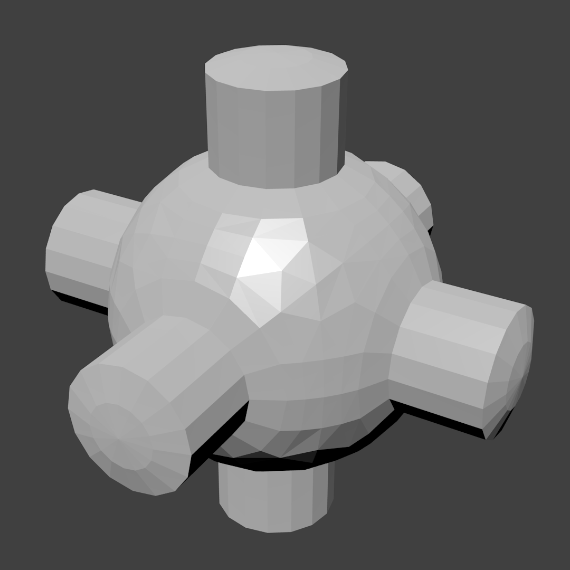
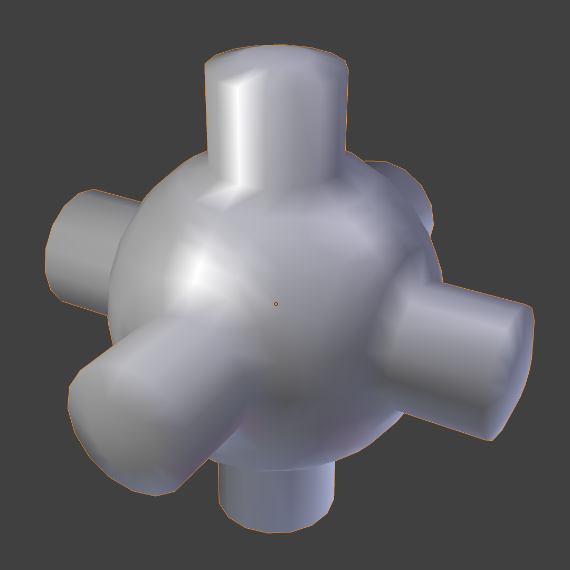
Notice that the outline of the object is still strongly faceted. Activating the smoothing features does not actually modify the object's geometry; it changes the way the shading is calculated across the surfaces (normals will be interpolated), giving the illusion of a smooth surface.
Using Shade Flat will revert the shading back (normals will be constant) to that shown in the first image below.
|
|
- Keep Sharp Edges
Do not clear sharp edges (which are redundant with objects shaded as flat or smooth). This option is useful to not destroy data in case you want to revert changes later.
Shade Auto Smooth
Reference
- Mode:
Object Mode
- 選單:
Adds a Smooth By Angle Modifier to automatically set the sharpness of mesh edges based on the angle between the neighboring faces. Note, the modifier will be pinned to be the last modifier.
- Auto Smooth
If disabled, any Smooth By Angle Modifiers are removed.
- 角度
Maximum angle between face normals that will be considered as smooth.
Shade Flat
Reference
- Mode:
Object Mode
- 選單:
Signify the object to render and display faces uniformly, using the Face Normal's direction. This is usually desirable for objects with flat surfaces.
This operator will also remove any Smooth By Angle Modifiers
- Keep Sharp Edges
Do not clear sharp edges (which are redundant with objects shaded as flat or smooth). This option is useful to not destroy data in case you want to revert changes later.