Région de la Barre Latérale (Sidebar)
Footage
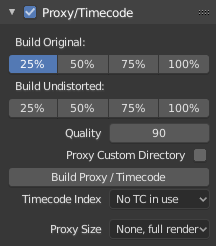
Proxy/Timecode
A proxy is a smaller image (faster to load) that stands in for the main image. When you rebuild proxies Blender computes small images (like thumbnails) for the big images and may take some time. After computing them, though, editing functions like scrubbing and scrolling is much faster but gives a low-res result. Make sure to disable proxies before final rendering.
Once you have chosen the Proxy/Timecode options, you need to use to generate the proxy clip and it will be available after Blender makes it.
- Build Original
Used to define which resolutions of proxy images should be built.
- Build Undistorted
Builds images from undistorted original images for the sizes set above. This helps provide faster playback of undistorted footage.
- Quality
Defines the quality of the JPEG images used for proxies.
- Proxy Custom Directory
By default, all generated proxy images are storing to the
<path of original footage>/BL_proxy/<clip name>folder, but this location can be set by hand using this option.- Rebuild Proxy
Regenerates proxy images for all sizes set above and regenerate all timecodes which can be used later.
- Timecode
When you are working with footage directly copied from a camera without pre-processing it, there might be bunch of artifacts, mostly due to seeking a given frame in sequence. This happens because such footage usually does not have correct frame rate values in their headers. This issue can still arise when the source clip has the same frame rate as the scene settings. In order for Blender to correctly calculate frames and frame rate there are two possible solutions:
Pré-traitez votre vidéo avec par exemple MEncoder pour réparer l’en-tête du fichier et insérer les images clés correctes.
Use Proxy/Timecode option in Blender.
- None
Do not use any timecode.
- Record Run
Use images in the order they are recorded.
- Free Run
Use global timestamp written by recording device.
- Free Run (Rec Date)
Interpolate a global timestamp using the record date and time written by recording device.
- Record Run No Gaps
Record run, but ignore timecode, changes in frame rate or dropouts.
Note
Record Run is the timecode which usually is best to use, but if the source file is totally damaged, Record Run No Gaps will be the only chance of getting acceptable result.
- Proxy Render Size
Defines which proxy image resolution is used for display. If Render Undistorted is set, then images created from undistorted frames are used. If there are no generated proxies, render size is set to « No proxy, full render », and if render undistorted is enabled, undistortion will happen automatically on frame refresh.
Paramètres de métrage
Voir Paramètres d’image.
View
2D Cursor
The 2D cursor is the dashed gray cross-hair that is shown in the main region. It can be used by setting the pivot point to 2D Cursor to transform all points in relation to the location of the 2D cursor.
- Location X, Y
The location of the 2D cursor is relative to the bottom left of the main region. The edge of the image will be 0.5 away, so (0.5, 0.5) will be the top right corner.
The 2D cursor’s location can also be set with Shift-RMB.