World Panel
- World
- The World Menu de blocos de dados.
- Texture Count
- Shows the count of textures in the world texture stack.
Nota
Background Image in 3D
To use an image as a background image in your 3D View, for example as a reference when doing a model, see using a Background Image.
Preview
Shows a view inside a sphere, on which the background textures are mapped.
World (Background)
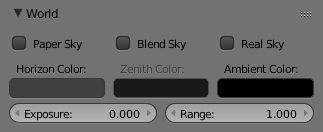
World panel.
Sky
How colors below are interpreted depends on which kind of Sky is chosen.
- None Enabled
- If none of these three buttons is checked, your background will just be plain flat color (using the horizon one).
- Paper Sky
- If this option is added, the gradient keeps its characteristics, but it is clipped in the image (it stays on a horizontal plane (parallel to XY plane): on any camera angle, the horizon is always at the middle of the image).
- Blend Sky
- The background color is blended from horizon to zenith. If only this button is pressed, the gradient runs from the bottom to the top of the rendered image regardless of the camera orientation.
- Real Sky
- If this option is added, the gradient produced has two transitions, from nadir (same color as zenith) to horizon to zenith; the blending is also dependent on the camera orientation, which makes it more realistic. The horizon color is exactly at the horizon (on the XY plane), and the zenith color is used for points vertically above and below the camera.
Veja também
When using a Sun Lamp options for Sky & Atmosphere are available in the Lamp tab.
Colors
- Horizon Color
- The RGB color at the horizon.
- Zenith Color
- The RGB color at the zenith (overhead).
- Ambient Color
- Ambient Light. See also Indirect Lighting.
Exposure and Range
See Exposure & Range.
Textures
Mapping
Instead of a color, or blend of two colors, Blender can use a 2D image which it maps to a very large Box or sphere which encompasses the entire scene, or which it maps to a virtual space around the scene.
The World textures are accessible in the texture menu (just select World first, then Texture). They are used much like the Materials textures, except for a couple of differences. The textures can be mapped according to:

Texture Coordinates select menu.
- Texture Coordinates
- View
- The default orientation, aligned with the coordinates of the final render.
- Global
- Uses global coordinates.
- Angular Map
- Used to wrap a standard hemisphere angular map around the scene in a dome. This can be used for image-based lighting with Ambient Occlusion set to sky color. You will generally need a high dynamic range image (HDRI) angular map. (It will look like a weird spherical image).
- Sphere
- Sphere mapping, similar to that of materials.
- Tube
- Wrap the rectangular texture around in a cylinder, similar to that of materials.
- Object
- Position the texture relative to a specified object’s local texture space.
Influence

Texture Influence panel.
The texture affects color only, but in four different ways:
- Blend
- Makes the Horizon color appear where the texture is non-zero.
- Horizon
- Affect the color of the horizon.
- Zenith Up
- Affect the zenith color overhead.
- Zenith Down
- Affect the zenith color underneath.
If you are disappointed that your camera appears to carry the texture with it rather than rotate through the texture, you should check the Real Sky checkbox in the World panel.