Using UV Maps
Sooner or later, you may want to use an image texture on your model. The UV Editor allows you to map textures directly to the mesh faces. The 3D Viewport shows you the object being textured. If you set the 3D Viewport into Textured viewport shading, you will immediately see any changes made in the UV Editor, and vice versa. This is because no real rendering is taking place; it is all just viewport shading. If you were to apply an image to UVs then render, the texture would not show up by default. So to render an image, you must:
Створити Матеріал для об’єкта.
Сказати Blender’у використовувати текстури UV на гранях при рендерингу.
Для створення Матеріалу ви маєте клацнути на кнопці «Додати Нове» – Add New для матеріалів у контексті «Відтінювання» – Shading.
There are two ways to tell Blender to use the UV texture when rendering; the quick way and the proper way.
The quick way is to use generated UV coordinates. Generated coordinates is used by default by all Texture nodes, with the exception of Image textures that use UV coordinates by default. To use generated coordinates for images as well use the Generated output of the Texture Coordinate node.
The proper way is to use UV Unwrapping to manually generate UV coordinates. To use UV mapping, use the Texture Coordinate node (UV output) or the UV Map node and select the UV map to use, «UVMap» by default.
Повна інформація про використання текстур Зображення знаходиться на сторінці Image Textures.
Примітка
Для Рендерингу Вимагається Матеріал
You can perform UV texturing on a mesh within Blender without assigning a material, and you will even see it in your 3D Viewport in textured viewport mode. However, when you render, you will just get a default gray if the object does not have a Material assigned. You will get a black if you do not load an image. If you do not create a texture that uses the image, your object will render according to the procedural material settings.
Використання Тестової Сітки – Using the Test Grid
If your image is a base uniform pattern and you want the application of that image to your model to look like cloth, you do not want any stretching (unless you want the cloth to look like spandex). You may also need to test your UV mapping with a test image:
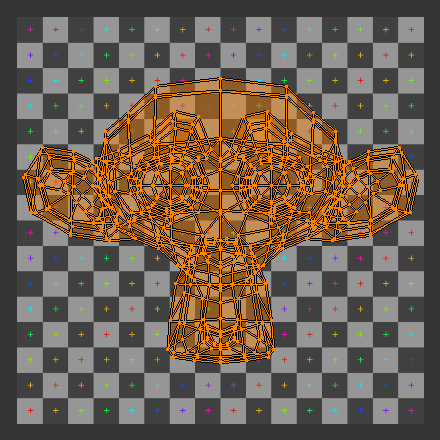
Тестова сітка, застосована для UV-координат.¶ |
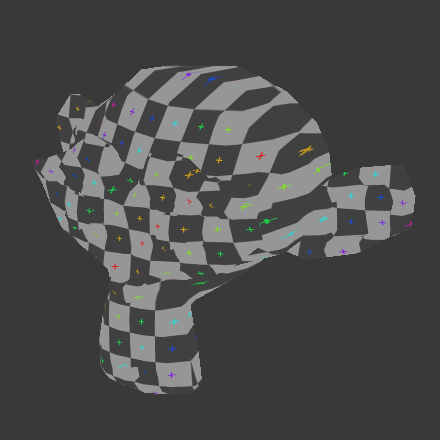
Передогляд текстури на геометрії.¶ |
Коли ви рендерите, то сіть буде мати тестову сітку, як своє забарвлення, і текстура UV буде за розміром зображення, яке ви визначили.
Модифікування вашої Текстури Зображення – Modifying your Image Texture
Дивись також
Запікання Рендера – Render Bake
Малювання Текстур – Texture Paint
Перевага збереження текстури, як окремого файлу, полягає у тому, що ви можете легко перемикатися між текстурами, просто копіюючи файли зображень, а також ви можете використовувати для її редагування зовнішні програми. Перевагою пакування текстур є то, що ваш проект повністю зберігається в одному blend-файлі і вам треба управляти тільки цим одним файлом.