UV Layout
| Nom: | UV Layout |
|---|---|
| Emplacement: | |
| Version: | 1.1.1 |
| Blender: | 2.75 |
| Catégorie: | Import-Export |
| Auteur(s): | Campbell Barton, Matt Ebb |
Usage
Dans votre programme de peinture d’image favorite, vous pouvez utiliser une configuration UV exporté pour créer une texture. Puis enregistrer vos modifications, de retour dans Blender, utilisez pour la charger en tant que votre image UV pour le maillage en Mode Édition pour l’UV map souhaité (et actif).
As a way of communicating to an artist who is painting your UV Texture for you,
Blender has a tool called UV Layout
(located in the UV/Image Editor, )
that saves an image as a Targa (.tga), EPS, or an SVG format for the object you have selected.
The image will be lines defining the UV edges that are within the image area of the UV mapping area.
Edges outside the boundary, even if selected, will not be shown in the saved graphic.
The artist will use this as a transparent layer in their paint program as a guide when painting your texture.
The example below shows Blender in the background, and the Gimp working on the texture,
using the saved layout as a guide. Note that targa format supports the Alpha channel,
so you can paint transparent areas of the mesh. For using images as textures, see the page on
Image Textures.
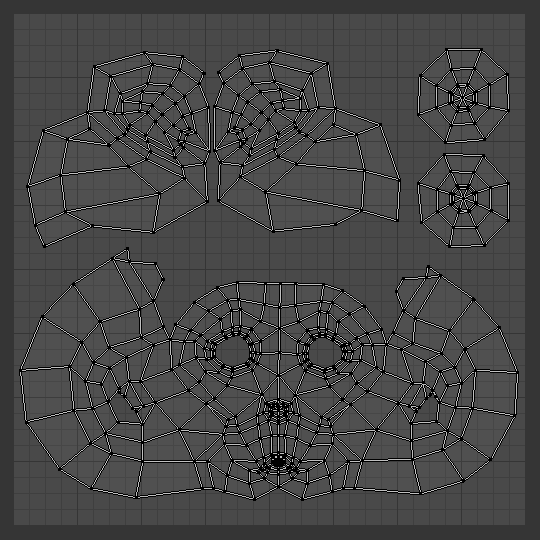
A UV layout in the UV/Image Editor. |

A UV layout in a paint program. |
Properties

Export options.
- All UVs
- if disabled, then only the UV faces selected will be outlined.
- Modified
- Export UVs from the modified mesh.
- Format
- sélectionner le type de fichier d’image à enregistrer (
.png,.eps,.svg). - Size
- sélectionner la taille de l’image en pixels. L’image doit être carrée.
- Fill Opacity
- Définir l’opacité du remplissage.