Add-ons (modules supplémentaires)
The Add-ons section lets you manage secondary scripts, called « Add-ons » that extends Blender’s functionality. In this section you can search, install, enable and disable Add-ons.
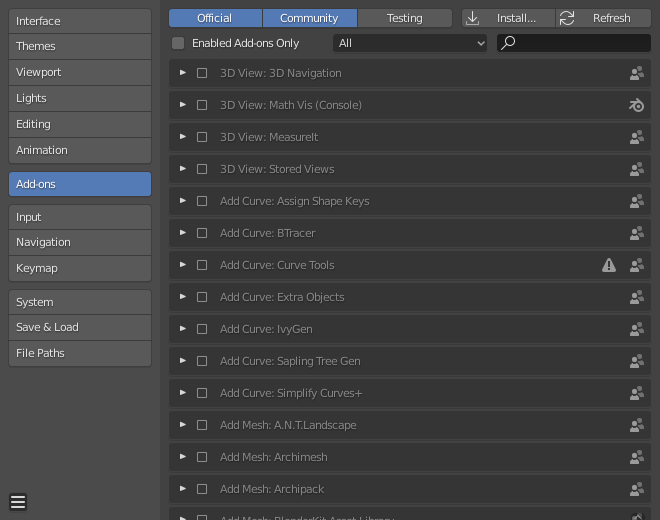
Blender Preferences Add-ons section.
Finding Add-ons
- Recherche
Blender comes with some pre-installed Add-ons already, ready to be enabled. But you can also add your own, or any interesting ones you find on the web.
- Supported Level (niveau de prise en charge)
Les add-ons de Blender sont divisés en deux groupes selon qui les a écrits/pris en charge :
Official : add-ons qui sont écrits par les développeurs de Blender.
Community : add-ons qui sont écrits par des personnes de la communauté Blender.
- Enabled Add-ons Only
Shows only enabled add-ons for the current Category.
- Category
Les add-ons sont divisés en catégories selon le domaine de Blender qu’ils affectent.
Activation et désactivation
Enable and disable an add-on by checking or unchecking the box to the right of the add-on you chose, as shown in the figure below.

Activer un add-on.
The add-on functionality should be immediately available.
Note
Add-ons that activate or change multiple hotkeys have a special system of activation. For example, with the « UI: Pie Menu Official » add-on for each menu there’s a selection box to activate the menu and its hotkey.
Astuce
If the Add-on does not activate when enabled, check the Console window for any errors that may have occurred.
3rd Party Add-ons
There are hundreds of add-ons that are not distributed with Blender and are developed by others. To add them to the list of other add-ons, they must be installed into Blender.
To install these, use the Install… button and
use the File Browser to select the .zip or .py add-on file.
Now the add-on will be installed, however not automatically enabled. The search field will be set to the add-on’s name (to avoid having to look for it), Enable the add-on by checking the enable checkbox.
- Refresh (actualiser)
Scans the Add-on Directory for new add-ons.
Astuce
Chemin des add-ons défini par l’utilisateur
You can also create a personal directory containing new add-ons and configure your files path in the File Paths section of the Preferences. To create a personal script directory:
Créez un dossier vide à l’emplacement de votre choix (ex.
my_scripts).Ajoutez un sous-dossier à
my_scriptsnomméaddons(il doit avoir ce nom pour que Blender le reconnaisse).Open the File Paths section of the Preferences.
Set the Scripts file path to point to your script directory (e.g.
my_scripts).Save the preferences and restart Blender for it to recognize the new add-on location.
Now when you install add-ons you can select the Target Path when installing 3rd party scripts. Blender will copy newly installed add-ons under the directory selected in your Preferences.
Information sur les add-ons
Vous pouvez cliquer sur la flèche à gauche de la boîte de l’add-on pour voir plus d’informations, telles que son emplacement, une description et un lien vers la documentation. Ici vous pouvez aussi trouver le bouton pour faire le rapport d’un bogue spécifique de cet add-on.
Préférences des add-ons
Some add-ons may have their own preferences which can be found in the Preferences section of the add-on information box.
Some add-ons use this section for example to enable/disable certain functions of the add-on. Sometimes these might even all default to off. So it is important to check if the enabled add-on has any particular preferences.