Misturar pesos de vértices
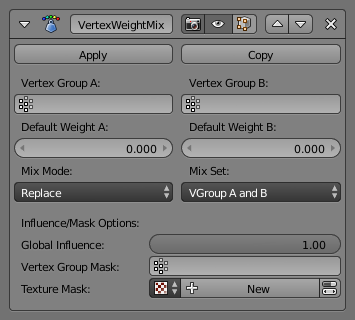
O painel do modificador Misturar pesos de vértices.
This modifier mixes a second vertex group (or a simple value) into the affected vertex group, using different operations.
Importante
This modifier does implicit clamping of weight values in the standard (0.0 to 1.0) range. All values below 0.0 will be set to 0.0, and all values above 1.0 will be set to 1.0.
Opções
- Grupo de vértices A
- O grupo de vértices que será afetado.
- Padronização de pesos - grupo A
- The default weight to assign to all vertices not in the given vertex group.
- Grupo de vértices B
- The second vertex group to mix into the affected one. Leave it empty if you only want to mix in a simple value.
- Padronização de pesos - grupo B
- The default weight to assign to all vertices not in the given second vertex group.
- Modo de mistura
How the vertex group weights are affected by the other vertex group’s weights.
- Substituir pesos
- Replaces affected weights with the second group’s weights.
- Adicionar para os pesos
- Adds the values of Group B to Group A.
- Subtrai dos pesos de influência
- Subtracts the values of Group B from Group A.
- Multiplicar pesos
- Multiplies the values of Group B with Group A.
- Dividir pesos
- Divides the values of Group A by Group B.
- Diferença
- Subtracts the smaller of the two values from the larger.
- Média
- Adds the values together, then divides by 2.
- Definições de mistura
Permite escolher quais vértices serão afetados.
- Todos os vértices
- Affects all vertices, disregarding the vertex groups content.
- Vertices from group A
- Affects only vertices belonging to the affected vertex group.
- Vertices from group B
- Affects only vertices belonging to the second vertex group.
- Vertices from one group
- Affects only vertices belonging to at least one of the vertex groups.
- Vértices em ambos os grupos.
- Affects only vertices belonging to both vertex groups.
Importante
When using All vertices, Vertices from group B or Vertices from one group, vertices might be added to the affected vertex group.
Opções de Influência e máscara
- Influência global
The overall influence of the modifier (0.0 will leave the vertex group’s weights untouched, 1.0 is standard influence).
Importante
Influence only affects weights, adding/removing of vertices to/from vertex group is not prevented by setting this value to 0.0.
Máscara de grupo de vértices
- Máscara de grupo de vértices
- An additional vertex group, the weights of which will be multiplied with the global influence value for each vertex. If a vertex is not in the masking vertex group, its weight will be not be affected.
Máscara de textura
- Máscara de textura
An additional texture, the values of which will be multiplied with the global influence value for each vertex.
This is a standard texture data-block control. When set, it reveals other settings:
- Coordenadas de textura
How the texture is mapped to the mesh.
- Local
- Usa as coordenadas locais dos vértices.
- Global
- Use vertex coordinates in global space.
- Objeto
Use vertex coordinates in another object’s space.
- Objeto
- The object to be used as reference for Object mapping.
- UV
Usa as coordenadas definidas no mapa UV.
- Mapa UV
- O mapa UV que será usado para o mapeamento UV.
- Usar canal
Which channel to use as weight factor source.
- Red/Green/Blue/Alpha
- Um dos valores dos canais de cor.
- Intensidade
- The average of the RGB channels (if RGB(1.0, 0.0, 0.0) value is 0.33).
- Valor
- The highest value of the RGB channels (if RGB(1.0, 0.0, 0.0) value is 1.0).
- Matiz
- Uses the hue value from the standard color wheel (e.g. blue has a higher hue value than yellow).
- Saturação
- Uses the saturation value (e.g. pure red’s value is 1.0, gray is 0.0).
Nota
All of the channels above are gamma corrected, except for Intensity.
Nota
You can view the modified weights in Weight Paint Mode. This also implies that you will have to disable the Vertex Weight Mix Modifier if you want to see the original weights of the vertex group you are editing.
Exemplo
Using a Texture and the Mapping Curve
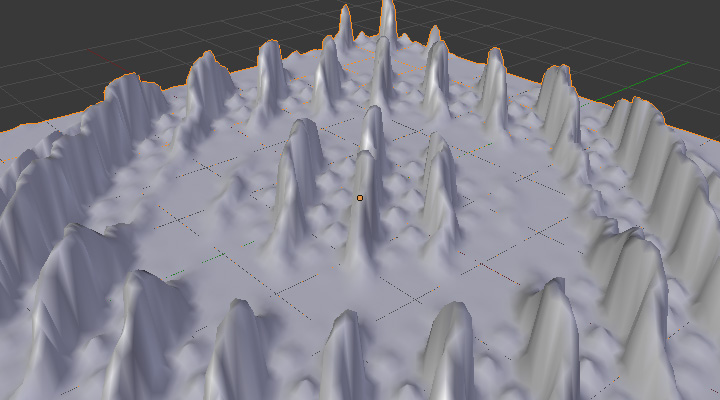
Here we are going to create a sort of strange alien wave (yes, another example with the Wave Modifier… but it is a highly visual one; it is easy to see the vertex group effects on it…).
So as above, add a 100×100 grid. This time, add a vertex group, but without assigning any vertex to it – we will do this dynamically.
Add a first Vertex Weight Mix Modifier, set the Vertex Group A field with a Default Weight A of 0.0, and set Default Weight B to 1.0.
Leave the Mix Mode to Replace weights, and select All vertices as Mix Set. This way, all vertices are affected. As none are in the affected vertex group, they all have a default weight of 0.0, which is replaced by the second default weight of 1.0. And all those vertices are also added to the affected vertex group.
Now, select or create a masking texture. The values of this texture will control how much of the «second weight» of 1.0 replaces the «first weight» of 0.0… In other words, they are taken as weight values!
You can then select which texture coordinates and channel to use. Leave the mapping to the default Local option, and play with the various channels…
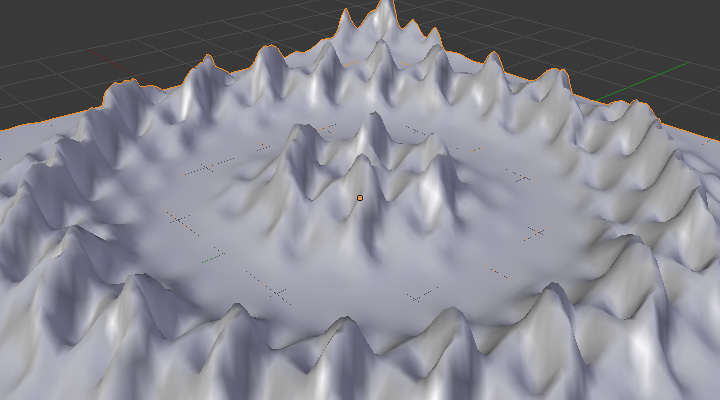
Usando a intensidade. |
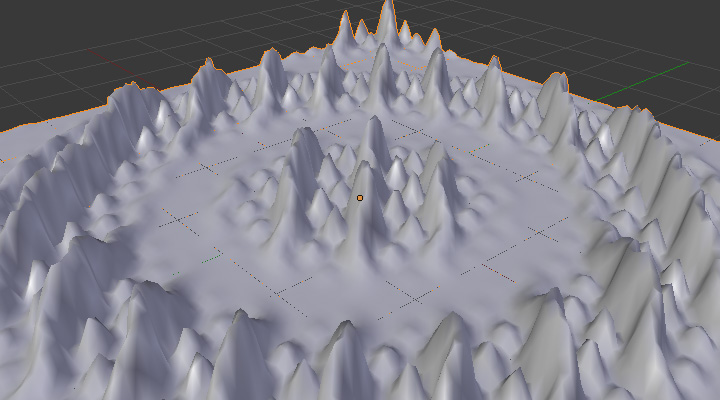
Usando o vermelho. |
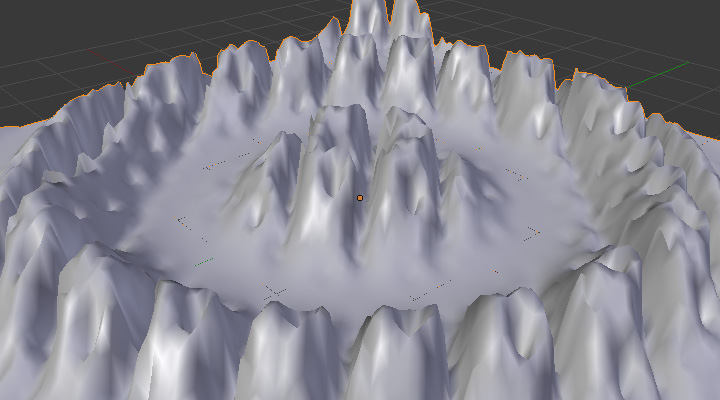
Usando a saturação. |
Do not forget to add a Wave Modifier, and select your vertex group in it!
You can use the weights created this way directly, but if you want to play with the curve mapping, you must add the famous Vertex Weight Edit Modifier, and enable its Custom Curve mapping.
By default, it is a one-to-one linear mapping – in other words, it does nothing! Change it to something like in Fig. Curva de mapeamento personalizada., which maps (0.0, 0.5) to (0.0, 0.25) and (0.5, 1.0) to (0.75, 1.0), thus producing nearly only weights below 0.25, and above 0.75: this creates great «walls» in the waves…

Uma curva de mapeamento personalizada. |
Mapeamento personalizado desabilitado. |
Mapeamento personalizado habilitado. |
The blend-file, TEST_4 scene.