Уменьшение шума
При выполнении окончательной визуализации важно как можно сильнее уменьшить. Здесь мы обсудим ряд хитростей, которые, хотя и нарушают законы физики, особенно важны при визуализации анимации за разумный период времени. Нажимайте на миниатюры для увеличения изображений, чтобы как следует рассмотреть различия в количестве шумов.
Трассировка путей
Cycles использует трассировку путей с последующей оценкой событий, которая не очень хорошо подходит для визуализации всех видов световых эффектов, например, каустик, но имеет преимущество в том, что в состоянии визуализировать более детальные и большие сцены по сравнению с некоторыми другими алгоритмами визуализации. Это происходит потому, что нам не нужно, например, хранить в памяти фотонную карту, а так же потому, что мы можем сохранять лучи относительно когерентными для использования в кэше изображений по требованию, по сравнению с, например, двунаправленной трассировкой пути.

We do the inverse of what reality does, tracing light rays from the camera into the scene and onto lights, rather than from the light sources into the scene and then into the camera. This has the advantage that we do not waste light rays that will not end up in the camera, but also means that it is difficult to find some light paths that may contribute a lot. Light rays will be sent either according to the surface BRDF, or in the direction of known light sources.
См.также
For more details, see the Light Paths and Sampling documentation.
Почему возникает шум
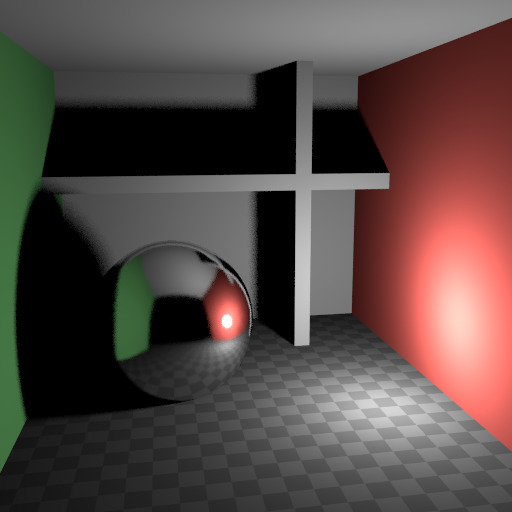
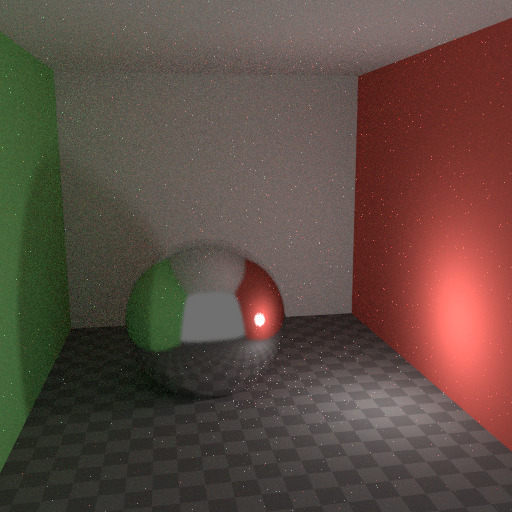
To understand where noise can come from, take for example the scene below. When we trace a light ray into the location marked by the white circle on a red dot, the second image below gives an impression of what the diffuse shader «sees».
To find the light that is reflected from this surface, we need to find the average color from all these pixels. Note the glossy highlight on the sphere, and the bright spot the light casts on the nearby wall. These hotspots are 100x brighter than other parts of the image and will contribute significantly to the lighting of this pixel.
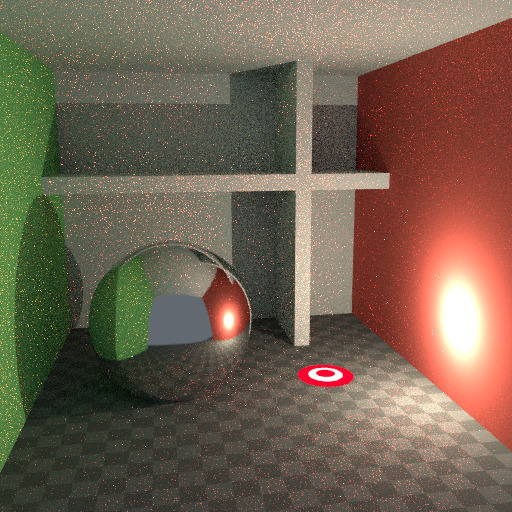
The scene. |
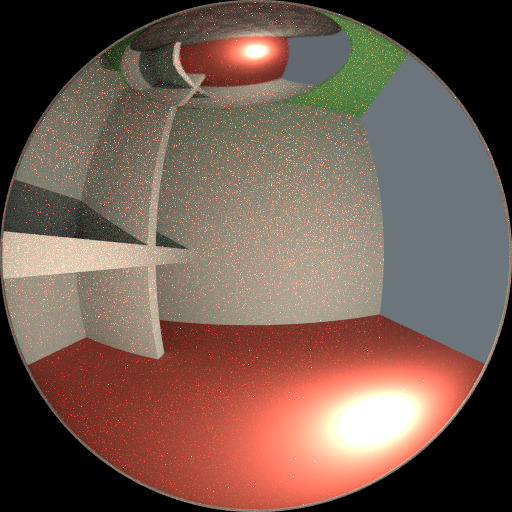
Irradiance at the shading point. |
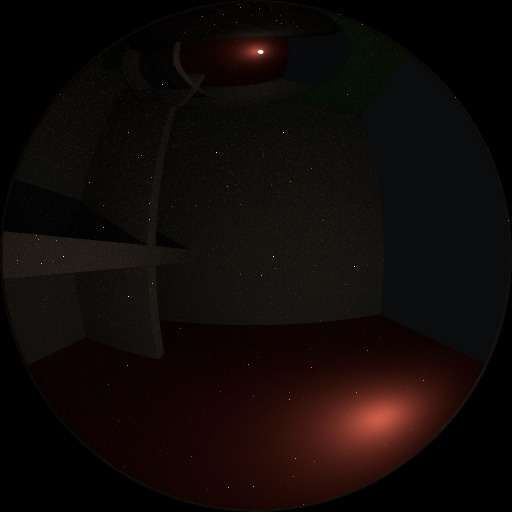
The detected highlights. |
The light is a known light source, so its location is already known, but the glossy highlight(s) that it causes are a different matter. The best we can do with path tracing is to distribute light rays randomly over the hemisphere, hoping to find all the important bright spots. If for some pixels we miss some bright spot, but we do find it for another, that results in noise. The more samples we take, the higher the probability that we cover all the important sources of light.
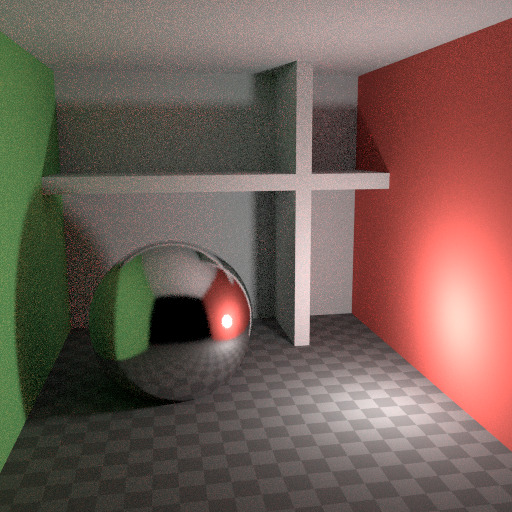
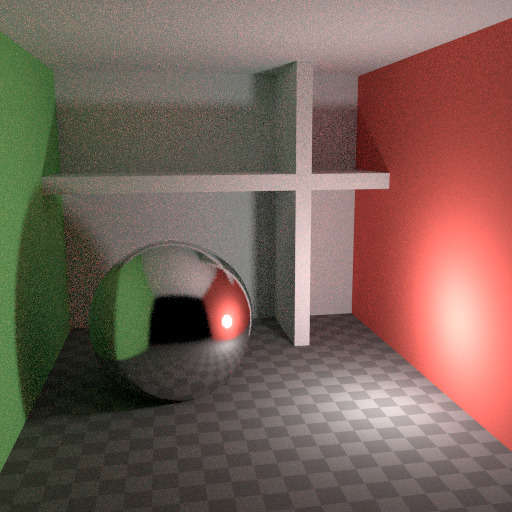
With some tricks we can reduce this noise. If we blur the bright spots, they become bigger and less intense, making them easier to find and less noisy. This will not give the same exact result, but often it’s close enough when viewed through a diffuse or soft glossy reflection. Below is an example of using Glossy Filter and Light Falloff.
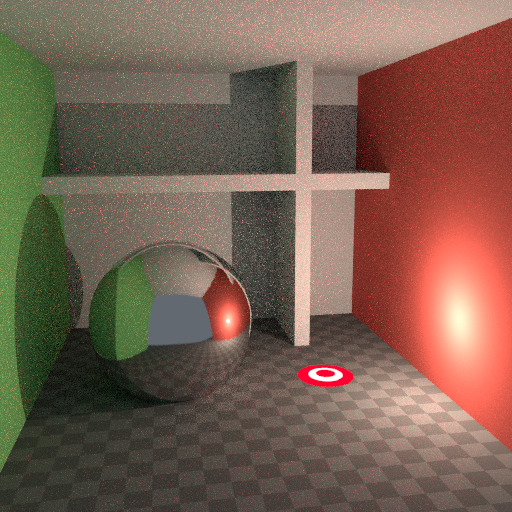
Using Glossy Filter & Light Falloff. |
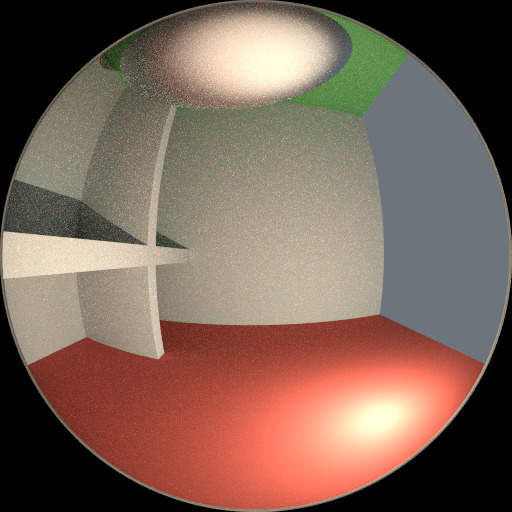
Irradiance at the shading point. |

The detected highlights. |
Отскоки
In reality light will bounce a huge number of times due to the speed of light being very high. In practice more bounces will introduce more noise, and it might be good to use something like the Limited Global Illumination preset in the Light Paths Section that uses fewer bounces for different shader types. Diffuse surfaces typically can get away with fewer bounces, while glossy surfaces need a few more, and transmission shaders such as glass usually need the most.
No bounces. |
Two bounces at max. |
Four bounces at max. |
Также важно не использовать в шейдерах цвета, чьи компоненты содержат значения 1.0 или близкие к ним; пытайтесь держать максимальное значение в районе 0.8 или меньше и сделать ваши источники света ярче. В действительности, поверхности редко полностью отражает весь свет, но есть, конечно, исключения; как правило, через стекло проходит больше света, поэтому для него нужно больше отскоков. Высокие значения для цветовых компонентов, как правило, вносят шум, поскольку при отскоках от каждой поерхности интенсивность света уменьшается не сильно.
Каустики и фильтр глянца
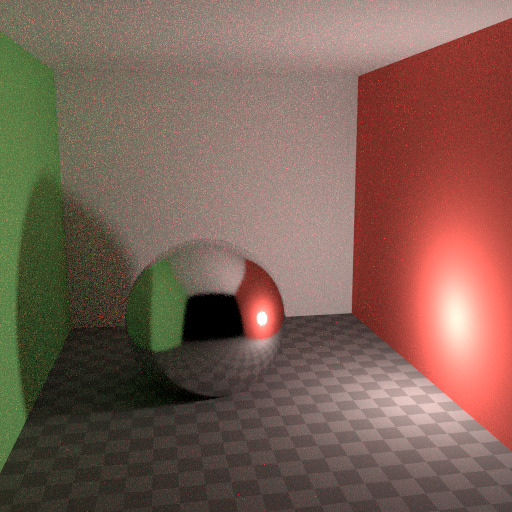
Caustics are a well-known source of noise, causing fireflies. They happen because the renderer has difficulty finding specular highlights viewed through a soft glossy or diffuse reflection. There is a No Caustics option to disable glossy behind a diffuse reflection entirely. Many renderers will typically disable caustics by default.
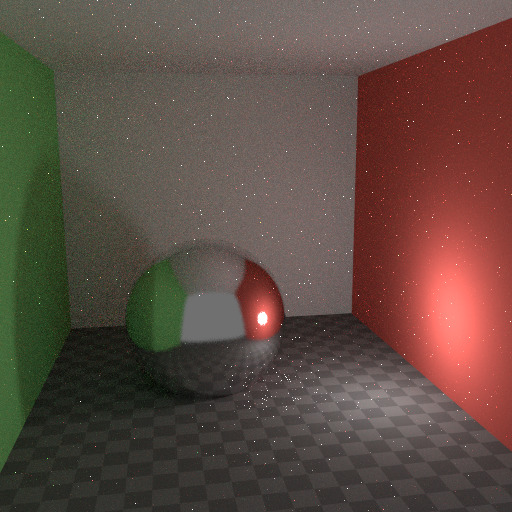
Default settings. |
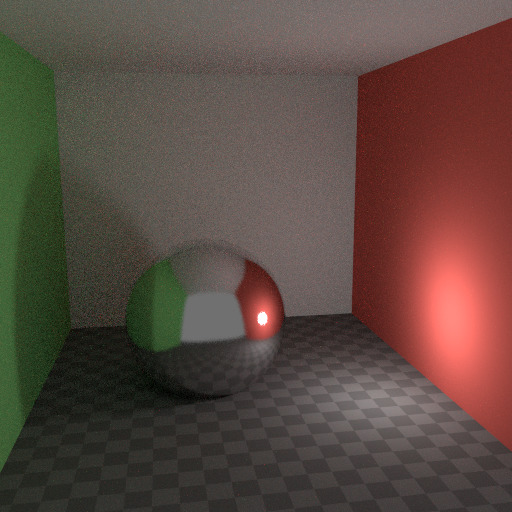
Caustics disabled. |

Filter Glossy greater than zero. |
Однако, использование параметра Без каустик ведёт к потере света, кроме того, он не покрывает случай, когда резкое глянцевое отражение рассматривается сквозь мягкое глянцевое отражение. Существует параметр Фильтр глянца, уменьшающий шум в таких случаях за счёт точности. Он размывает резкое глянцевое отражение, чтобы его было проще найти, увеличивая Шероховатость шейдера.
Изображения выше показывают разницу между настройками по умолчанию, с отключёнными каустиками и с фильтром глянца, установленным в 1.0.
Спад света
В реальности интенсивность света в вакууме спадает со скоростью 1/(расстояние^2). Однако, если расстояние стремится к нулю, эта величина стремится к бесконечности, и мы можем получить очень яркие пятна на изображении. В основном это проблема для непрямого освещения, у которого вероятность попадания в небольшое, но очень яркое пятно довольно низка и оно случается редко. Это типичный способ возникновения светлячков.

Hard Falloff. |
Soft Falloff. |
To reduce this problem, the Light Falloff node has a Smooth factor, that can be used to reduce the maximum intensity a light can contribute to nearby surfaces. The images above show default falloff and smooth value 1.0.
Multiple Importance Sampling
Materials with emission shaders can be configured to use Multiple Importance Sampling (Настройки материала). This means that they will get rays sent directly towards them, rather than ending up there based on rays randomly bouncing around. For very bright mesh light sources, this can reduce noise significantly. However, when the emission is not particularly bright, this will take samples away from other brighter light sources for which it is important to find them this way.
The optimal setting here is difficult to guess; it may be a matter of trial and error, but often it is clear that a somewhat glowing object may be only contributing light locally, while a mesh light used as a light would need this option enabled. Here is an example where the emissive spheres contribute little to the lighting, and the image renders with slightly less noise by disabling Multiple Importance on them.
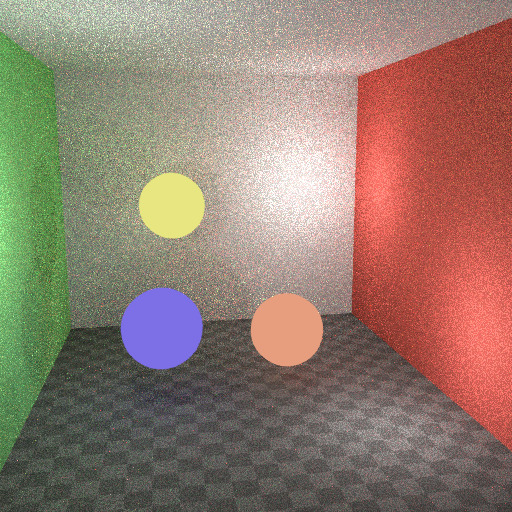
Multiple Importance off. |

Multiple Importance on. |
The world background also has a Multiple Importance (Settings) option. This is mostly useful for environment maps that have small bright spots in them, rather than being smooth. This option will then, in a preprocess, determine the bright spots, and send light rays directly towards them. Again, enabling this option may take samples away from more important light sources if it is not needed.
Стекло и прозрачные тени
При отключении каустик стеклу будет не хватать теней, а с фильтром глянца они могут быть слишком мягкими. Мы можем сделать шейдер шейдер, который будет использовать шейдер «BSDF стекла», если смотреть прямо на него, и шейдер «Прозрачный BSDF», если смотреть через отражение. Шейдер «Прозрачный BSDF» может использоваться для прозрачных теней, чтобы находить источники света прямо через поверхности, и даст правильные цветные тени, но без каустик. Для определения того, когда какой шейдер использовать, используется узел «Путь света».
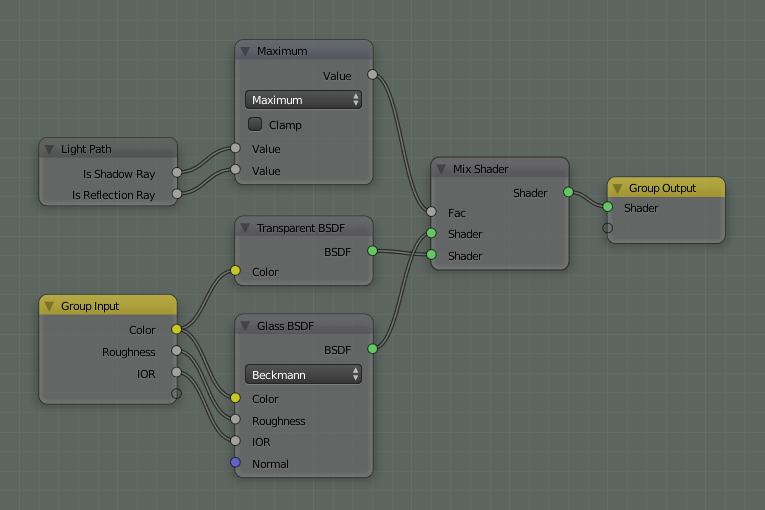
Оптимизированный шейдер стекла
Выше вы можете видеть дерево узлов, используемое для хитрости с прозрачностью стекла; на левой визуализации присутствует слишком много тени, поскольку нет каустик, на правой визуализации используется данная хитрость.
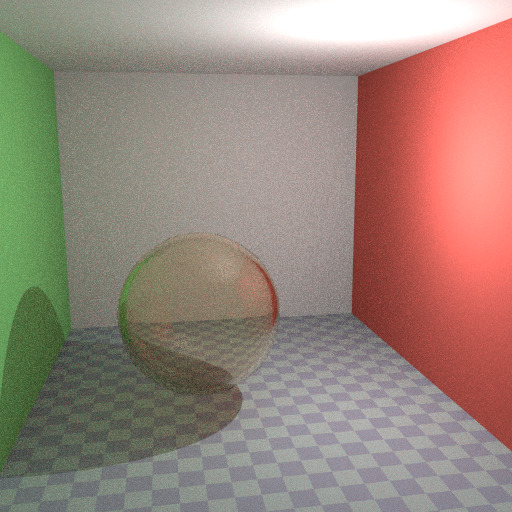
Default Glas BSDF. |
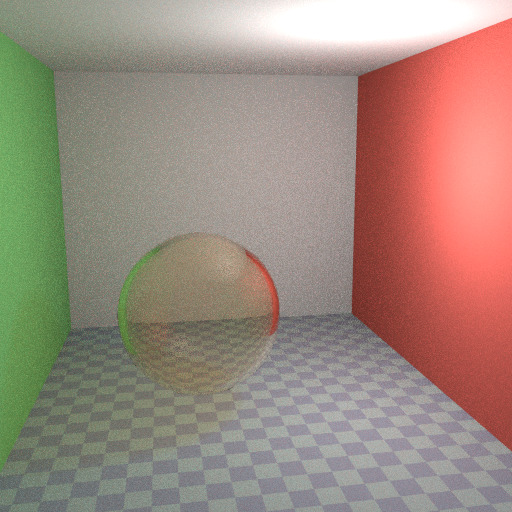
Optimized Glass Shader. |
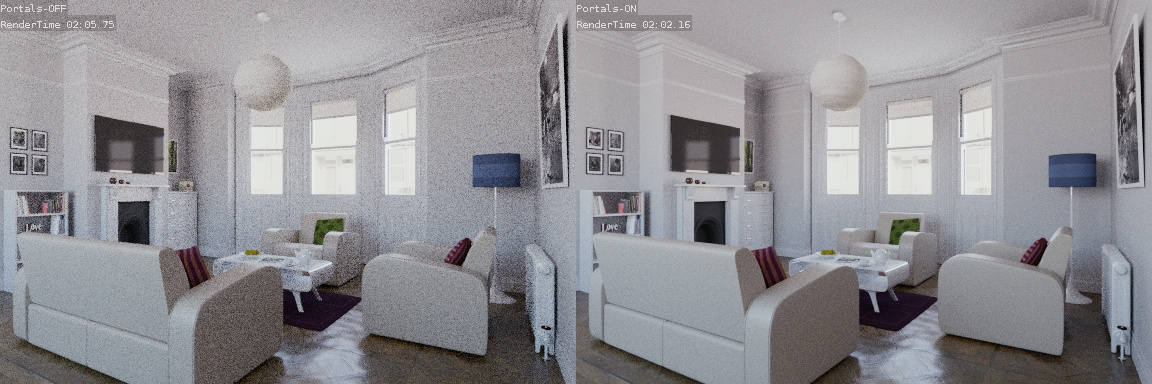
Световые порталы
When rendering a daylight indoor scene where most of the light is coming in through a window or door opening, it is difficult for the integrator to find its way to them. To fix this, use Light Portals. You then will need to modify its shape to match that of the opening that you are trying to fill.
Denoising
Even with all the settings described above there will always end up being some render noise no matter how many samples you use. To fix this there is a post-processing technique to cleanup the final bit of noise. To use this enable Denoising in the Render Layers tab of the Properties editor.
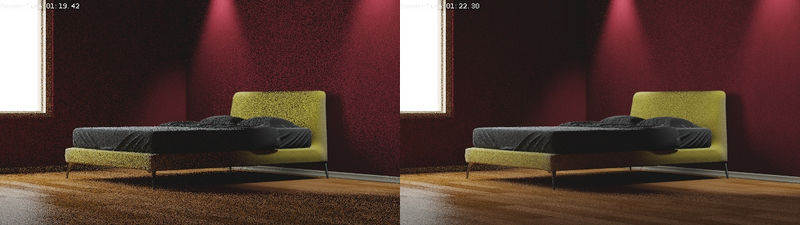
Below is an example render by The Pixelary.
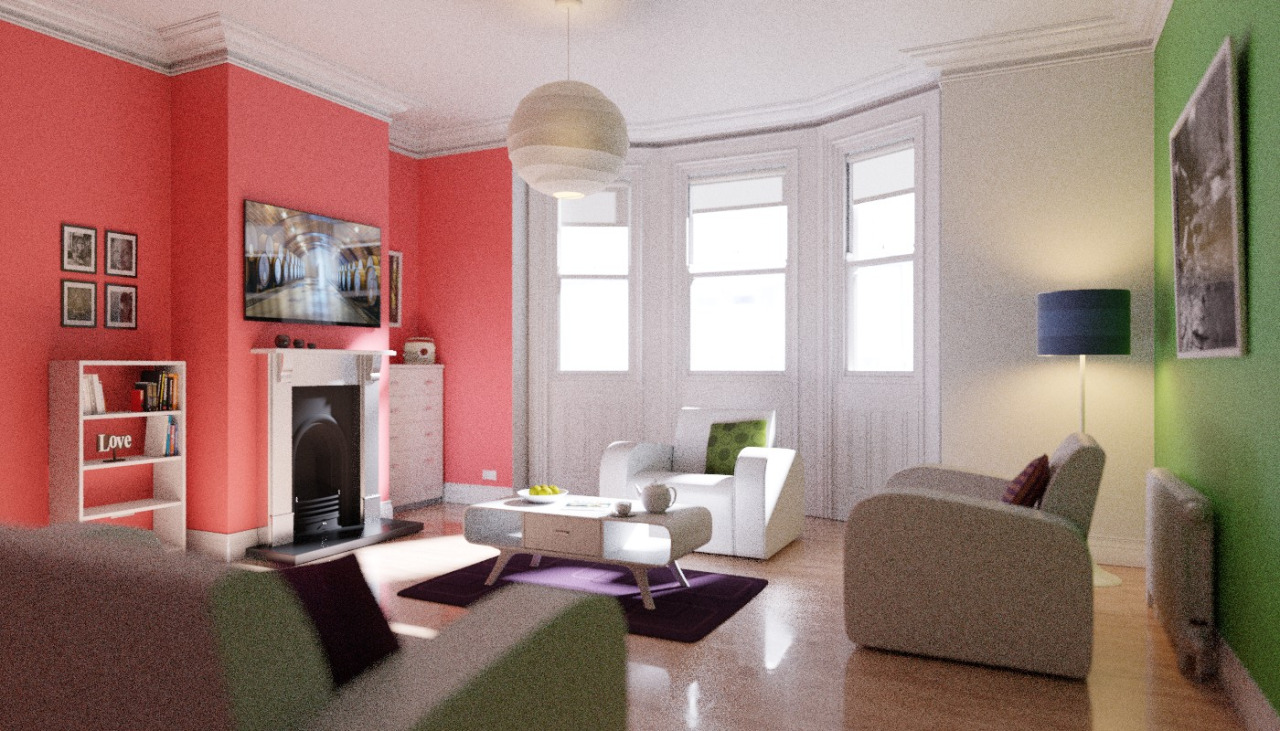
Example render before denoising. |
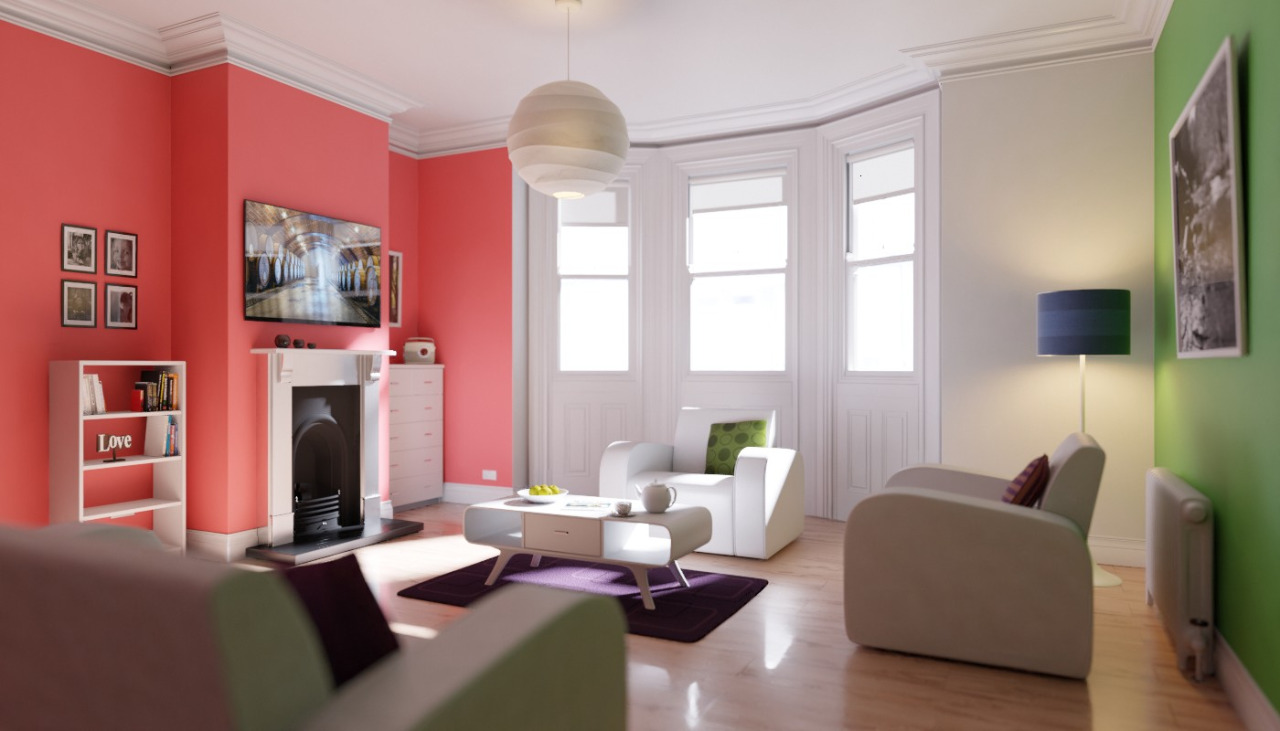
Example render after denoising. |
Подавление светлячков
В идеале, используя все предыдущие уловки, светлячки будут устранены, однако они всё ещё могут возникнуть. Чтобы справиться с ними, интенсивность любого светового луча, вносящего вклад в освещение пикселя, может быть ограничена максимальным значением настройками интегратора.
Если параметр установлен в слишком низкое значение, это может привести к отсутствию бликов на изображении, которые могут быть полезны для сохранения эффектов камеры, таких как засветка или блики. Чтобы смягчить это противоречие, часто бывает полезно ограничивать только непрямые отскоки, оставляя нетронутыми блики, непосредственно видимые камерой.

No Clamp (0). |
With Clamp set to 4. |