Surface
Transform
Referensi
- Mode:
Edit Mode
- Menu:
Tools for moving control points.
- Move, Rotate, Scale
- To Sphere, Shear, Bend, Push/Pull, Warp, Randomize
See Mesh Transformations.
- Move/Scale Texture Space
See Texture Space.
Mirror
Referensi
- Mode:
Edit Mode
- Menu:
- Pintasan:
Ctrl-M
See Mirror.
Snap
Referensi
- Mode:
Edit Mode
- Menu:
- Pintasan:
Shift-S
See the Snap menu, as well as the snapping options.
Spin
Referensi
- Mode:
Edit Mode
- Menu:
Similar to its mesh counterpart, this operator extrudes the selected control points several times along a circle that's centered on the 3D Cursor and parallel to the viewing plane. The weights of the new control points are set up to produce a circle, and the surface is marked as Cyclic, Bézier, and Endpoint in the extrusion direction (see Active Spline).
Add Duplicate
Referensi
- Mode:
Edit Mode
- Menu:
- Pintasan:
Shift-D
Duplicates the selected control points and creates a new surface based on them. The new control points are placed in the Move mode: move the mouse to bring them to the desired position, then click LMB to confirm. Alternatively, press RMB or Esc to keep them at their original position.
Note that the selected control points must form a single, valid sub grid. If this is not the case, the duplication will fail with an error.
Split
Referensi
- Mode:
Edit Mode
- Menu:
- Pintasan:
Y
Disconnects the selected sub grid from the rest of the surface, keeping it within the same Surface object. The control points at the border are duplicated so that both the original surface and the disconnected surface have them.
The sub grid must consist of one or more complete rows or columns of the surface grid.
Separate
Referensi
- Mode:
Edit Mode
- Menu:
- Pintasan:
P
Disconnects the selected sub grid from the rest of the surface and moves it into a new Surface object. The control points at the border are duplicated so that both the original surface and the disconnected surface have them.
The sub grid must consist of one or more complete rows or columns of the surface grid.
Toggle Cyclic
Referensi
- Mode:
Edit Mode
- Menu:
- Pintasan:
Alt-C
Opens a popover menu with the options Cyclic U and Cyclic V. The surface is made cyclic (closed) or non-cyclic (open) in the corresponding direction.
If a surface is cyclic, the last row or column of its control point grid is connected back to the first. A cylinder is cyclic along either the U or V direction, while a sphere is cyclic along both.
Lihat juga
The Cyclic settings are also in the Active Spline panel in the Sidebar.
Set Spline Type
Referensi
- Mode:
Edit Mode
- Menu:
This feature only works for Curves.
Show/Hide
Referensi
- Mode:
Edit Mode
- Menu:
- Pintasan:
H, Shift-H, Alt-H
Hides the selected or unselected control points, or unhides all hidden control points.
By default, unhiding control points adds them to the selection. To prevent this, uncheck the Select option in the Adjust Last Operation panel.
Cleanup
Referensi
- Mode:
Edit Mode
- Menu:
This feature only works for Curves.
Delete
Referensi
- Mode:
Edit Mode
- Menu:
- Pintasan:
X, Delete
Removes the selected Vertices (control points) or Segments (lines) from the surface. In both cases, the selection must consist of one or more complete rows or columns of the surface grid.
- Vertices
Deletes the selected control points. The resulting gap is bridged with new grid lines so that the surface stays contiguous.
- Segments
Deletes the lines and control points that lie between the outermost selected control points. The resulting gap is not bridged.
- Dissolve Vertices
This feature only works for Curves.
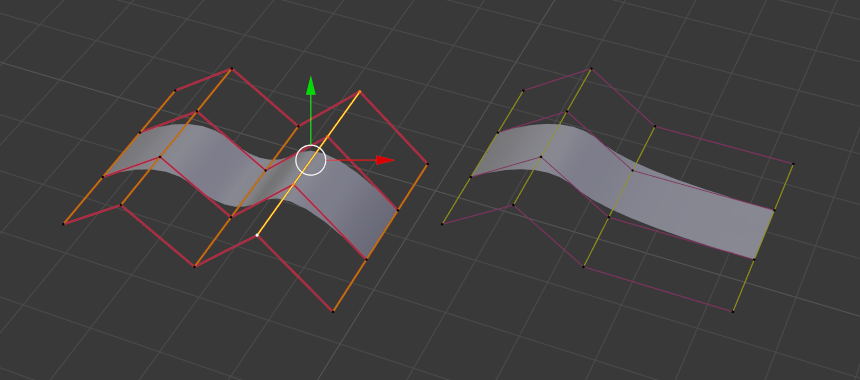
Before and after deleting a row of control points.