Vista Telecamera

../../../_images/editors_3dview_navigate_camera-view_example.png

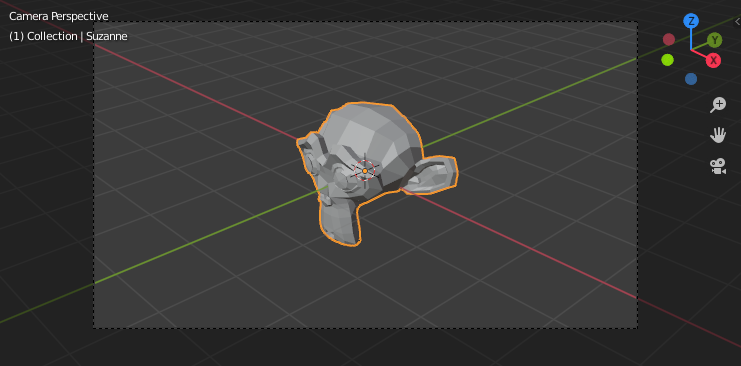
Dimostrazione della vista della telecamera.

The Camera view shows the current scene as seen from the currently active camera’s view point.

The Camera view can be used to virtually compose shots and preview how the scene will look when rendered. The rendered image will contain everything within the dashed line.

Vedi anche

Camera Settings for details how camera settings are used for display & rendering.

Suggerimento

The active camera can be selected while in camera view using the camera frame (assuming the object isn’t hidden).

Visualizzazione della Telecamera Attiva

Riferimento

Modalità

All modes

Menu

View ‣ Cameras ‣ Active Camera

Scorciatoia

Numpad0

This switches the view to the active camera. The triangle above the camera will become shaded when active.

Impostazione della Telecamera Attiva

Riferimento

Modalità

Object Mode

Menu

Visualizza ‣ Telecamere ‣ Imposta Oggetto Attivo come Telecamera

Scorciatoia

Ctrl-Numpad0

../../../_images/editors_3dview_navigate_camera-view_cameras.png

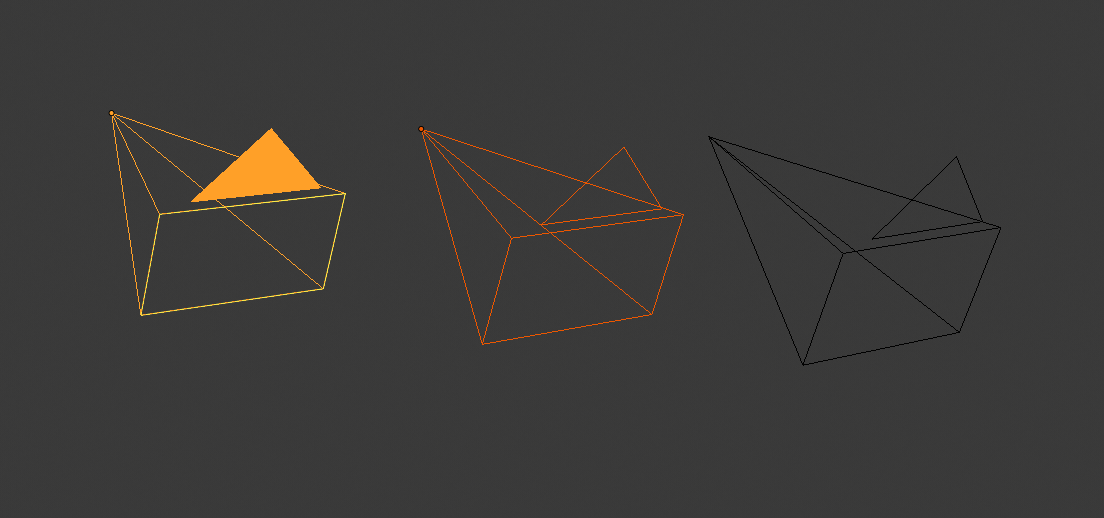
Telecamera attiva (a sinistra) visualizzata con un triangolo solido sopra di essa.

This is the camera currently used for rendering and when viewing from the camera.

This sets the current active object as the active camera & switches to the camera view.

The active camera can also be set in the Scene tab of the Properties.

Nota

The active camera, as well as the layers, can be specific to a given view, or global (locked) to the whole scene. See Local Camera.

Cambio Telecamera Animata

By default a scene contains one camera. However, a scene can contain more than one camera, but only one of them will be used at a time. So you will only need to add a new camera if you are making cuts between them. See Animating Cameras.

Frame Camera Bounds

Riferimento

Modalità

All Modes

Menu

View ‣ Cameras ‣ Frame Camera Bounds

Scorciatoia

Home

Centers the camera view inside the 3D Viewport’s screen area and resizes the view to fit within the area’s bounds.

Navigazione Telecamera

There are several different ways to navigate and position the camera in your scene, some of them are explained below.

Zooming in and out is possible in this view, but to change the viewpoint, you have to move or rotate the camera.

Suggerimento

The active «camera» might be any kind of object. So these actions can be used, for example, to position and aim a light.

Move Active Camera to View

Riferimento

Modalità

Object Mode

Scorciatoia

Ctrl-Alt-Numpad0

This matches the active camera to a regular (non camera) view, for a convenient method of placing the camera without having to move the object directly.

Camera View Positioning

By enabling Lock Camera to View in the View panel of the Sidebar region, while in camera view, you can navigate the 3D Viewport as usual, while remaining in camera view. Controls are exactly the same as when normally moving in 3D.

Vedi anche

Fly/Walk Navigation for first person navigation that moves the active camera too.

Ruota, Panoramica, Sposta, e Traccia

To perform these camera moves, the camera must first be selected so transform operations apply to it. The following actions also assume that you are in camera view. Having done so, you can now manipulate the camera using the same tools that are used to transform any object:

Ruota

Press R to enter object rotation mode. The default will be to rotate the camera in its local Z axis (the axis orthogonal to the camera view), which is the definition of a camera «roll».

Panoramica Verticale o Inclinazione

This is just a rotation along the local X axis. Press R to enter object rotation mode, then X twice (the first press selects the global axis, pressing the same letter a second time selects the local axis – this works with any axis; see the Axis Locking page).

Pan Orizzontale o Imbardata

This corresponds to a rotation around the camera’s local Y axis. Press R, and then Y twice.

Sposta

Per spostare la telecamera, premere G quindi MMB (o Z due volte).

Tracciamento Laterale

Press G and move the mouse (you can use X twice or Y to get pure-horizontal or pure-vertical sideways tracking).