Reduzindo Ruído
Quando realizando uma renderização final, é importante reduzir o ruído o máximo possível. Aqui iremos discutir alguns truques que, apesar de violar as leis da física, são particularmente importantes quando renderizando animações em tempo razoável. Clique nas imagens de exemplo para aumentá-las e ver bem as diferenças de ruído.
Traçador de caminhos
Cycles usa traçador de caminhos com estimativa de próximo evento, o que não é bom na renderização de todos tipos de efeitos de luz, como cáustica, mas tem a vantagem de ser hábil na renderização de cenas maiores e mais detalhadas comparado a alguns outros algoritmos de renderização. Isso porquê não precisamos armazenar, por exemplo, um mapa de fótons na memória, e porquê podemos manter raios relativamente coerentes para usar um cache sob demanda, comparado a por ex. traçador de caminhos bidirecional.

We do the inverse of what reality does, tracing light rays from the camera into the scene and onto lights, rather than from the light sources into the scene and then into the camera. This has the advantage that we do not waste light rays that will not end up in the camera, but also means that it is difficult to find some light paths that may contribute a lot. Light rays will be sent either according to the surface BRDF, or in the direction of known light sources.
Veja também
For more details, see the Light Paths and Sampling documentation.
The Source of the Noise
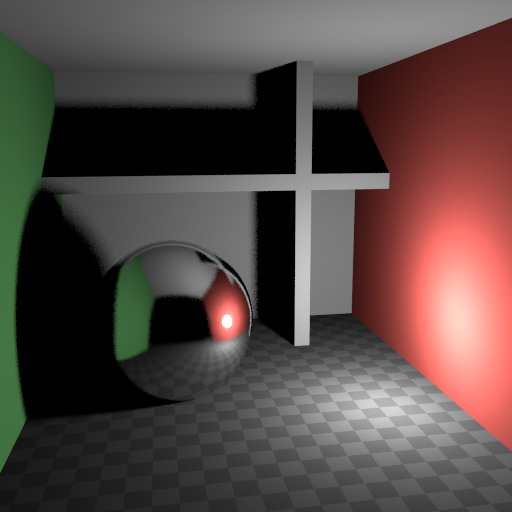
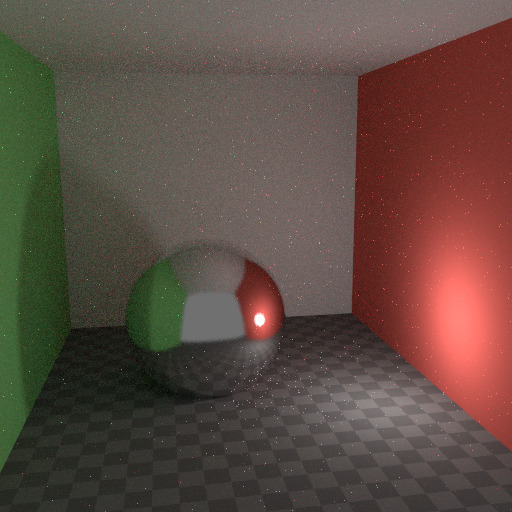
Para entender de onde vem o ruído, pegue por exemplo a cena abaixo. Quando traçamos o raio de luz no local marcado por um círculo branco em um ponto vermelho, a segunda imagem dá a impressão do que o sombreador difuso «vê».
To find the light that is reflected from this surface, we need to find the average color from all these pixels. Note the glossy highlight on the sphere, and the bright spot the light casts on the nearby wall. These hotspots are much brighter than other parts of the image and will contribute significantly to the lighting of this pixel.
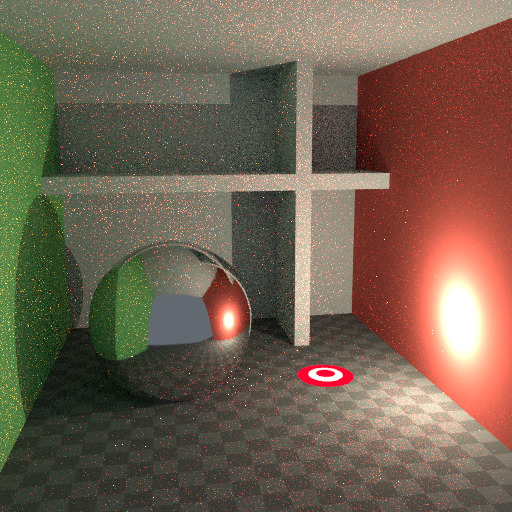
A cena. |
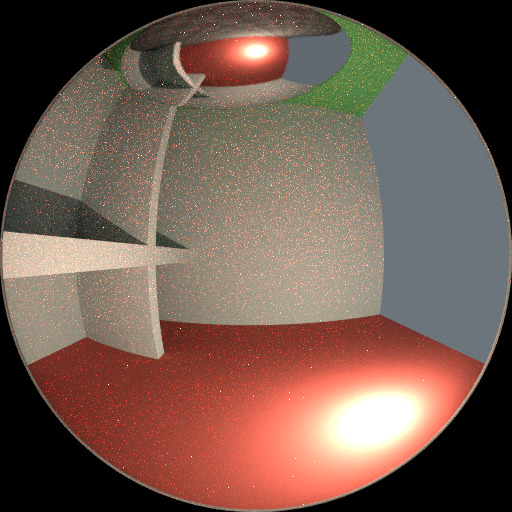
Irradiância no ponto de sombreamento. |
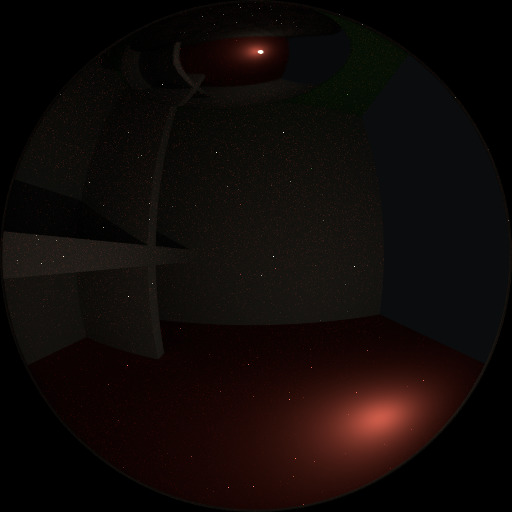
Os destaques detectados. |
The light is a known light source, so its location is already known, but the glossy highlight(s) that it causes are a different matter. The best we can do with path tracing is to distribute light rays randomly over the hemisphere, hoping to find all the important bright spots. If for some pixels we miss some bright spot, but we do find it for another, that results in noise. The more samples we take, the higher the probability that we cover all the important sources of light.
With some tricks we can reduce this noise. If we blur the bright spots, they become bigger and less intense, making them easier to find and less noisy. This will not give the same exact result, but often it’s close enough when viewed through a diffuse or soft glossy reflection. Below is an example of using Glossy Filter and Light Falloff.
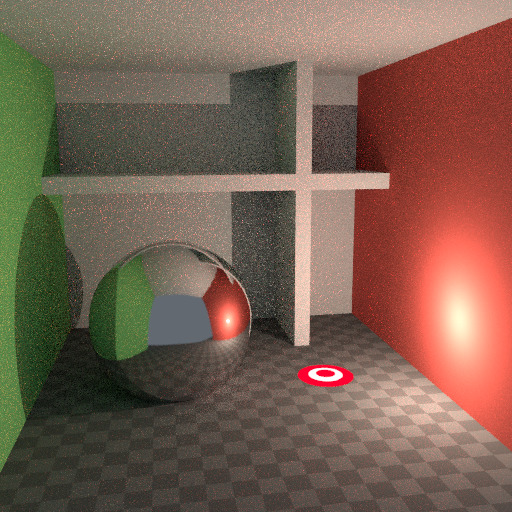
Usando Filtro de Polimento & Decaimento de Luz |
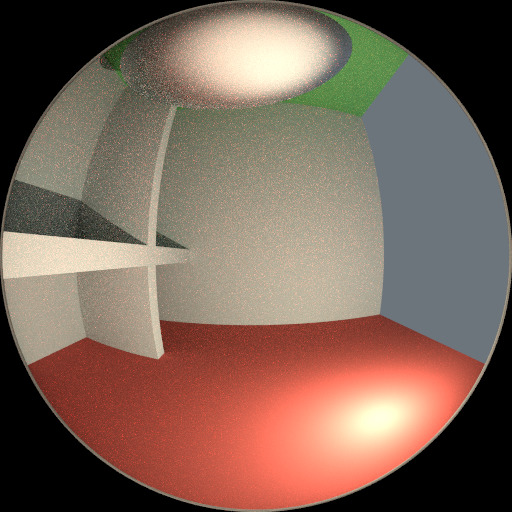
Irradiância no ponto de sombreamento. |

Os destaques detectados. |
Rebatimentos
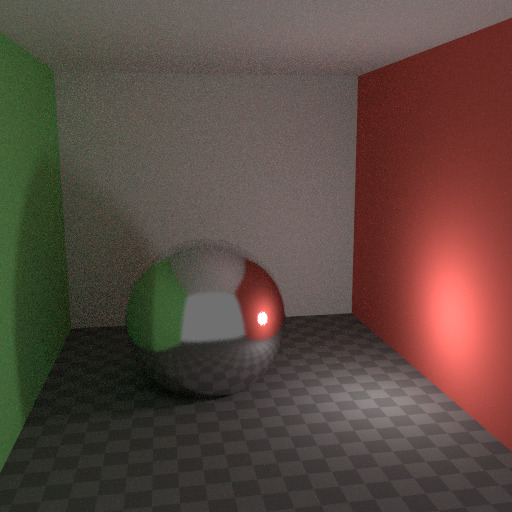
Na realidade a luz irá rebater uma quantidade gigante de vezes devido à velocidade da luz ser muito grande. Na prática mais rebatimentos irá introduzir mais ruído, e pode ser bom usar algo como a predefinição Iluminação Global Limitada na seção Caminhos de Luz que usa menos rebatimentos para diferentes tipos de sombreador. Tipicamente superfícies difusas podem sair com menos rebatimentos, enquanto superfícies polidas precisam mais algumas, e sombreadores de transmissão como vidro usualmente precisam mais.
Sem rebatimentos. |
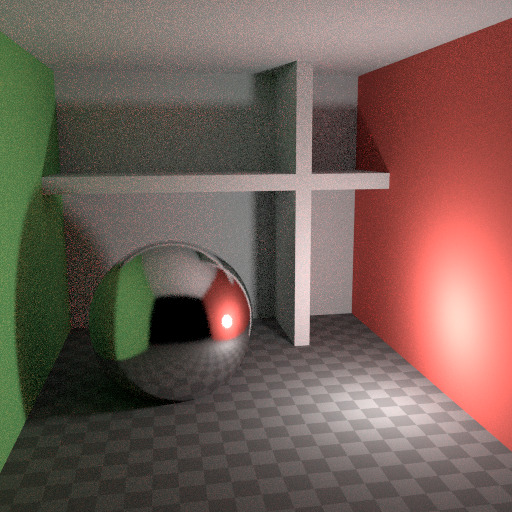
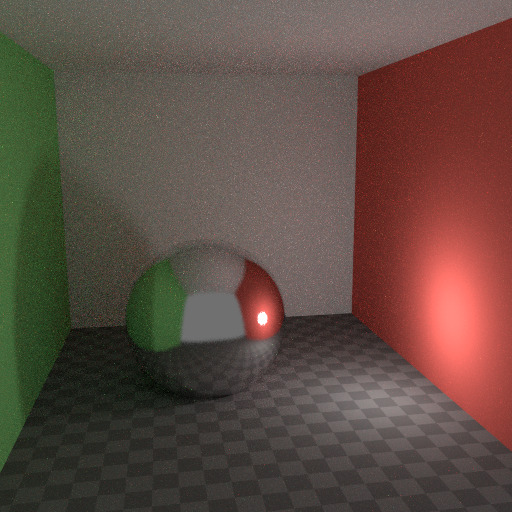
Dois rebatimentos ao máximo. |
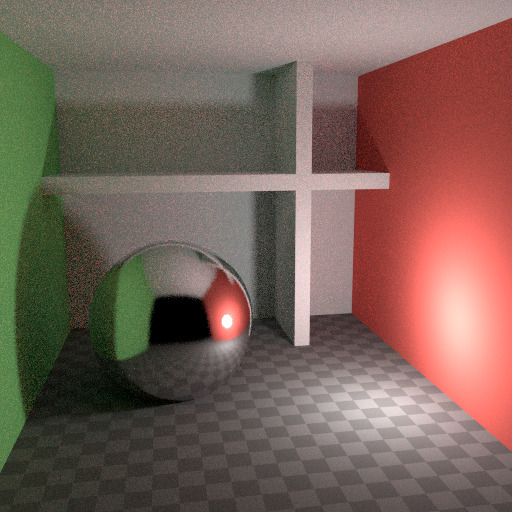
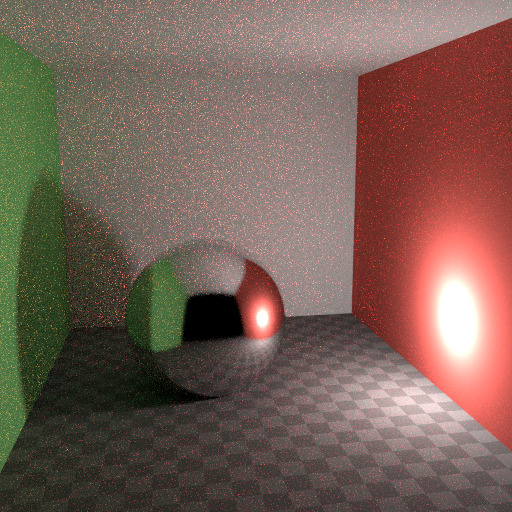
Quatro rebatimentos ao máximo. |
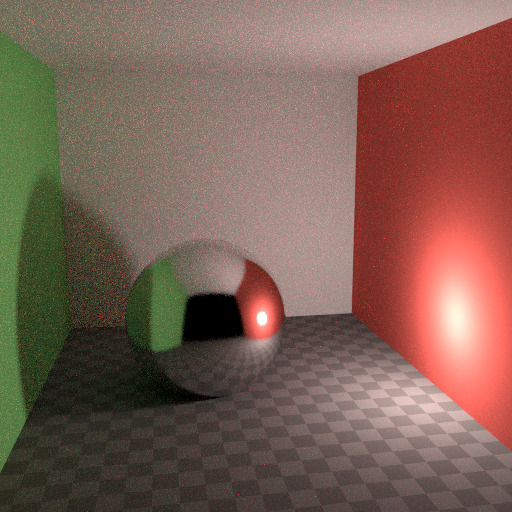
Importante também é usar sombreadores de cor que não têm componentes com valor de 1.0 ou valores próximos a isso; tente manter o valor máximo de 0.8 ou menos e faça suas luzes mais brilhantes. Na realidade, superfícies são raramente perfeitas ao refletir toda luz, mas claro há exceções; vidro usualmente irá deixar mais luz através, por isso precisamos mais rebatimentos nesse caso. Valores maiores para os componentes de cor tendem a introduzir ruído porquê a intensidade da luz não diminui muito conforme rebate em cada superfície.
Cáusticas e Filtro de Polimento
Caustics are a well-known source of noise, causing Fireflies. They happen because the renderer has difficulty finding specular highlights viewed through a soft glossy or diffuse reflection. There is a No Caustics option to disable glossy behind a diffuse reflection entirely. Many renderers will typically disable caustics by default.

Configurações padrão. |
Cáusticas desativadas. |
Filtro de Polimento maior que zero. |
However, using No Caustics will result in missing light, and it still does not cover the case where a sharp glossy reflection is viewed through a soft glossy reflection. There is a Filter Glossy option to reduce the noise from such cases at the cost of accuracy. This will blur the sharp glossy reflection to make it easier to find, by increasing the shader Roughness.
A imagem acima mostra as configurações padrão, sem cáustica, e filtro de polimento em 1.0.
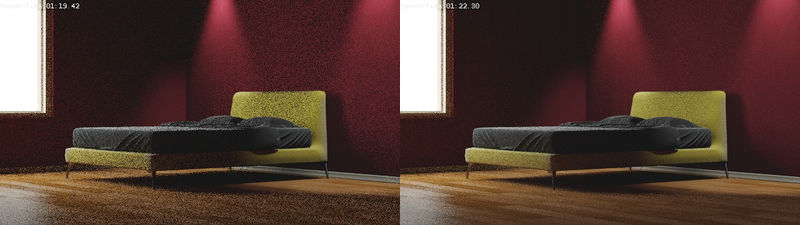
Decaimento de Luz
In reality light in a vacuum will always fall off at a rate of 1/(distance^2). However, as distance goes to zero, this value goes to infinity and we can get very bright spots in the image. These are mostly a problem for indirect lighting, where the probability of hitting such a small but extremely bright spot is low and so happens only rarely. This is a typical recipe for Fireflies.
Decaimento abrupto. |
Decaimento suave. |
To reduce this problem, the Light Falloff node has a Smooth factor, that can be used to reduce the maximum intensity a light can contribute to nearby surfaces. The images above show default falloff and smooth value 1.0.
Amostra de múltipla importância
Materials with emission shaders can be configured to use Multiple Importance Sampling (Configurações de material). This means that they will get rays sent directly towards them, rather than ending up there based on rays randomly bouncing around. For very bright mesh light sources, this can reduce noise significantly. However, when the emission is not particularly bright, this will take samples away from other brighter light sources for which it is important to find them this way.
The optimal setting here is difficult to guess; it may be a matter of trial and error, but often it is clear that a somewhat glowing object may be only contributing light locally, while a mesh light used as a light would need this option enabled. Here is an example where the emissive spheres contribute little to the lighting, and the image renders with slightly less noise by disabling Multiple Importance on them.
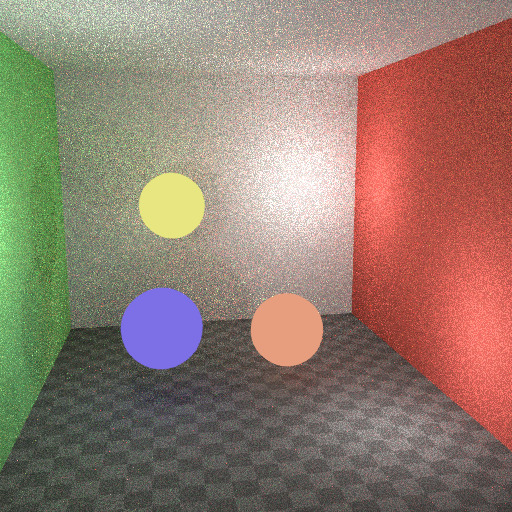
Amostra de múltipla importância desabilitada. |

Amostra de múltipla importância habilitada. |
O plano de fundo do mundo também possui uma opção de Importância Múltipla (Configurações). Isso é mais útil para mapas de ambiente que possuem pontos claros pequenos neles. Essa opção irá então, num pré-processo, determinar as regiões claras, e enviar raios de luz diretamente na sua direção. Novamente, ativar essa opção pode levar amostras de fontes de luz mais importantes se não for necessário.
Vidros e Sombras Transparentes
With caustics disabled, glass shadows may appear too dark, and with filter glossy the caustics might be too soft. We can make a glass shader that will use a Glass BSDF when viewed directly, and a Transparent BSDF when viewed indirectly. The Transparent BSDF can be used for transparent shadows to find light sources straight through surfaces, and will give properly-colored shadows, but without the caustics. The Light Path node is used to determine when to use which of the two shaders.
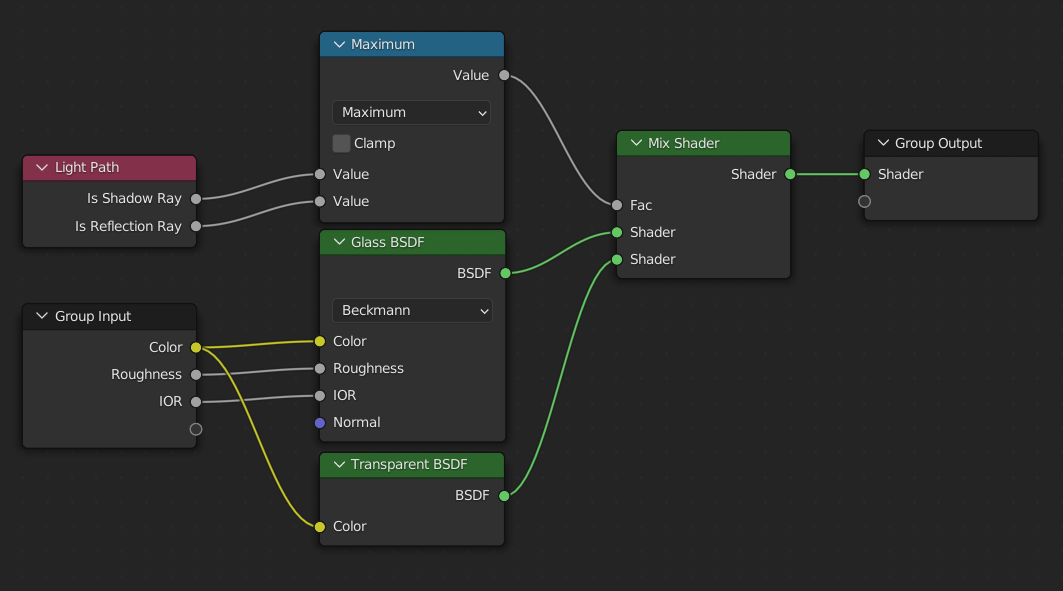
Sombreador de vidro otimizado.
Above we can see the node setup used for the glass transparency trick; on the left the render has dark shadows due to missing caustics, and on the right the render with the trick.
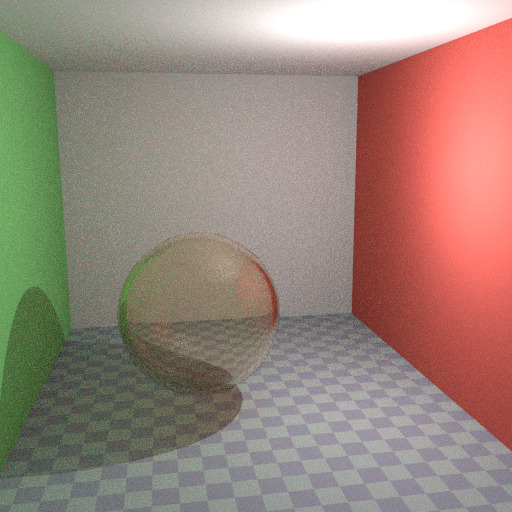
Default Glass BSDF. |
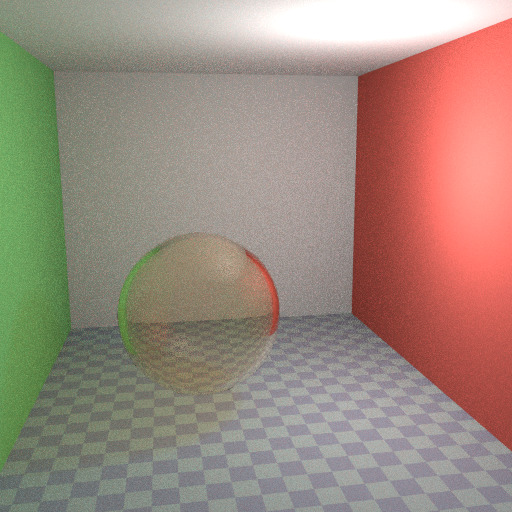
Sombreador para Vidros Otimizado. |
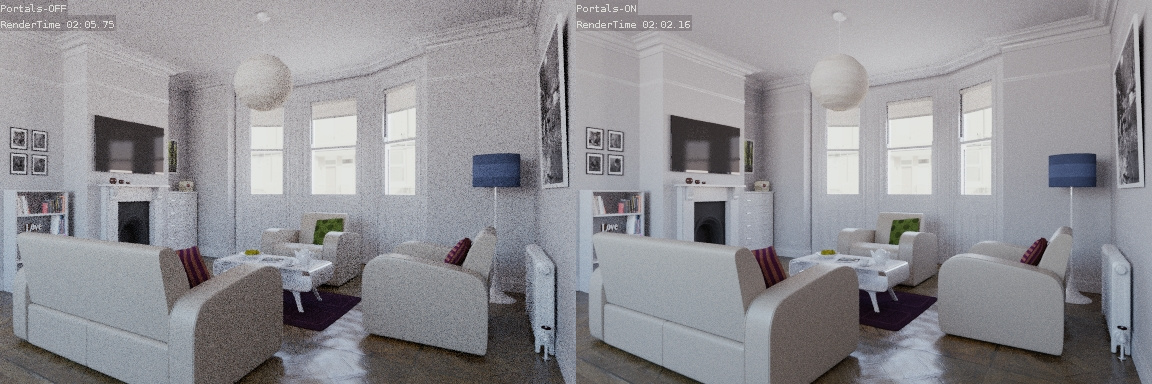
Light Portals
When rendering a daylight indoor scene where most of the light is coming in through a window or door opening, it is difficult for the integrator to find its way to them. To fix this, use Light Portals. You then will need to modify its shape to match that of the opening that you are trying to fill.
Redução de ruídos
Even with all the settings described above there will always end up being some render noise no matter how many samples you use. To fix this there is a post-processing technique to cleanup the final bit of noise. To use this enable Denoising in the Render tab of the Properties.
Below is an example render by The Pixelary.
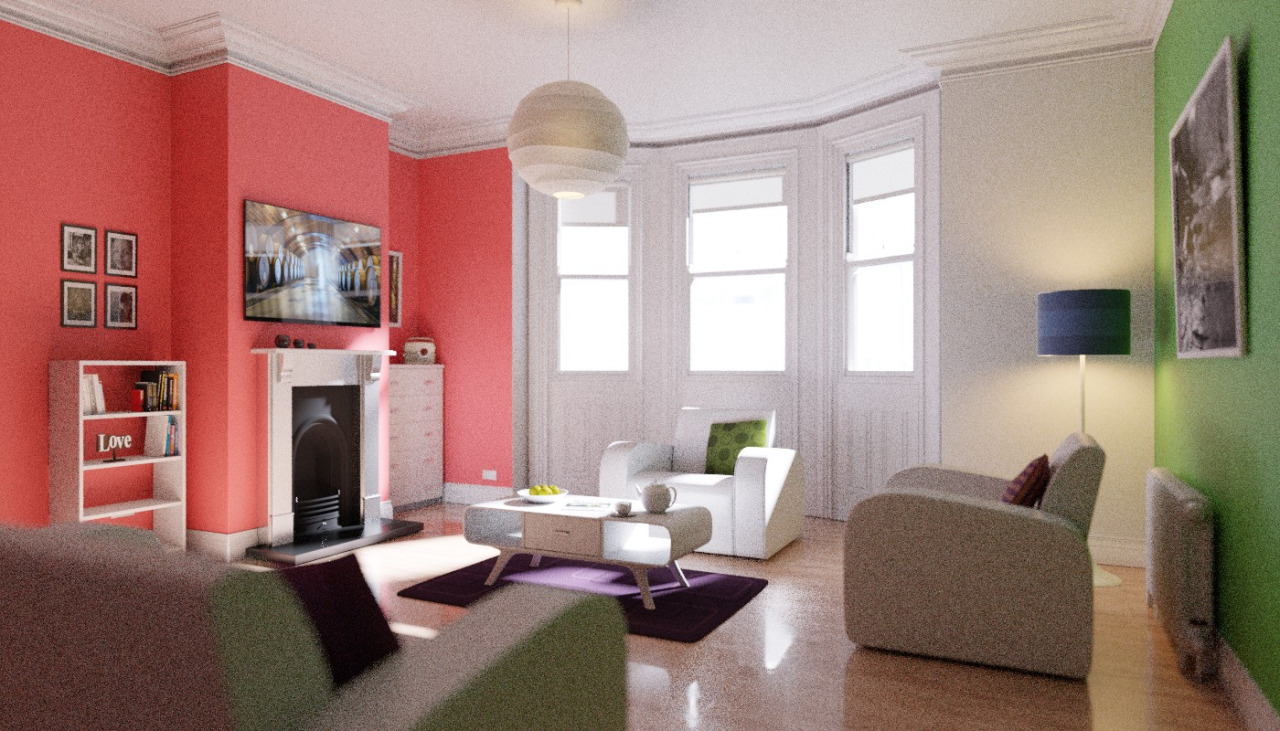
Example render before denoising. |
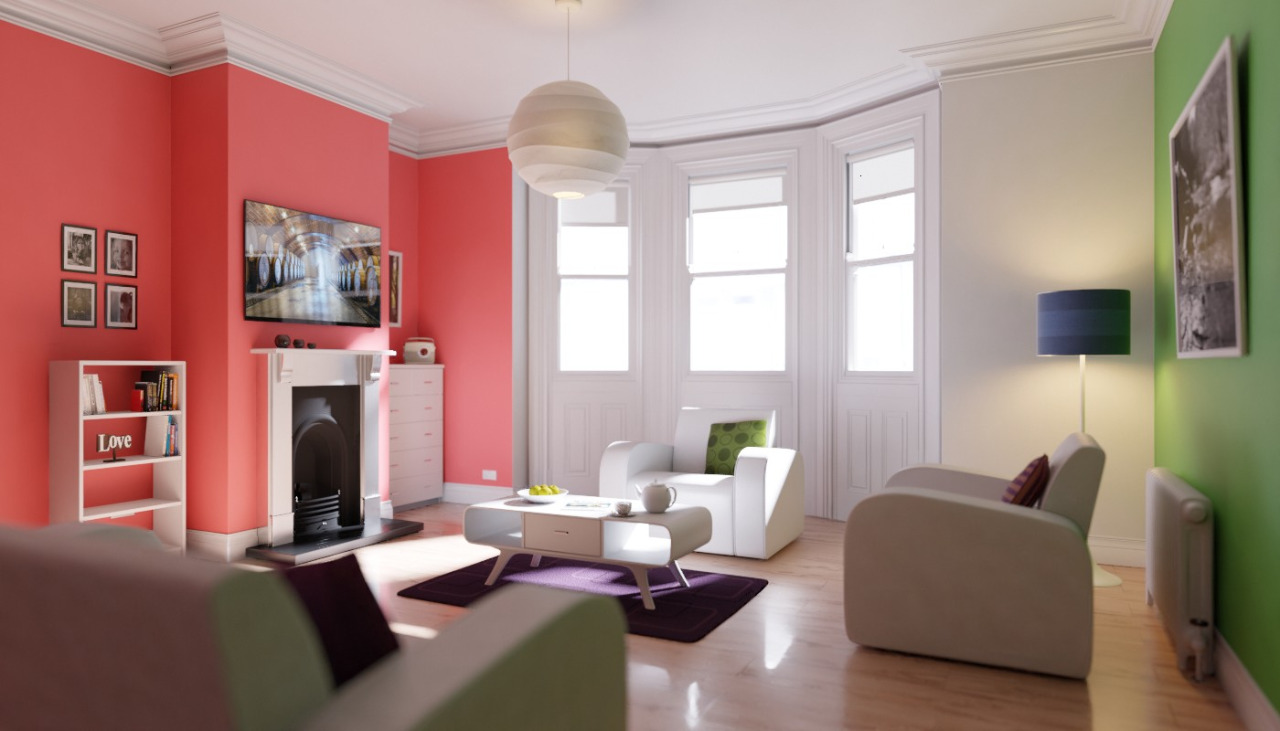
Example render after denoising. |
Truncar Pontos de Brilho (Fireflies)
Ideally with all the previous tricks, Fireflies would be eliminated, but they could still happen. For that, the intensity that any individual light ray sample will contribute to a pixel can be clamped to a maximum value with the integrator Clamp setting.
Se definida muito baixa isso pode causar pontos de brilho faltando na imagem, que pode ser útil preservá-los para efeitos de câmera como bloom e glare. Para mitigar esse enigma é frequentemente útil truncar apenas os rebatimentos indiretos, deixando pontos de brilho diretamente visíveis à câmera intocados.

Sem Truncar (0). |
Com Truncar definido para 4. |