Ferramentas para vértices
Referência
| Mode: | Edit Mode |
|---|---|
| Menu: | |
| Hotkey: | Ctrl-V |
This page covers many of the tools in the menu. These are tools that work primarily on vertex selections, however, some also work with edge or face selections.
Fusão
Fusão de vértices
Referência
| Mode: | Edit Mode |
|---|---|
| Menu: | , |
| Hotkey: | Alt-M |
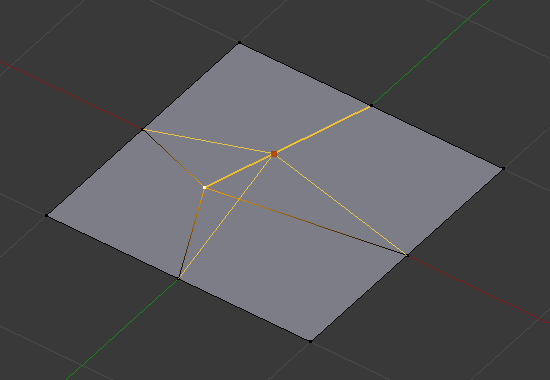
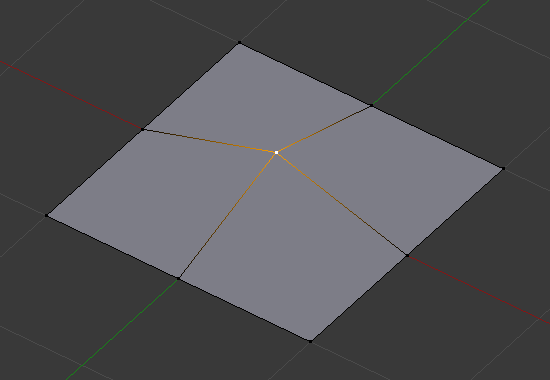
Esta ferramenta permite que você faça a fusão de todos os vértices selecionados em um único, dissolvendo todos os outros. Você pode escolher a localização do vértice sobrevivente no menu da caixa de diálogo que esta ferramenta apresenta antes de sua execução.
- No primeiro
- Disponível somente no modo de seleção de Vértices, isso irá posicionar o vértice remanescente na localização do primeiro vértice selecionado.
- No último
- Disponível somente no modo de seleção de Vértices, isso irá posicionar o vértice remanescente na localização do último vértice selecionado (o vértice ativo).
- No centro
- Available in all select modes, it will place the remaining vertex at the center of the selection.
- No cursor
- Available in all select modes, it will place the remaining vertex at the 3D Cursor.
- Recolher
- Every island of selected vertices (connected by selected edges) will merge on its own median center, leaving one vertex per island. It is also available via the menu option…
Merging vertices of course also deletes some edges and faces. But Blender will do everything it can to preserve edges and faces only partly involved in the reunion.
Nota
At First and At Last depend on that the selection order is saved: the order is lost, for instance, after changing selection mode.
- UVs
- If UVs is ticked in the Adjust Last Operation panel, the UV mapping coordinates, if existing, will be corrected to avoid image distortion.
Auto Merge
Referência
| Mode: | Edit Mode |
|---|---|
| Menu: |
When the Auto Merge option is enabled, as soon as a vertex moves closer to another one than the Threshold setting, they are automatically merged. This option affects interactive operations only (tweaks made in the Adjust Last Operation panel are considered interactive too). If the exact spot where a vertex is moved contains more than one vertex, then the merge will be performed between the moved vertex and one of those.
Merge by Distance
Referência
| Mode: | Edit Mode |
|---|---|
| Menu: | , |
Merge by Distance is a useful tool to simplify a mesh by merging the selected vertices that are closer than a specified distance to each other. An alternative way to simplify a mesh is to use the Decimate Modifier.
- Distância de fusão
- Sets the distance threshold for merging vertices.
- Não selecionados
- Permite que os vértices na seleção sejam fundido com os vértices não selecionados. Quando desabilitado, os vértices selecionados serão fundidos apenas com outros vértices selecionados.
Separando
Rip Region
Referência
| Mode: | Edit Mode |
|---|---|
| Menu: | |
| Hotkey: | V |
Rip creates a «hole» into a mesh by making a copy of selected vertices and edges, still linked to the neighbor non-selected vertices, so that the new edges are borders of the faces on one side, and the old ones, borders of the faces of the other side of the rip.
Exemplos
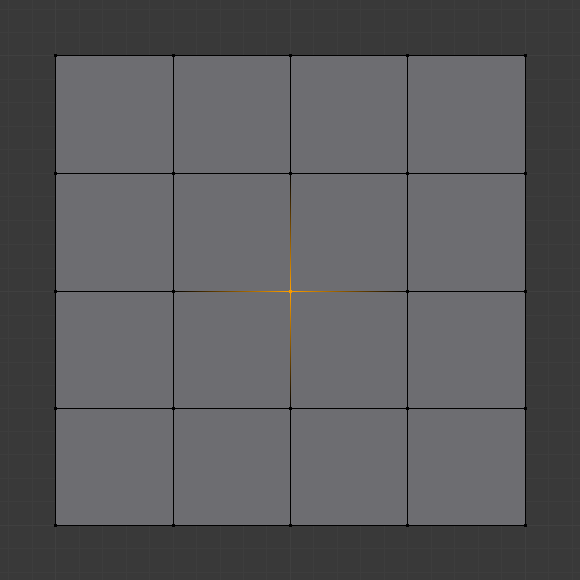
Vértices selecionados. |
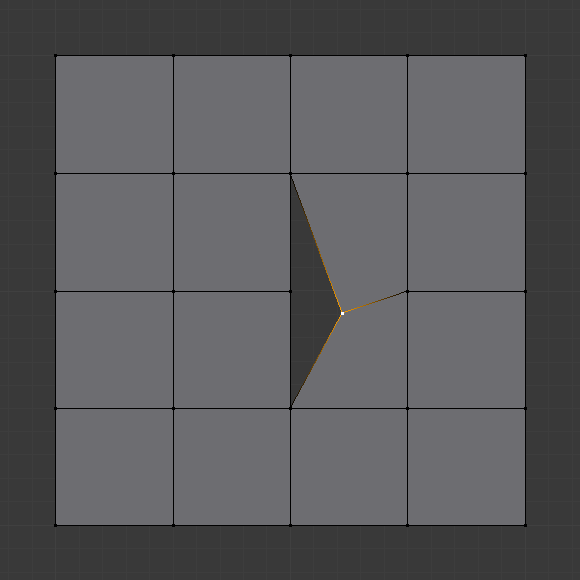
Hole created after using rip on vertex. |
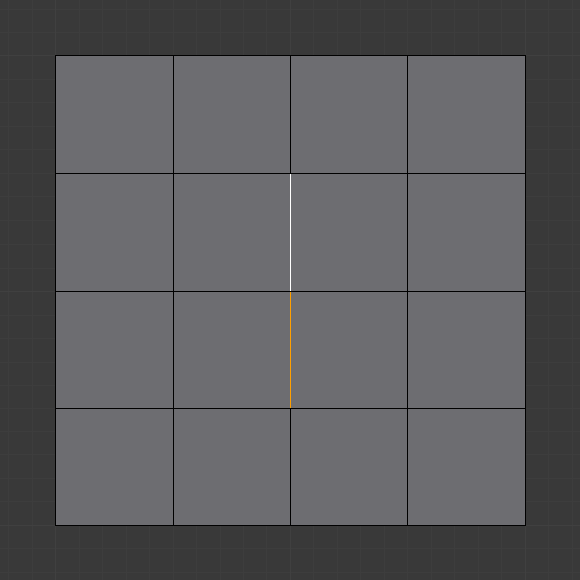
Arestas selecionadas. |
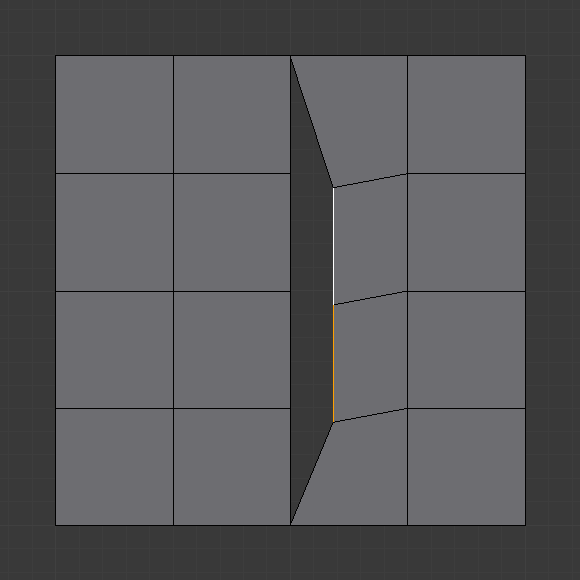
Result of rip with edge selection. |
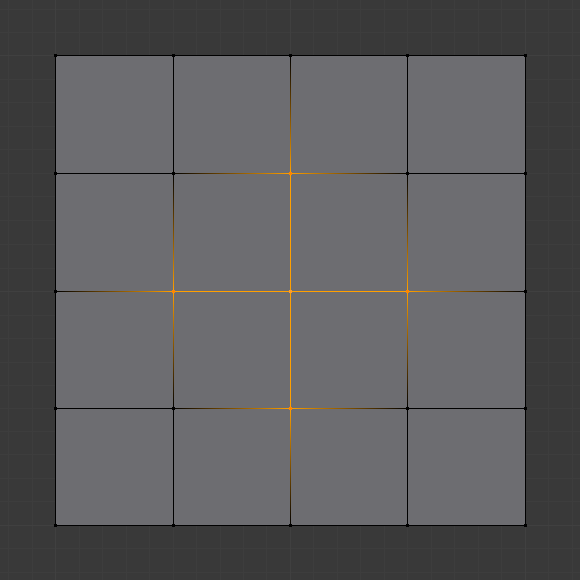
Uma seleção complexa de vértices. |
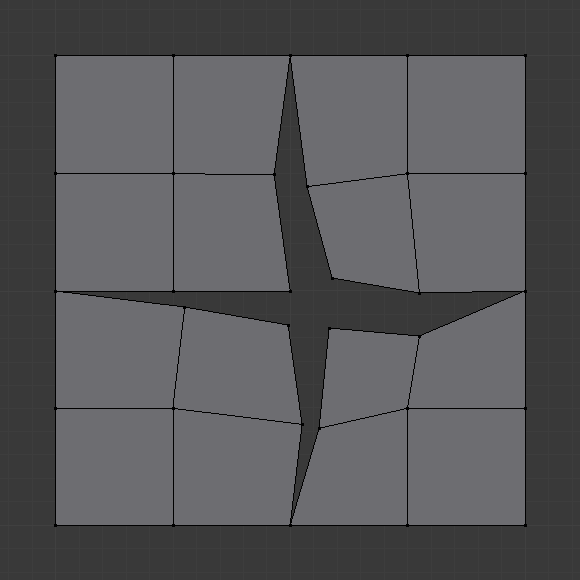
Resultado da operação de rompimento. |
Limitações
Rip will only work when edges and/or vertices are selected. Using the tool when a face is selected (explicitly or implicitly), will return an error message «Cannot perform ripping with faces selected this way». If your selection includes some edges or vertices that are not «between» two faces manifold, it will also fail with message «No proper selection or faces include».
Rip Vertices and Fill
Referência
| Mode: | Edit Mode |
|---|---|
| Menu: | |
| Hotkey: | Alt-V |
Rip fill works the same as the Rip tool above, but instead of leaving a hole, it fills in the gap with geometry.
|
Arestas selecionadas. |
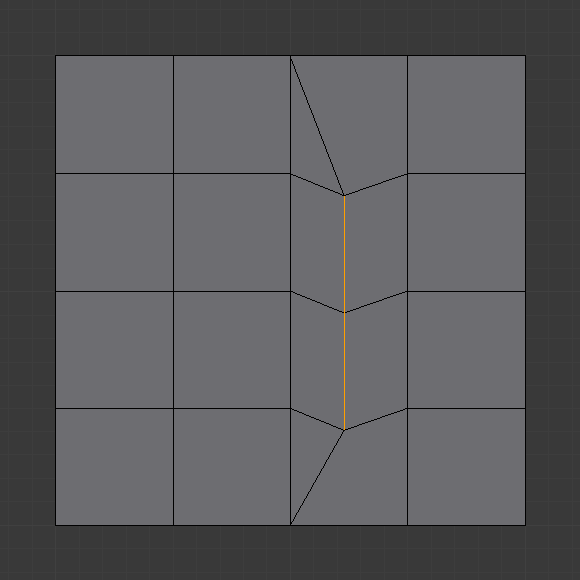
Resultado do preenchimento de ruptura. |
Dividir
Referência
| Mode: | Edit Mode |
|---|---|
| Menu: | |
| Hotkey: | Y |
Splits (disconnects) the selection from the rest of the mesh. The border edge to any non-selected elements are duplicated.
Note that the «copy» is left exactly at the same position as the original, so you must move it G to see it clearly…
Rip Edge
Referência
| Mode: | Edit Mode |
|---|---|
| Menu: | |
| Hotkey: | Alt-D |
This tool takes any number of selected vertices and duplicate-drags them along the closest edge to the mouse, When extending an edge loop, it extends the vertices at the endpoints of the loop. Which is similar behavior like Extrude tool, but it creates an n-gon.
It helps to easily add details to existing edges.
Separar
Referência
| Mode: | Edit Mode |
|---|---|
| Menu: | |
| Hotkey: | P |
The Separate tool will Split mesh elements in another mesh object.
- Seleção
- Separa os elementos selecionados.
- Através do material
- Separates fragments based on the materials assigned to the different faces.
- Através das partes soltas
- Creates one object for every independent (disconnected) fragment of the original mesh.
Deslizar vértices
Referência
| Mode: | Edit Mode |
|---|---|
| Menu: | |
| Hotkey: | Shift-V |
Vertex Slide will transform a vertex along one of its adjacent edges. Use Shift-V to activate tool. The nearest selected vertex to the mouse cursor will be the control one. Move the mouse along the direction of the desired edge to specify the vertex position. Then press LMB to confirm the transformation.
- Uniformizar E
- By default, the offset value of the vertices is a percentage of the edges length along which they move. When Even mode is active, the vertices are shifted by an absolute value.
- Flipped F
- When Flipped is active, vertices move the same distance from adjacent vertices, instead of moving from their original position.
- Limitar Alt ou C
- Toggle clamping the slide within the edge extents.
Vértices selecionados. |
Posicionando os vértices interativamente. |
Vértices reposicionados. |
Casco convexo
Referência
| Mode: | Edit Mode |
|---|---|
| Menu: |
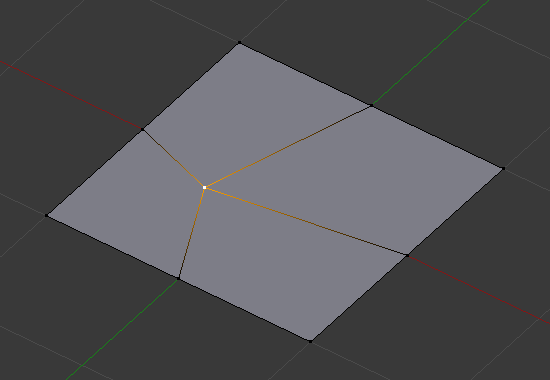
The Convex Hull operator takes a point cloud as input and outputs a convex hull surrounding those vertices. If the input contains edges or faces that lie on the convex hull, they can be used in the output as well. This operator can be used as a bridge tool as well.

Input mesh, point cloud, and Convex Hull result.
- Apagar os não utilizados
- Removes vertices, edges, and faces that were selected, but not used as part of the hull. Note that vertices and edges that are used by other edges and faces not part of the selection will not be deleted.
- Usar as faces existentes
- Where possible, use existing input faces that lie on the hull. This allows the convex hull output to contain n-gons rather than triangles (or quads if the Join Triangles option is enabled).
- Criar lacunas
- Delete edges and faces in the hull that were part of the input too. Useful in cases like bridging to delete faces between the existing mesh and the convex hull.
- Juntar triângulos
- Joins adjacent triangles into quads. Has all the same properties as the Tris to Quads operator (angle limit, compare UVs, etc.).
- Max Face Angle, Max Shape Angle, Compare
- See Triângulos para quadriláteros.
Tornar parente dos vértices
Referência
| Mode: | Edit Mode |
|---|---|
| Menu: | |
| Hotkey: | Ctrl-P |
This will parent the other selected object(s) to the vertices/edges/faces selected, as described here.
Adicionar gancho
Referência
| Mode: | Edit Mode |
|---|---|
| Menu: | |
| Hotkey: | Ctrl-H |
Adds a Hook Modifier (using either a new empty, or the current selected object) linked to the selection. Note that even if it appears in the history menu, this action cannot be undone in Edit Mode – because it involves other objects…
When the current object has no hooks associated, only the 2 first options will appear on the menu.
- Gancho para novo objeto
- Creates a new Hook Modifier for the active object and assigns it to the selected vertices; it also creates an empty at the center of those vertices, which are hooked to it.
- Gancho para objeto selecionado
- Does the same as Hook to New Object, but instead of hooking the vertices to a new empty, it hooks them to the selected object (if it exists). There should be only one selected object (besides the mesh being edited).
- Gancho para o osso do objeto selecionado
- Does the same as Hook to New Object, but it sets the last selected bone in the also selected armature as a target.
- Atribuir a um gancho
- The selected vertices are assigned to the chosen hook. For that to happen, a list of the hooks associated to the object is displayed. All the unselected vertices are removed from it (if they were assigned to that particular hook). One vertex can be assigned to more than one hook.
- Remover gancho
- Removes the chosen hook (from the displayed list) from the object: the specific Hook Modifier is removed from the modifier stack.
- Selecionar gancho
- Selects all vertices assigned to the chosen hook (from the hook list).
- Redefinir o gancho
- It’s equivalent to the Reset button of the specific Hook Modifier (chosen from the hook list).
- Re-centralizar gancho
- It’s equivalent to the Recenter button of the specific Hook Modifier (chosen from the hook list).
Mesclar a partir de um formato, Propagar formatos
Referência
| Mode: | Edit Mode |
|---|---|
| Menu: | and |
These are options regarding shape keys.
- Propagar formato
- Aplica as localizações dos vértices selecionados para todas as outras chaves de formato.
- Mesclar a partir do formato
- Mescla em um formato a partir de uma chave de formato.