Группы узлов
Пример узла группы.
Grouping nodes can simplify a node tree by allowing instancing and hiding parts of the tree.
Conceptually, grouping nodes allows you to specify a set of nodes that you can treat as though it were «just one node». Node groups are similar to functions in programming, they can be reused in many places in a node tree and can be customized by changing the «parameters» of the node group.
As an example: If you have created a material that you would like to use with different inputs e.g. diffuse color: red plastic, green plastic. You could create different materials with Make Single User for each different color with a copy of the tree part describing the plastic material. If you like to edit the material you would need to redo the edit on all materials. A better method of reuse is to create node groups, exposing only the variable inputs (e.g. diffuse color).
Also nested node groups are supported. I.e. a node group can be inserted or created inside another node group.
Примечание
Рекурсивные группы узлов запрещены для всех текущих узловых систем, чтобы предотвратить бесконечную рекурсию. Группа узлов никогда не может содержать себя (или другую группу, которая её содержит).
Интерфейс
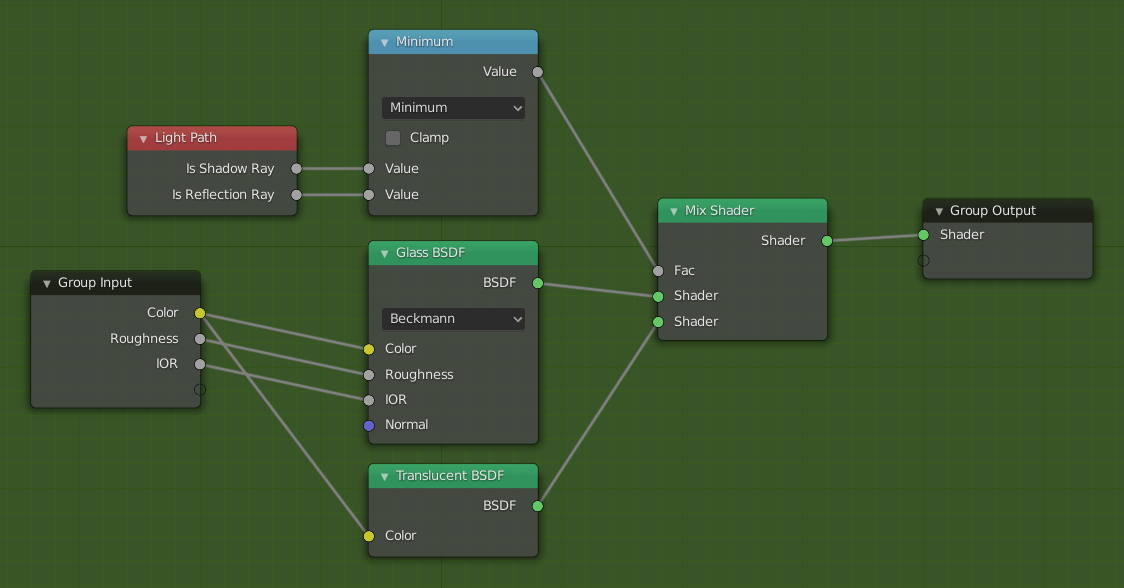
Когда создаётся группа узлов, создаются новые узлы Group Input и Group Output для представления потока данных, входящего в группу и исходящего из неё. Кроме того, подключения к портам входа, исходящие от невыбранных узлов, будут присоединены к новым портам на узле Group Input. Точно так же исходящие подключения к портам входа невыбранных узлов будут привязаны к новому узлу Group Output.
If you want to pass an additional parameter into the group, a socket must be added to the Group Input node. Therefore drag a connection from the hollow socket on the right side of the Group Input node to the desired input socket on the node requiring an input. The process is similar for the Group Output regarding data you want to be made available outside the group.
Panel
Справка
- Mode
Все режимы
- Panel
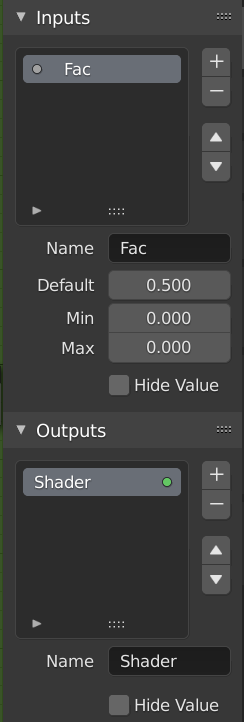
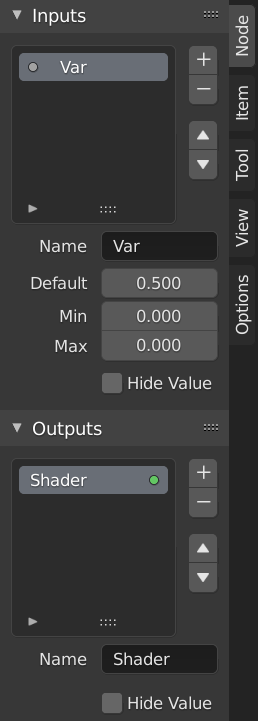
Интерфейс панели редактирования групп.
Sockets can be added, re-ordered, or removed, descriptive names can be added and the details of the input data value defined here.
If you have multiple inputs or outputs, they can be re-ordered by selecting the socket in the list. And then moving them up or down with the arrow buttons on the right side of the panel. The plus button will add an unconnected socket of the same type as the selected socket or a value socket if there is no selection. The minus button will remove the selected socket. The triangle at the bottom of the list has filtering functions to help finding nodes if the group has a large number of sockets.
- Name (имя)
Имя порта для отображения в интерфейсе узла.
- Tooltip (подсказки)
The message displayed when hovering over socket properties. Currently only supported for Geometry Node Editor
- Default (по умолчанию)
The value to use when nothing is connected to the node socket. Note, this will not affect the current node but will affect instances of the node.
- Min, Max
The minimum and maximum value for the UI button shown in the node interface. Note, this is not a minimum or maximum for the data that can pass through the node. If a socket passes a higher value than the maximum it will still pass into the node unchanged.
- Hide Value (скрыть значение)
Скрыть значение порта, даже если порт не подключен.
Редактирование группы
Справка
- Mode
Все режимы
- Меню
- Главная панель редактора
- Горячая клавиша
Tab, Ctrl-Tab
With a node group selected, Tab expands the node to a frame, and the individual nodes within it are shown. You can move them around, play with their individual controls, re-thread them internally, etc. just like you can if they were a normal part of the editor view. You will not be able, though, to thread them to a node outside the group; you have to use the external sockets on the side of the node group. While Tab can be used to both enter and exit a group, Ctrl-Tab only exits.
Пример раскрытой группы узлов.
Создание группы
Справка
- Mode
Все режимы
- Меню
- Горячая клавиша
Ctrl-G
To create a node group, select the nodes you want to include, then press Ctrl-G, . A node group will have a green title bar. All selected nodes will now be contained within the node group. Default naming for the node group is «NodeGroup», «NodeGroup.001» etc. There is a name field in the node group you can click into to change the name of the group. Change the name of the node group to something meaningful.
При добавлении групп узлов из одного blend-файла в другой, Blender не делает различий между группами узлов материалов и составными (composite) группами узлов. Поэтому рекомендуется использовать некоторое соглашение об именах, которое позволит вам различать эти два типа.
Совет
What not to include in node groups:
Remember that the essential idea is that a group should be a reusable, self-contained software component. Material node groups should not include:
- Input nodes
If you include a source node in your group, you will end up having the source node appearing twice: once inside the group, and once outside the group in the new material node tree.
- Output node
If you include an output node in the group, there will not be an output socket available from the group!
Разгруппировка
Справка
- Mode
Все режимы
- Меню
- Горячая клавиша
Ctrl-Alt-G
The Ctrl-Alt-G tool removes the group and places the individual nodes into your editor workspace. No internal connections are lost, and now you can link internal nodes to other nodes in your workspace.
- Separate (отделение) P
Отделение выбранных узлов от группы узлов.
- Copy
Копирование в родительское дерево узлов, оставляя группу без изменений.
- Move (перемещение)
Перемещение в родительское дерево узлов, удаление из группы.
Вставка в группу
Справка
- Mode
Все режимы
- Меню
Выбрав набор узлов, заканчивающийся узлом группы назначения, и нажав , вы переместите эти узлы в эту группу. Перемещённые узлы собираются в собственную группу, чтобы сохранить их контекст соединения, имея собственные входные и выходные узлы группы. Существующие входные и выходные узлы группы обновляются новыми портами, если таковые имеются, из новых узлов. Группу узлов необходимо отредактировать, чтобы она содержала один узел Group Input и один узел Group Output.
Appending Node Groups
Справка
- Editor
Верхняя панель
- Mode
Все режимы
- Меню
Once you have appended a Node Tree to your blend-file, you can make use of it in a node editor by pressing Shift-A, , then selecting the appended group. The «control panel» of the Group include the individual controls for the grouped nodes. You can change them by working with the Group node like any other node.