Transform Orientations
参照
- Mode(モード)
Object Mode(オブジェクトモード) と Edit Mode(編集モード)
- Panel(パネル)
- ショートカットキー
Comma
Transform Orientations affect the behavior of Transformations. You will see an effect on the Object Gizmo (the widget in the center of the selection), as well as on transformation constraints, Axis Locking.
For example, when you press X, during the execution of the operation, it will constrain the transformation to the Global X axis. But if you press X a second time it will constrain to your Transform Orientation's X axis.

Transform Orientations selector.
The Orientations options can be set through the Transform Orientation selector in a 3D Viewport header.
In addition to the five preset options, you can define your own custom orientation (see Custom Orientations below).
座標系
- Global(グローバル)
Align the transformation axes to world space.
The Navigation Gizmo in the top right corner of the viewport, and the Grid Floor, shows the axes of world coordinate system.
- Local(ローカル)
Align the transformation axes to the selected objects' space.
When an object is rotated, the direction of the Local gizmo matches to the object's rotation relative to the global axes. While the Global gizmo always correspond to world coordinates.
- Normal(ノーマル)
Align the transformation axes so that the Z axis of the gizmo will match the average Normal of the selected element. If multiple elements are selected, it will orient towards the average of those normals.
In Object Mode, this is equivalent to Local orientation.
- Gimbal(ジンバル)
Align each axis to the Euler rotation axis as used for input. Uses a Gimbal behavior that can be changed depending on the current Rotation Mode.
- View(ビュー)
Align the transformation axes to the window of the 3D Viewport:
Y: 上/下
X: 左/右
Z: 画面の方向/画面から遠ざかる方向
- Cursor(カーソル)
Align the transformation axes to the 3D cursor.
例
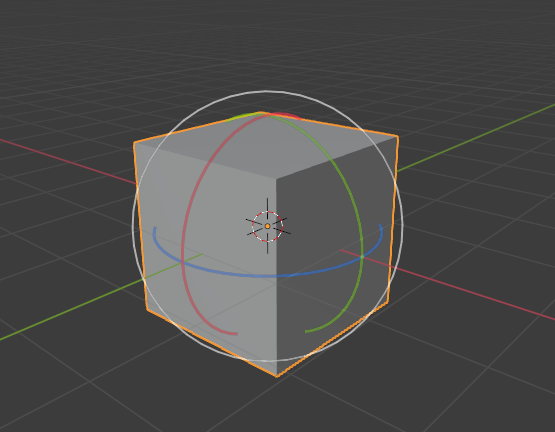
グローバル変換座標系が選択されたデフォルトの立方体。¶ |
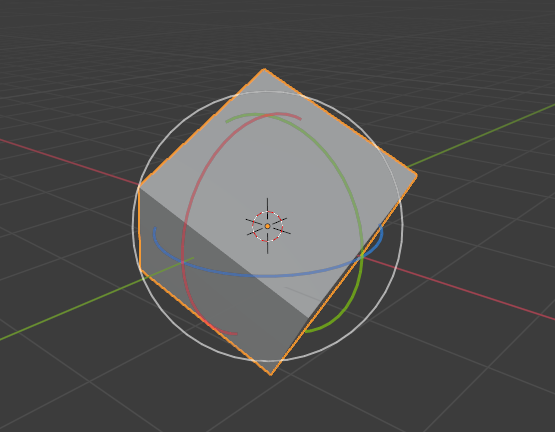
グローバル座標系で回転した立方体、ギズモは変わりません。¶ |
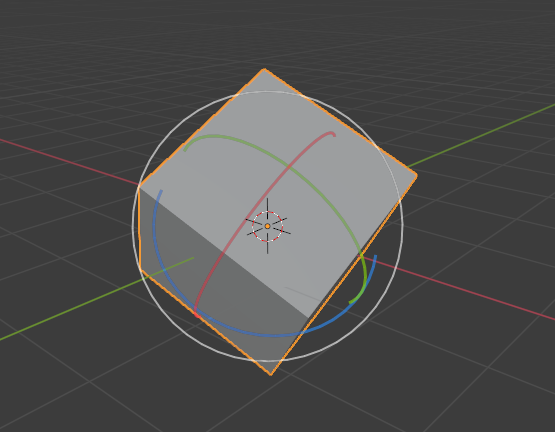
Local orientation, gizmo matches to the object's rotation.¶ |
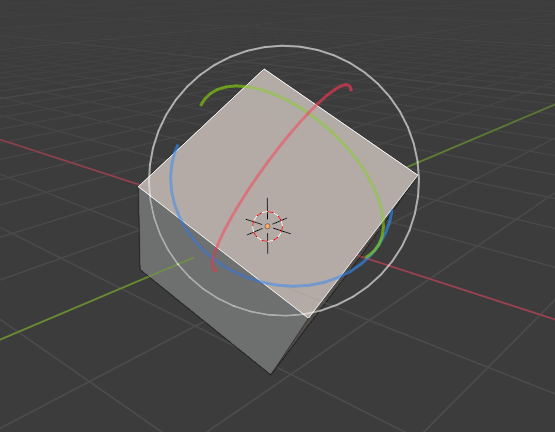
Edit Mode(編集モード)にて、法線の方向。¶ |
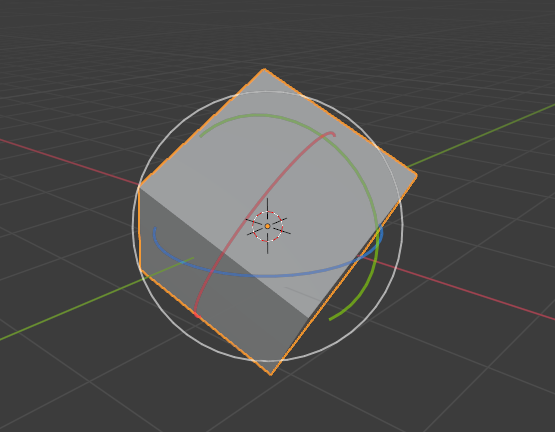
ジンバル変換座標系。¶ |
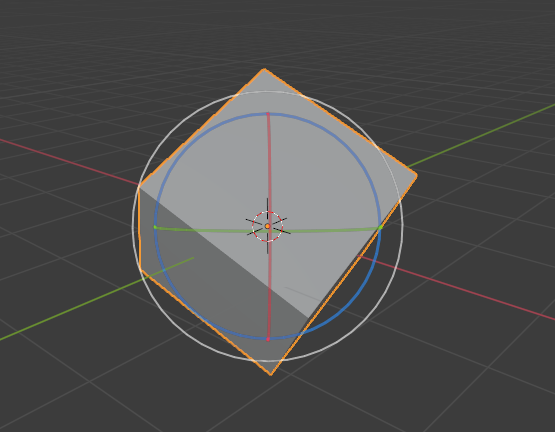
ビュー変換座標系。¶ |
カスタム座標系
参照
- Mode(モード)
Object Mode(オブジェクトモード) と Edit Mode(編集モード)
- Panel(パネル)
You can define custom transform orientations, using object or mesh elements. Custom transform orientations defined from objects use the Local orientation of the object whereas those defined from selected mesh elements (vertices, edges, faces) use the Normal orientation of the selection.
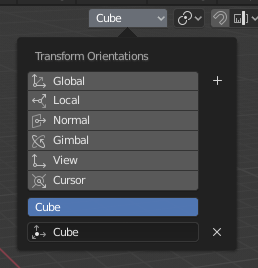
Transform Orientations panel.
The Transform Orientations panel, found in the header of the 3D Viewport, can be used to manage transform orientations: selecting the active orientation, adding ("+" icon), deleting ("X" icon) and rename custom orientations.
The default name for these orientations is derived from what you have selected. If it's an edge, it will be titled, "Edge", if it's an object, it will take that object's name, etc.
Create Orientation(座標軸の向きを作成)
To create a custom orientation, select the object or mesh element(s) and click the "+" button on the Transform Orientations panel.
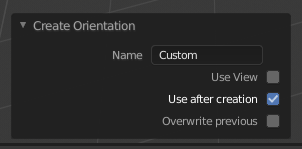
Create Orientation(座標軸の向きを作成) Adjust Last Operation(最後の操作を調整) パネル。
Just after creating the orientation, the Create Orientation Adjust Last Operation(最後の操作を調整) panel gives a few options:
- Name(名前)
新しい座標系に名前を付けるためのテキストフィールド。
- Use View(ビューを使用)
新しい座標系はビュー空間に揃えられます。
- Use After Creation(作成後に使用)
If checked it leaves the newly created orientation active.
- Overwrite Previous(以前の物を上書き)
If the new orientation is given an existing name, a suffix will be added to it to avoid overwriting the old one, unless Overwrite Previous is checked, in which case it will be overwritten.