はじめに
The first step is to unwrap your mesh. You want to unwrap when you feel your mesh is complete with respect to the number of faces it needs to have. If you do add faces or subdivide existing faces when a model is already unwrapped, Blender will add those new faces for you, but you may need to do additional mapping or editing. In this fashion, you can use the UV texture image to guide additional geometry changes.
UVについて
Every point in the UV map corresponds to a vertex in the mesh. The lines joining the UVs correspond to edges in the mesh. Each face in the UV map corresponds to a mesh face.
Each face of a mesh can have many UV textures. Each UV texture can have an individual image assigned to it. When you unwrap a face to a UV texture in the UV Editor, each face of the mesh is automatically assigned four UV coordinates: These coordinates define the way an image or a texture is mapped onto the face. These are 2D coordinates, which is why they are called UV, to distinguish them from XYZ coordinates. These coordinates can be used for rendering or for real-time viewport display as well.
Blenderのすべての面は異なる画像へのリンクを持つことができます。UV座標は、この画像が面にどのようにマッピングされるかを定義します。この画像は、リアルタイムでレンダリングや表示できます。画像を割り当てたり、アクティブなメッシュオブジェクトのUV座標を変更したりするには、3D Viewport(3Dビューポート)を "Face Select(面選択)"モードにする必要があります。これにより、面が多くのUVテクスチャに参加できるようになります。キャラクターのヘアラインにある面は、顔のUVテクスチャ、 および 頭皮/髪のUVテクスチャに参加している可能性があります。
これらについては、次のセクションで詳しく説明します。
入門
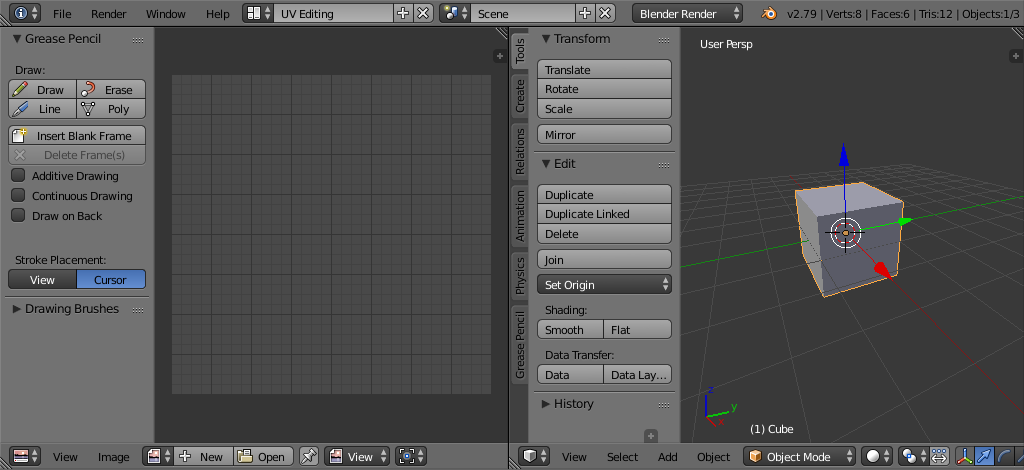
UV Editing screen layout.
デフォルトでは、メッシュはUVで作成されません。最初に面をマッピングする必要があり、次に それらを編集 できます。モデルを展開するプロセスは、3D Viewport(3Dビューポート)のEdit Mode(編集モード)で行われます。このプロセスにより、 UV Editor(UVエディター) で1つまたは複数のUV Islands(UVアイランド)が作成されます。
まず、 画面上部の Preferences(プリファレンス) ヘッダーの選択リストから UV Editing ワークスペース を選択します。これにより、1つのエリアがUV Editor(UVエディター)を表示し、もう1つの領域がD Viewport(3Dビューポート)を表示します。
すべての展開はEdit Mode(編集モード)で行われるため、 Edit Mode(編集モード) に入ります。頂点、面、または辺の選択モードにすることができます。
ワークフロー
The process for unwrapping is straightforward, but there are a lot of options available, each of which dramatically affect the outcome of the unwrap. By understanding the meaning behind the options, you will become more efficient at unwrapping.
The process is: