Nhóm Nút (Node Groups)

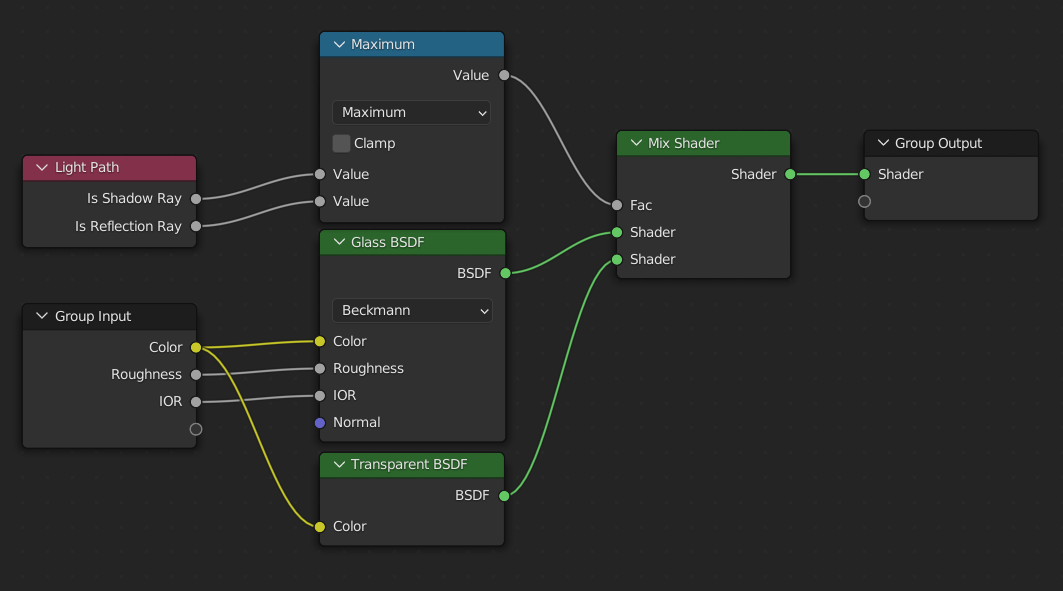
Ví dụ về nhóm nút.
Grouping nodes can simplify a node tree by allowing instancing and hiding parts of the tree.
Conceptually, grouping nodes allows you to specify a set of nodes that you can treat as though it were "just one node". Node groups are similar to functions in programming, they can be reused in many places in a node tree and can be customized by changing the "parameters" of the node group.
As an example: If you have created a material that you would like to use with different inputs e.g. diffuse color: red plastic, green plastic. You could create different materials with Make Single User for each different color with a copy of the tree part describing the plastic material. If you like to edit the material you would need to redo the edit on all materials. A better method of reuse is to create node groups, exposing only the variable inputs (e.g. diffuse color).
Also nested node groups are supported. I.e. a node group can be inserted or created inside another node group.
Ghi chú
Đối với toàn bộ hệ thống nút hiện tại, các nhóm nút đệ quy sẽ không được phép hoạt động, hòng ngăn chặn sự đệ quy vô hạn. Một nhóm nút (hoặc là một nhóm khác bao bọc nó) không bao giờ có thể chứa chính bản thân mình được).
Giao Diện (Interface)
Khi một nhóm nút được kiến tạo, các nút "Đầu vào của Nhóm" và "Đầu Ra của Nhóm" mới sẽ được sinh tạo ra để biểu thị luồng chảy của dữ liệu vào và ra khỏi nhóm. Khi được kiến tạo, các kết nối đến ổ cắm đầu vào đến từ các nút chưa chọn sẽ được gắn vào các ổ cắm mới trên nút "Đầu Vào của Nhóm". Tương tự, các kết nối ra ngoài đến các ổ cắm đầu vào của các nút chưa chọn sẽ được gắn vào nút "Đầu Ra của Nhóm" mới.
If you want to pass an additional parameter into the group, a socket must be added to the Group Input node. Therefore drag a connection from the hollow socket on the right side of the Group Input node to the desired input socket on the node requiring an input. The process is similar for the Group Output regarding data you want to be made available outside the group.
Bảng (Panel)
Tham Chiếu (Reference)
- Bảng (Panel)
,

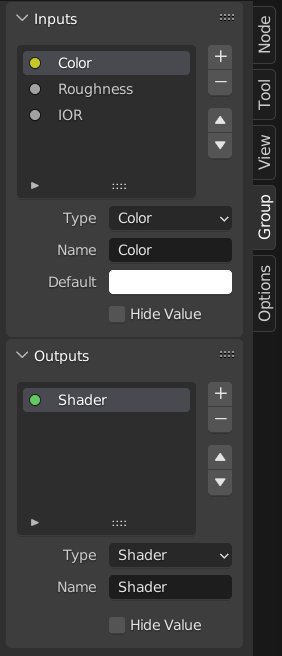
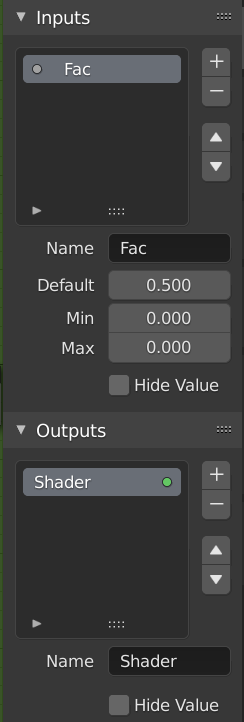
Bảng giao diện để biên soạn nhóm.
Sockets can be added, re-ordered, or removed, descriptive names can be added and the details of the input data value defined here.
If you have multiple inputs or outputs, they can be re-ordered by selecting the socket in the list. And then moving them up or down with the arrow buttons on the right side of the panel. The plus button will add an unconnected socket of the same type as the selected socket or a value socket if there is no selection. The minus button will remove the selected socket. The triangle at the bottom of the list has filtering functions to help finding nodes if the group has a large number of sockets.
- Tên (Name)
Tên của ổ cắm để hiển thị trong giao diện của nút.
- Chú Giải Công Cụ (Tooltip)
Thông điệp hiển thị khi di chuột qua các tính chất ổ cắm. Hiện tại chỉ được hỗ trợ cho:doc:Trình Biên Soạn Nút Hình Học (Geometry Node Editor) </editors/geometry_node>.
- Mặc Định (Default)
The value to use when nothing is connected to the node socket. Note, this will not affect the current node but will affect instances of the node.
- Mức/Độ Tối Thiểu, tối đa (Min, Max)
The minimum and maximum value for the UI button shown in the node interface. Note, this is not a minimum or maximum for the data that can pass through the node. If a socket passes a higher value than the maximum it will still pass into the node unchanged.
- Ẩn Giấu Giá Trị (Hide Value)
Ẩn giá trị ổ cắm ngay cả khi ổ cắm không được kết nối.
Biên Soạn Nhóm (Edit Group)
Tham Chiếu (Reference)
- Trình Đơn (Menu)
- Tiêu Đề (Header)
- Tổ Hợp Phím Tắt (Shortcut)
Tab, Ctrl-Tab
With a node group selected, Tab expands the node to a frame, and the individual nodes within it are shown. You can move them around, play with their individual controls, re-thread them internally, etc. just like you can if they were a normal part of the editor view. You will not be able, though, to thread them to a node outside the group; you have to use the external sockets on the side of the node group. While Tab can be used to both enter and exit a group, Ctrl-Tab only exits.

Ví dụ về một nhóm nút mở rộng.
Tạo Nhóm (Make Group)
Tham Chiếu (Reference)
- Trình Đơn (Menu)
- Tổ Hợp Phím Tắt (Shortcut)
Ctrl-G
To create a node group, select the nodes you want to include, then press Ctrl-G, . A node group will have a green title bar. All selected nodes will now be contained within the node group. Default naming for the node group is "NodeGroup", "NodeGroup.001" etc. There is a name field in the node group you can click into to change the name of the group. Change the name of the node group to something meaningful.
Khi bổ sung các nhóm nút từ một tập tin blend này sang tập tin blend khác thì Blender không phân biệt giữa các nhóm nút nguyên vật liệu hoặc nhóm nút tổng hợp đâu. Vì vậy, bạn nên sử dụng một số quy ước đặt tên, cho phép bạn phân biệt giữa hai loại nhé.
Mẹo
What not to include in node groups:
Remember that the essential idea is that a group should be a reusable, self-contained software component. Material node groups should not include:
- Input nodes
If you include a source node in your group, you will end up having the source node appearing twice: once inside the group, and once outside the group in the new material node tree.
- Output node
If you include an output node in the group, there will not be an output socket available from the group!
Rã Nhóm (Ungroup)
Tham Chiếu (Reference)
- Trình Đơn (Menu)
- Tổ Hợp Phím Tắt (Shortcut)
Ctrl-Alt-G
Xóa nhóm và đặt các cá nhân nút vào không gian làm việc của trình biên soạn của bạn. Việc mất mát các kết nối nội bộ sẽ không xảy ra đâu và bây giờ bạn có thể liên kết các nút nội bộ với các nút khác trong không gian làm việc của mình.
- Tách Rời (Separate) P
Phân rã các nút đã chọn ra khỏi nhóm nút.
- Sao Chép (Copy)
Sao chép sang cây nút phụ huynh, giữ nguyên nhóm.
- Di Chuyển (Move)
Di chuyển đến cây nút phụ huynh, xóa khỏi nhóm.
Chèn Thêm vào Nhóm (Group Insert)
Tham Chiếu (Reference)
- Trình Đơn (Menu)
Chọn một tập hợp các nút, kết thúc bằng nút nhóm đích, và nhấn sẽ di chuyển các nút vào nhóm đó. Các nút đã di chuyển được thu thập thành một nhóm của riêng chúng để bảo toàn bối cảnh kết nối của chúng, đồng thời chúng có các nút đầu vào và đầu ra của nhóm riêng của mình. Các nút đầu vào và đầu ra hiện có của nhóm được cập nhật với các ổ cắm mới, nếu có, từ các nút mới. Nhóm nút phải được chỉnh sửa để chứa một nút "Đầu Vào của Nhóm" và một nút "Đầu Ra của Nhóm" duy nhất.
Appending Node Groups
Tham Chiếu (Reference)
- Trình Biên Soạn (Editor)
Thanh Tiêu Đề (Topbar)
- Trình Đơn (Menu)
Once you have appended a Node Tree to your blend-file, you can make use of it in a node editor by pressing Shift-A, , then selecting the appended group. The "control panel" of the Group include the individual controls for the grouped nodes. You can change them by working with the Group node like any other node.