Вступ
Modifiers are automatic operations that affect an object’s geometry in a non-destructive way. With modifiers, you can perform many effects automatically that would otherwise be too tedious to do manually (such as subdivision surfaces) and without affecting the base geometry of your object.
Вони працюють, змінюючи те, як об’єкт показується та рендериться, а не саму геометрію, яку ви можете редагувати безпосередньо. Ви можете додавати кілька модифікаторів на один об’єкт для формування стеку, стосу модифікаторів – The Modifier Stack та застосовувати – Apply модифікатор, якщо ви бажаєте, щоб зміни, внесені ним, стали постійними.
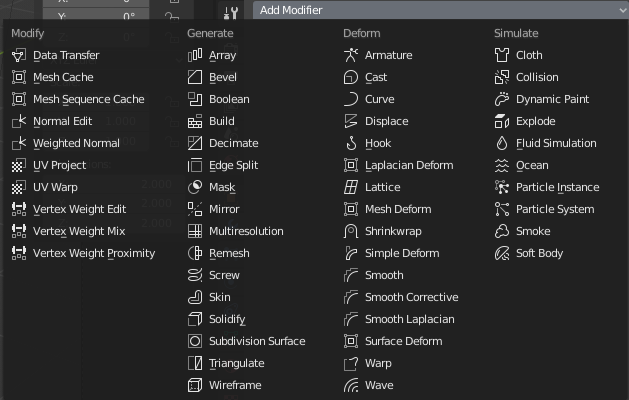
Modifiers menu.
They can be added to the active object using the Add Modifier drop-down menu at the top of their properties tab. New modifiers are always added at the bottom of the stack (i.e. will be applied last).
Існує чотири типи модифікаторів:
- Модифікування – Modify
- These are tools similar to the Deform ones (see below), however, they usually do not directly affect the geometry of the object, but some other data, such as vertex groups.
- Генерування – Generate
- These are constructive/destructive tools that will affect the whole topology of the mesh. They can change the general appearance of the object, or add new geometry to it…
- Деформування – Deform
- Unlike Generate ones above, these only change the shape of an object, without altering its topology.
- Імітування – Simulate
- Those represent physics simulations. In most cases, they are automatically added to the modifiers stack whenever a Particle System or Physics simulation is enabled. Their only role is to define the position in the modifier stack from which is taken the base data for the simulation they represent. As such, they typically have no attributes, and are controlled by settings exposed in separate sections of the Properties editor.
Інтерфейс
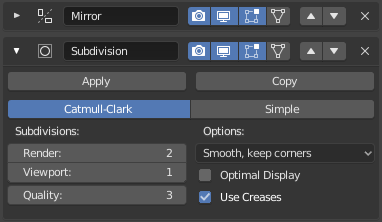
Panel layout (Subdivision Surface as an example).
Each modifier’s interface shares the same basic components, see Fig. Panel layout (Subdivision Surface as an example)..
At the top is the panel header. The icons each represent different settings for the modifier (left to right):
- Розгортання – Expand (іконка зі стрілкою вниз/управо)
- Згортання модифікатора дає показ тільки заголовку без опцій модифікатора.
- Тип – Type
- Іконка, як швидке візуальне орієнтування на тип модифікатора.
- Ім’я – Name
- Кожен модифікатор має унікальне ім’я на кожен об’єкт. Два модифікатори на одному об’єкті повинні мати унікальні імена, але два модифікатори на різних об’єктах можуть мати однакове ім’я. Стандартне ім’я базується на назві типу модифікатора.
- Рендер, зображ – Render (іконка з камерою)
- Toggle visibility of the modifier’s effect in the render.
- Show in viewport (screen icon)
- Toggle visibility of the modifier’s effect in the 3D View.
- Show in Edit Mode (vertices-square icon)
- Display the modified geometry in Edit mode, as well as the original geometry which you can edit.
- Show on cage (vertices-triangle icon) – Meshes only
Depends on the previous setting, if enabled, the modified geometry can also be edited directly, instead of the original one.
Попередження
While it shows edited items in their final, modified positions, you are still actually editing original data. This can lead to weird and unpredictable effects with some tools, and should be disabled whenever you need to perform complex or precise editing on the mesh.
- Apply On Spline Points (point-surface icon) – Curves, Surfaces and Texts only
Apply the whole modifier stack up to and including that one on the curve or surface control points, instead of their tessellated geometry.
Примітка
By default, curves, texts and surfaces are always converted to mesh-like geometry before that the modifier stack is evaluated on them.
- Пересув – Move (кнопки з іконками стрілок уверх та вниз)
- Move the modifier up/down in the stack.
- Delete (
Xicon) - Delete the modifier.
Примітка
The Square, Triangle and Surface icons may not be available, depending on the type of object and modifier.
Below the header are three buttons:
- Застосування – Apply
- Makes the modifier «real»: converts the object’s geometry to match the applied modifier’s results, and deletes the modifier.
- Apply as Shape Key
Stores the result of that modifier in a new relative shape key. This is only available with modifiers that do not affect the topology (typically, Deform modifiers only).
Примітка
Even though it should work with any geometry type that supports shape keys, currently it will only work with meshes.
- Копіювання – Copy
- Creates a duplicate of the modifier just below current one in the stack.
Попередження
Applying a modifier that is not first in the stack will ignore the stack order (it will be applied as if it was the first one), and may produce undesired results.
Нижче цих заголовка і кнопок усі показувані опції будуть унікальними для кожного модифікатора.
Стек модифікаторів – Modifier Stack
Modifiers are a series of non-destructive operations which can be applied on top of an object’s geometry. They can be applied in just about any order the user chooses.
Цей вид функціональності часто називається як «стек модифікаторів» – «modifier stack», і його часто можна знайти в кількох інших 3D застосунках.
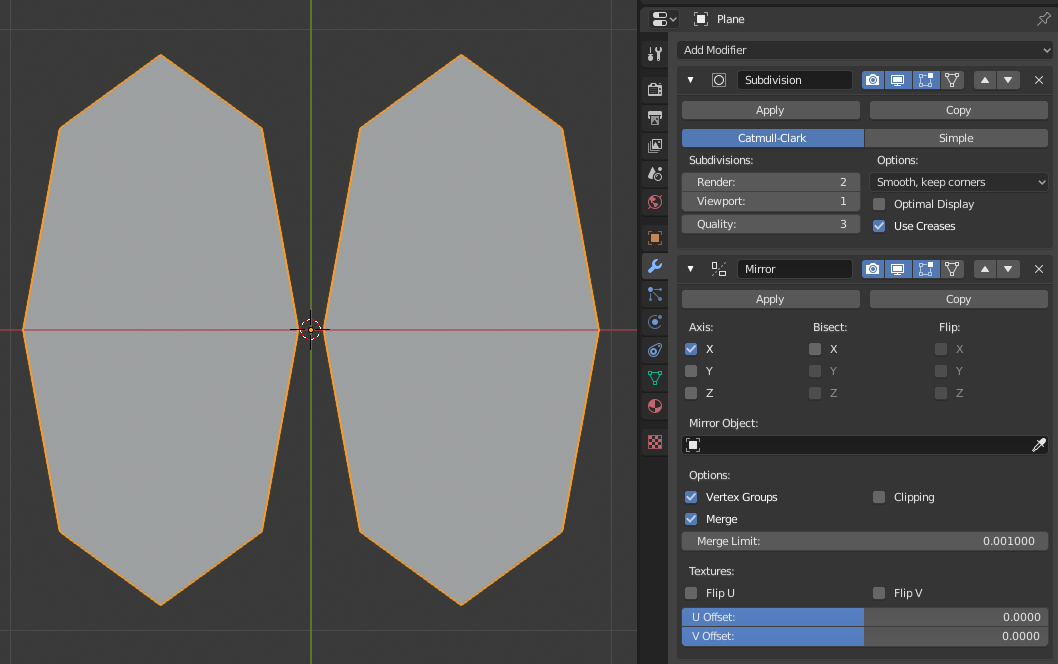
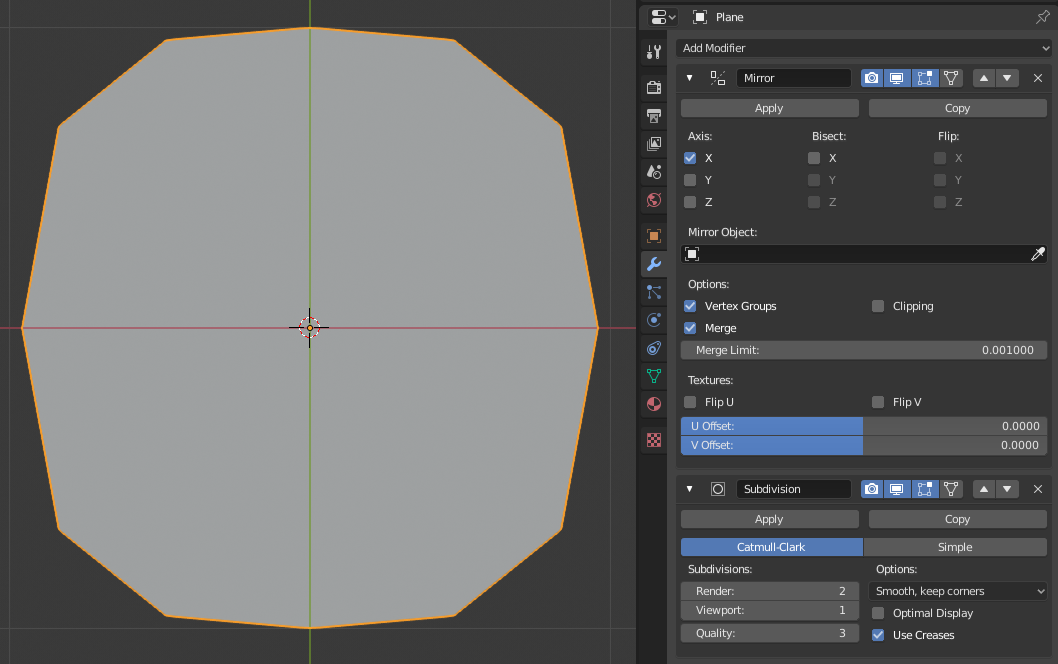
In a modifier stack the order in which modifiers are applied has an effect on the result. Fortunately modifiers can be rearranged easily by clicking the convenient up and down arrow icons. For example, the image below shows Subdivision Surface and Mirror modifiers that have switched places.
Модифікатори розраховуються зверху вниз у стеку. У цьому прикладі бажаний результат (справа) досягається шляхом, спершу, дзеркалення об’єкта, а потім, розрахування підподілення поверхні.
Приклад
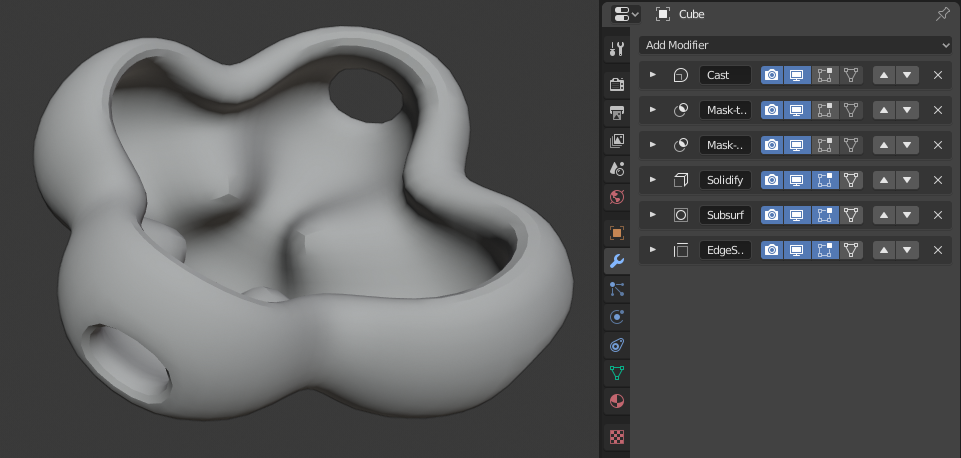
У цьому прикладі простий підподілений куб було трансформовано у досить складних об’єкт, використовуючи стек модифікаторів.
