Introduction
In Pose Mode, bones behave like objects. So the transform actions (move, rotate, scale, etc.) are very similar to the same ones in Object Mode (all available ones are regrouped in the submenu). However, there are some important specifics:
Bones’ relationships are crucial (see Bone Parenting).
The «transform center» of a given bone (i.e. its default pivot point, when it is the only selected one) is its root. Note by the way that some pivot point options seem to not work properly. In fact, except for the 3D Cursor one, all others appear to always use the median point of the selection (and not e.g. the active bone’s root when Active Object is selected, etc.).
Basic Posing
As previously noted, bones’ transformations are performed based on the Rest Position of the armature, which is its state as defined in Edit Mode. This means that in rest position, in Pose Mode, each bone has a scale of 1.0, and null rotation and position (as you can see it in the Transform panel, in the 3D Viewport’s Sidebar).

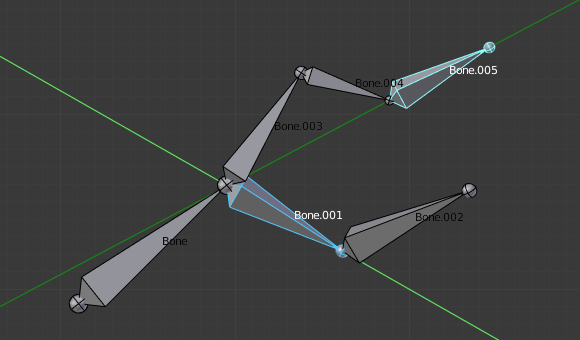
An example of a rotation locked to the local Y axis, with two bones selected.
Note that the two green lines materializing the axes are centered on the armature’s center, and not each bone’s root…
Moreover, the local space for these actions is the bone’s own one (visible when you enable the Axes option of the Armature panel). This is especially important when using axis locking, for example, there is no specific «bone roll» tool in Pose Mode, as you can rotate around the bone’s main axis just by locking on the local Y axis R Y Y… This also works with several bones selected; each one is locked to its own local axis!
When you pose your armature, you are supposed to have one or more objects skinned on it! And obviously, when you transform a bone in Pose Mode, its related objects or object’s shape is moved/deformed accordingly, in real-time. Unfortunately, if you have a complex rig set-up and/or a heavy skin object, this might produce lag during interactive editing. If you experience such troubles, try enabling the Delay Deform button in the Armature panel the skin objects will only be updated once you confirm the transform operation.