Relax
Reference
- Mode:
Edit Mode
- Tool:
The Relax tool can be used to distribute UVs more evenly. It works by pulling vertices along UV edges to bring the UV unwrap into balance.
The Relax tool can be compared with the Minimize Stretch tool which works directly on faces to reduce texture stretching and shearing. You may find that sometimes minimize stretch works better, sometimes the unwrap tool and other times the Relax tool.
First using Unwrap, then Minimize Stretch and touching up with the Relax tool often gives the best results. Remember, you can use «Undo» at any time to return to an earlier state.
Tool Settings
- Size
This option controls the radius of the brush, measured in pixels. F allows you to change the brush size interactively by dragging the mouse and then LMB. Typing a number then enter while using F allows you to enter the size numerically.
- Strength
Controls how much each application of the brush affects the UVs. You can change the strength interactively by pressing Shift-F in the 3D Viewport and then moving the brush and then LMB. You can enter the size numerically also while in Shift-F sizing.
- Falloff
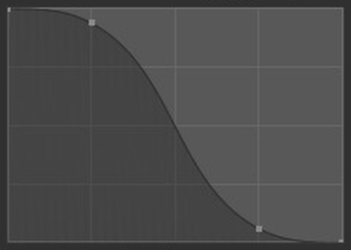
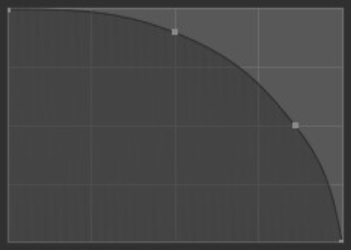
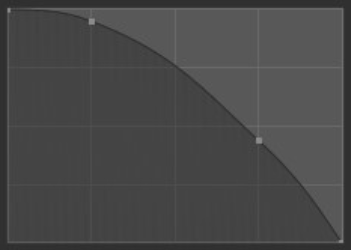
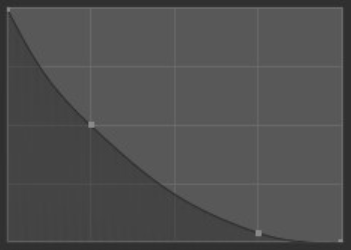
The Falloff allows you to control the Strength falloff of the brush. The falloff is mapped from the center of the brush (left part of the curve) towards its borders (right part of the curve). Changing the shape of the curve will make the brush softer or harder. Read more about using the Curve Widget.
- Curve Preset
- Custom:
You can choose how the strength of the falloff is determined from the center of the brush to the borders by manually manipulating the control points within the curve widget. There are also a couple of preset custom curves displayed at the bottom of the curve widget that can be used on their own or as a starting point for tweaking.
- Smooth:
The center strength, the border strength, and the falloff transition between them are evenly distributed.
- Smoother:
Similar to Smooth but produces a wider center point of the brush before tapering off.
- Sphere:
The strength of the brush is predominately at its strongest point with a steep falloff near the border of the brush.
- Root:
Similar to a Sphere but the center is a more concentrated point.
- Sharp:
The center of the brush is the strongest point then exponentially tapers off to a lower strength, creating a fine point.
- Linear:
With the center being the strongest, the strength will consistently weaken as it reaches the border of the brush.
- Sharper:
Similar to Sharp but the center point is more condensed.
- Inverse Square:
A hybrid between Smooth and Sphere.
- Constant:
The strength of the brush remains unified across the entire brush. This will create a sharp edge at the border of the brush.
- Options
- Lock Borders
Locks the boundary of UV islands from being affected by the brush. This is useful to preserve the shape of UV islands.
- Sculpt All Islands
To edit all islands and not only the island nearest to the brush center when the sculpt stroke was started.
- Method
How to determine the edge weighting:
- Laplacian:
The classic discrete laplace operator applied to the UV graph. Each edge has equal weighting, resulting in triangles which resemble a honeycomb shape, or quads aligned into square grid.
- HC:
Similar to Laplacian, the HC method uses equal weighting while trying to preserve a gradient between dense regions of the mesh and regions with fewer edges.
Note, this method uses the «Humphrey’s Classes» operator as described in the paper: «Improved Laplacian Smoothing of Noisy Surface Meshes».
- Geometry:
Edges are weighted according to the discrete Laplace operator (cotangent formula) applied to the 3D geometry. This tries to bring the relative lengths of edges in UV closer to the relative lengths of edges in 3D, resulting in a UV unwrap with less distortion across edge boundaries.
