Properties#
Active F-Curve#
Reference
- Panel:
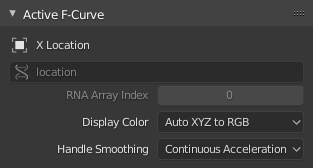
Active F-Curve panel.#
This panel displays properties for the active F-Curve.
- Channel Name
The name of the property that’s animated by the curve.
- Data Path
The programmatic path to the property.
- RNA Array Index
The index into the property, for multi-value properties. As an example, the Location property has three values (X, Y and Z), which means it can have three different curves with indices 0, 1 and 2.
- Display Color
How to determine the color of the F-Curve in the Graph editor.
- Auto Rainbow
Assigns a unique color to each curve that uses this setting.
- Auto XYZ to RGB
Detects curves that animate an X/Y/Z coordinate and colors them red/green/blue accordingly.
- User Defined
Lets you choose the color yourself.
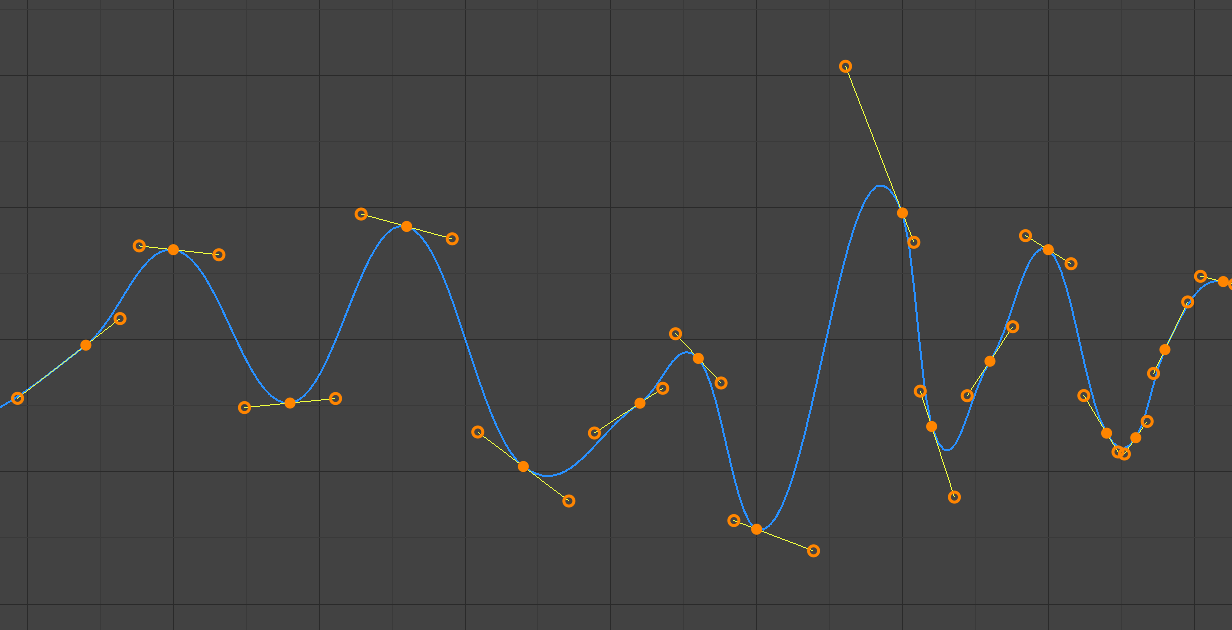
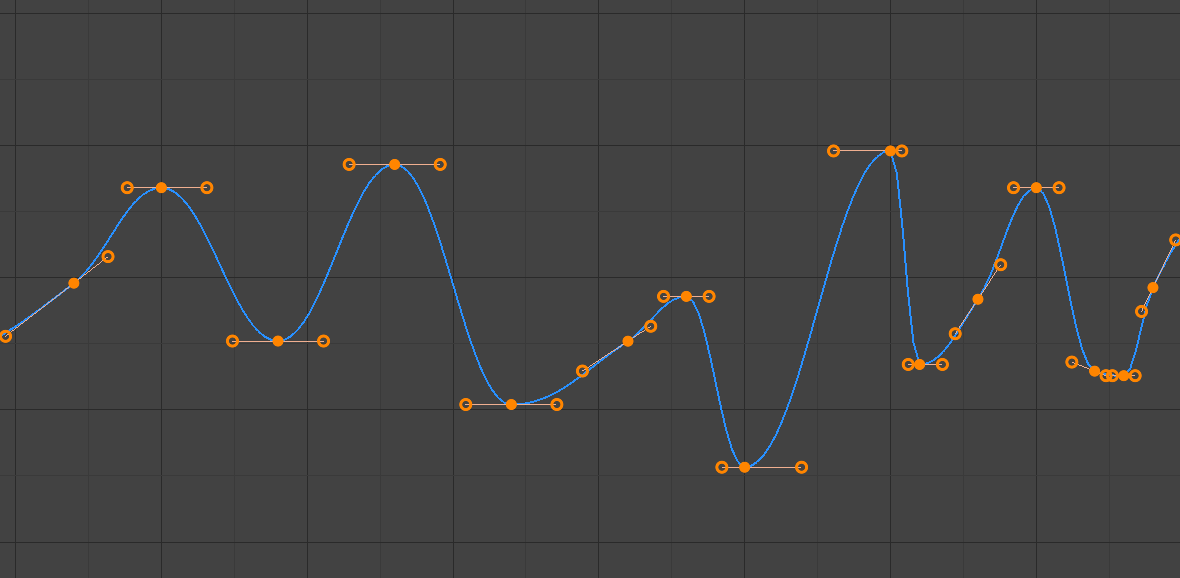
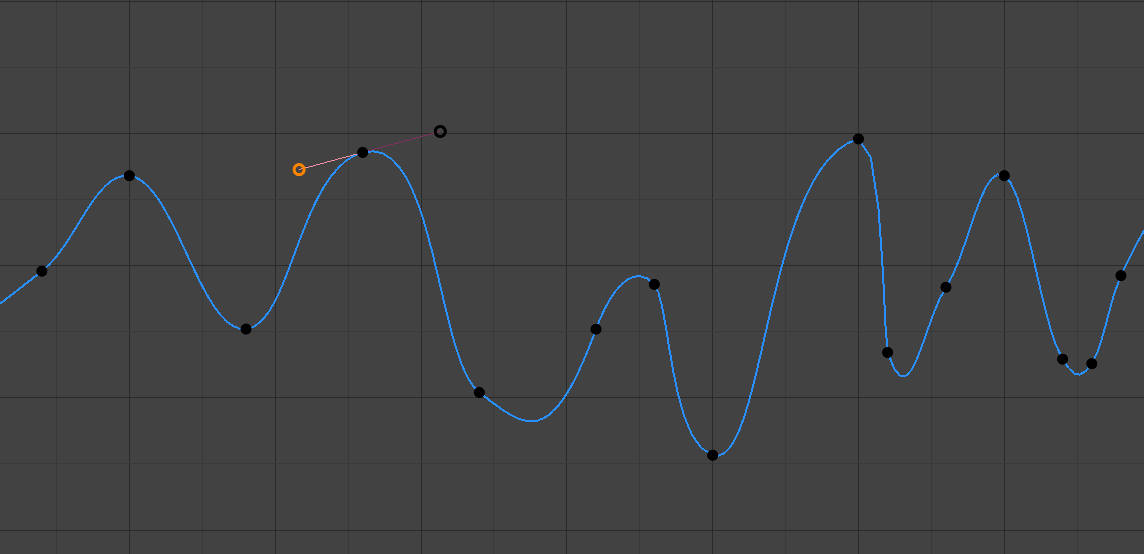
- Handle Smoothing
How to compute the Bézier handles when using the Automatic or Auto Clamped handle type.
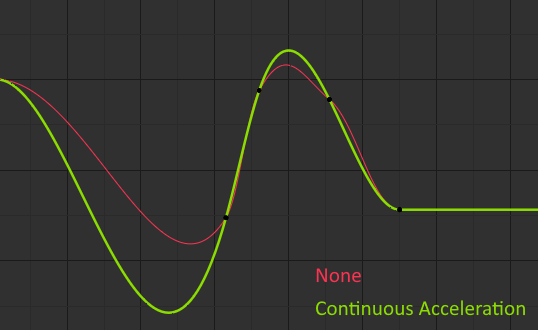
Handle smoothing mode comparison.#
- None
Only directly adjacent key values are considered when computing the handles.
This older method is very simple and predictable, but it can only produce truly smooth curves in the most trivial cases. Notice that the red curve in the image above has a few kinks in the middle.
- Continuous Acceleration
A system of equations is solved in order to avoid or minimize jumps in acceleration at every keyframe.
It produces much smoother curves out of the box, but necessarily means that any changes in the key values may affect interpolation over a significant stretch of the curve; although the amount of change decays exponentially with distance. This change propagation is stopped by any key with Free, Aligned, or Vector handles, as well as by extremes with Auto Clamped handles.
The mode also tends to overshoot and oscillate more with fully Automatic handles in some cases (see the image above). So it is recommended to use Auto Clamped by default, and only switch to Automatic handles in places where this is desired behavior. That effect can also be reduced by adding in-between keys.
Tip
Considering the upsides and downsides of each mode, Continuous Acceleration should be better suited for limited animation, which uses a small number of interpolated keys with minimal manual polish. In case of highly polished high key rate animation, the benefits of smoothing may not outweigh the workflow disruption from more extensive change propagation.
Active Keyframe#
Reference
- Panel:
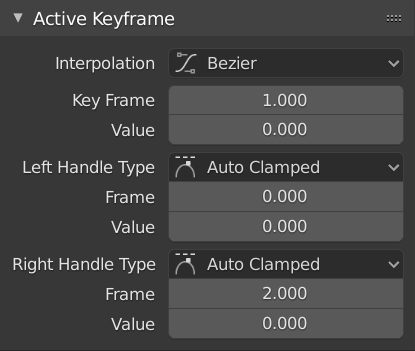
Active Keyframe panel.#
- Interpolation
The interpolation to use between the active keyframe and the next.
Interpolation
- Constant:
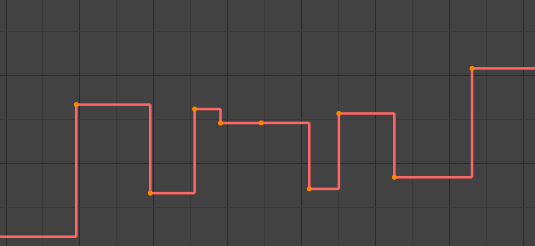
Constant.#
The curve holds the value until the next keyframe, producing a stair step effect with very abrupt changes. Normally only used during the initial “blocking” stage in pose-to-pose animation workflows.
- Linear:
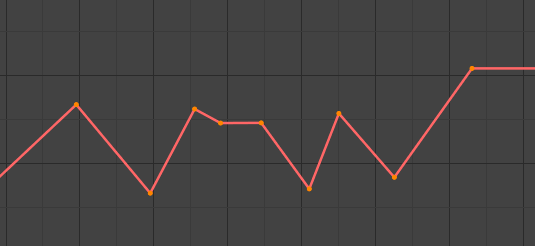
Linear.#
The curve goes from one keyframe to the next in a straight line, which prevents abrupt changes in value but not in speed. By creating two keyframes with Linear interpolation and extrapolation, you can easily make a straight line curve that goes on forever.
- Bézier:
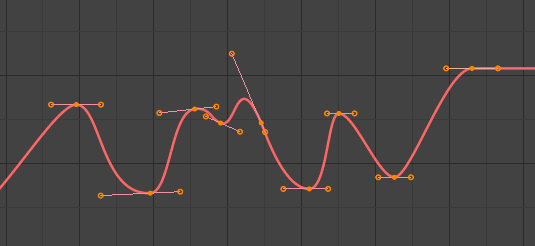
Bézier.#
The default interpolation, which is smooth in both values and speed.
Note
F-Curves for properties that only accept discrete values will always have a stair step pattern, no matter which option you chose.
Easing (by strength)
A set of interpolations that specialize in accelerating or decelerating an value, “easing” it from a stationary into a moving state or vice versa.
See also
For more info and a few live demos, see easings.net and Robert Penner’s Easing Functions.
Dynamic Effects
These additional easing types imitate (fake) physics-based effects like bouncing.
- Back
With Ease In, the value first moves away from the target and then shoots towards it. With Ease Out, it goes towards the target, overshoots it, and then returns.
- Back
The size and direction (i.e. above/below the curve) of the overshoot.
- Bounce
Makes the value bounce a few times with exponential decay, like a tennis ball that was dropped on the floor.
- Elastic
Makes the value overshoot the target, then rebound and undershoot it, then overshoot it again… with ever-decreasing intensity until it eventually settles.
- Amplitude
How far the value initially overshoots its target.
- Period
How much time there is between each oscillation.
- Easing
This option only applies to the Easing and Dynamic Effects categories above.
- Automatic Easing
Automatically pick the most commonly used type: Ease In when using one of the Easing interpolations, and Ease Out when using one of the Dynamic Effects.
- Ease In
The value accelerates, moving slowly at the beginning of the curve segment and speeding up towards the end.
- Ease Out
The value decelerates, moving quickly at the beginning of the curve segment and slowing down towards the end.
- Ease In Out
The value moves slowly in the beginning, speeds up towards the middle, and slows down again towards the end.
- Key Frame
The frame of the active keyframe.
- Value
The value of the active keyframe.
- Left/Right Handle Type
When the keyframe’s interpolation is set to Bézier, the shape of the curve around it is influenced by its handles. Each handle has its own type which determines if (and how) Blender positions it automatically, and if not, how much freedom you have in positioning it manually.
You can change the handles’ types in multiple ways: using these dropdowns in the Sidebar; through the menu ; or by pressing V and selecting from the popup menu.
If you want to change an automatic handle’s position, just drag it; you don’t need to manually change its type first.
- Automatic:
Auto handles.#
Automatic handles that produce smooth curves.
- Auto Clamped:
Auto clamped handles.#
Automatic handles clamped to prevent overshoots and changes in the curve direction between keyframes (S-shapes).
- Vector:
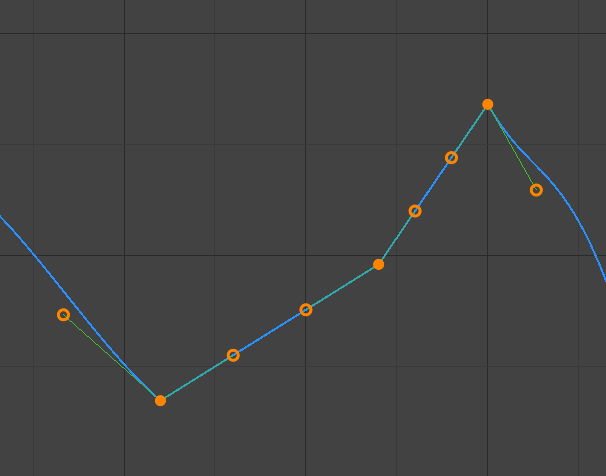
Vector handles.#
Automatic handles that produce straight curve segments (like linear interpolation).
- Aligned:
Aligned handles.#
Manual handles, which are however locked together to always point in opposite directions. This results in a curve that is always smooth at the control point.
- Free:

Free handles.#
Manual handles that can be moved independently, and thus can result in a sharp change of direction.
- Frame, Value
The frame and value for the left/right handle of the active keyframe.