Animation#
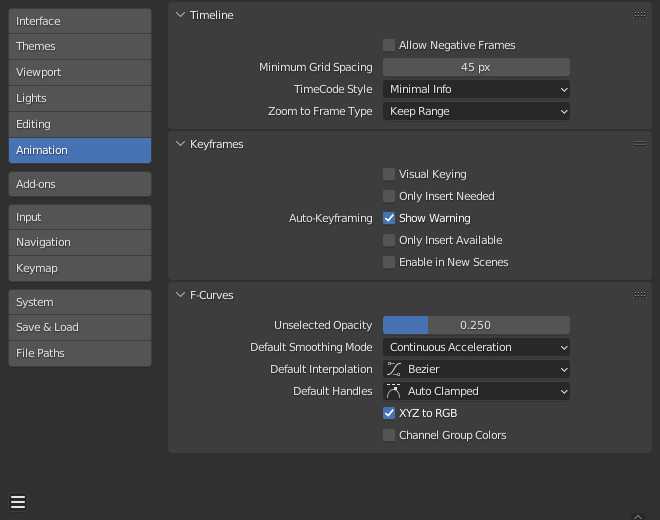
The Animation section lets you manage settings related to Animation. This includes how editors look and also some different tools properties.

Blender Preferences Animation section.#
Timeline#
These settings control things in the Timeline.
- Allow Negative Frame
Playback and animations can occur during negative frame ranges.
- Minimum Grid Spacing
The minimum number of pixels between grid lines.
- Timecode Style
Format of timecodes displayed when not displaying timing in terms of frames. The format uses ‘+’ as a separator for sub-second frame numbers, with left and right truncation of the timecode as necessary.
- Zoom to Frame Type
Defines what time range (around the cursor) will be displayed when the View Frame Numpad0 is performed.
- Keep Range:
The currently displayed time range is preserved.
- Seconds:
The number of seconds specified in the Zoom Seconds field will be shown around the cursor.
- Keyframes:
The number of animation keyframes defined in the Zoom Keyframes field will be shown around the cursor.
Keyframes#
These settings control Keyframes which are the building blocks for animations.
- Default Key Channels
Which channels to insert keys at when no keying set is active.
- Location:
Inset keyframes for an object’s Location.
- Rotation:
Inset keyframes for an object’s Rotation.
- Scale:
Inset keyframes for an object’s Scale.
- Rotation Mode:
Inset keyframes for an object’s Rotation Mode.
- Custom Properties:
Inset keyframes for Custom Properties.
- Only Insert Needed
This will only insert keyframes if the value of the property is different.
- Manual:
When keying manually, skip inserting keys that don’t affect the animation.
- Auto:
Auto-Keying will skip inserting keys that don’t affect the animation.
- Keyframing – Visual Keying
When an object is using constraints, the object property value does not actually change. Visual Keying will add keyframes to the object property, with a value based on the visual transformation from the constraint.
- Auto-Keyframing
- Enable in New Scenes
Enables Auto Keyframe by default for new scenes.
- Show Warning
Displays a warning at the top right of the 3D Viewport, when moving objects, if Auto Keyframe is on.
- Only Insert Available
This will only add keyframes to channels of F-Curves that already exist.
See also
Learn more about Auto-Keyframing.
F-Curves#
These settings control how F-Curves look and their default behavior.
- Unselected Opacity
Controls the opacity of unselected F-Curves against the background of the Graph Editor.
- Default Smoothing Mode
Controls the behavior of automatic curve handles for newly created F-Curves.
- Default Interpolation
Controls the default Interpolation for newly created keyframes.
- Default Handles
Controls the default Handle for newly created F-Curves.
- XYZ to RGB
Color for X, Y, or Z animation curves (location, scale or rotation) is the same as the color for the X, Y, and Z axis.
- Channel Group Colors
Display groups and channels with colors matching their corresponding groups.
- Only Show Selected F-Curve Keyframes
Only shows the keyframes markers on the selected curves.
- Use High Quality Display
Display F-Curves using Anti-Aliasing and other effects (disable for a better performance).