კვანძების რენგლერი (Node Wrangler)
კვანძების რენგლერი გაძლევს სხვადასხვა ხელსაწყოებს, რომლებიც კვანძებთან სწრაფად და ეფექტურად მუშაობაში გეხმარება.
მართალია, ამ დანამატის ბევრი ფუნქცია კვანძების ყველა მხარდაჭერილ რედაქტორში მუშაობს (კომპოზიტორი, იერფერები, გეომეტრიის კვანძები და ტექსტურების კვანძები), მაგრამ ზოგი ფუნქია მხოლოდ კვანძთა კონკრეტულ რედაქტორებში მუშაობს, ზოგიც სხვადასხვა რედაქტორში სხვადადასხვანაირად. მხოლოდ კონკრეტულ რედაქტორებშ მომუშავე ფუნქციები ჭდეებითაა აღნიშნული (კომპოზიტორი (Compositor), იერფერი (Shader), გეომეტრიის კვანძები (Geometry Nodes), ტექსტურის კვანძები (Texture Nodes)). ჭდეების არმქონე ფუნქციები, წესით, კვანძების ყველა რედაქტორისთვის უნდა მუშაობდეს.
დანამატის ჩართვა
გახსენი ბლენდერი და სასურველი პარამეტრების (Preferences) დანამატების განყოფილებაში გადადი.
მოძებნე "კვანძების რენგლერი" და დანამატის ჩართვის უჯრა მონიშნე.
გამოყენება
გამოიყენე კვანძების რედაქტორში მდებარე გვერდითა ზოლი, ან Shift-W-თი სწრაფი წვდომის მენიუ გამოიძახე. ასევე, შეგიძლია, დანამატთა სასურველი პარამეტრების პანელში მალსახმობების სია მოიძიო.
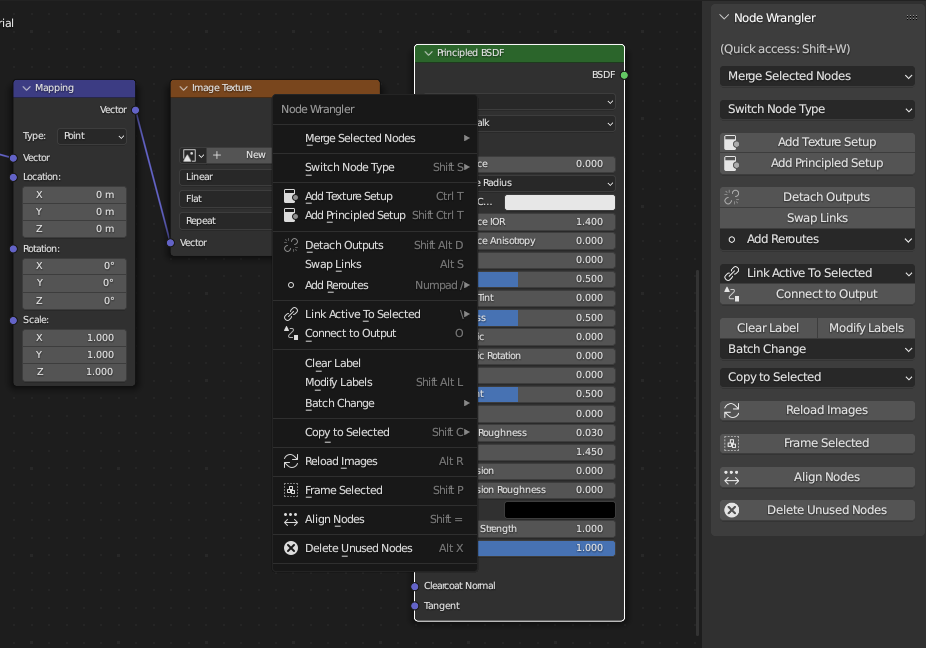
ფუნქციების უმეტესობა გვერდითა ზოლის პანელიდან, ან სწრაფი წვდომის მენიუდან ხელმისაწვდომია.
აღწერა (Description)
ზარმაცი დაკავშირება (Lazy Connect)
მითითება
- მალსახმობი:
Alt-მარჯვ.ღ.-გათრევა, Shift-Alt-მარჯვ.ღ.-გათრევა
შეაერთე ორი კვანძი ისე, რომ ბუდეებზე არც კი დააწკაპუნო. უბრალოდ, გაათრიე კურსორი ერთი კვანძიდან მეორესკენ და Alt-მარჯვ.ღ. გეკავოს. ეს განვლილი ტრაექტორიის დასაწყისსა და დასასრულთან მდებარე უახლოეს კვანძებს მონიშნავს კავშირის დასამყარებლად, ასე რომ, კვანძებზე დაწკაპუნება არც კი დაგჭირდება.

მონიშვნა შეიძლება, ზარმაცული იყოს.
იგი ცდილობს, რაც შეიძლება, ზუსტად შესაბამისი ბუდეები დააკავშიროს, მათი სახელების, ტიპებისა და იმის მიხედვით, არიან თუ არა გახსნილი.
უფრო ზუსტი კავშირისთვის შეგიძლია, Shift-Alt-მარჯვ.ღ. გამოიყენო ალტერნატივად. მას დაკავშირებამდე შესაძლო შენატანებისა და გამონატანების მენიუ გამოაქვს, ასე რომ, შეგიძლია, დასაკავშირებელი ბუდეები ზუსტად აირჩიო. ეს განსაკუთრებით მაშინაა გამოსადეგი, როცა კვანძების დიდ იერარქიაზე მუშაობ, რადგან შეგიძლია, კავშირები ხშირი დაზუმვის გარეშე დაამყარო.
ზარმაცი შერევა (Lazy Mix)
მითითება
- მალსახმობი:
Shift-Ctrl-მარჯვ. ღ.-გათრევა
შეაერთე ორი კვანძის გამონატანი კვანძის შესაფერისი ტიპის "შერევით". ეს კვანძების მონიშვნისა და ტიპის ავტომატური აღმოჩენით შერწყმიდან შერევის ფუნქციის გაშვების "ზარმაცული" გზაა.
შერწყმა (Merge)
მითითება
- მენიუ:
()
შეაერთე მონიშნული კვანძების გამონატანები კვანძის "შერევის" ტიპში (შერევა, მათემატიკა, Z-კომბინირება, ალფა ზემოდან, იერფერთა შერევა, იერფერის დამატება, გეომეტრიის შეერთება).
ნოტი
ამჟამად შერწყმას არა აქვს გეომეტრიის კვანძებიდან მთელი რიცხვის, სტრიქონისა და ბულის ტიპების მხარდაჭერა.
შერწყმა შესაძლებელია ავტომატურად და ხელით. ავტომატური საშუალებები დანამატს საშუალებას აძლევს, განსაზღვროს, რომელი "შერევის" კვანძი გამოიყენოს იმის მიხედვით, თუ რა ტიპის გამონატანები შეირწყმება. ხელით შერწყმის მეთოდები საშუალებას გაძლევს, თავად აირჩიო და იძულებით შექმნა კავშირები მაშინაც კი, როცა გამონატანთა ტიპები და "შერევის" კვანძი თავსებადი არაა.
ნოტი
ზოგადად, მალსახმობის მოდიფიკატორი ნაწილი იმ "შერევის" კვანძის ტიპს აღნიშნავს, რომლის გამოყენებაც გინდა (Ctrl ავტომატური აღმოჩენისთვის, Ctrl-Alt შერევის კვანძისთვის და Shift-Ctrl მათემატიკის კვანძისთვის), ხოლო არამოდიფიკატორი ნაწილი აღნიშნავს "შერევის" კვანძის რეჟიმს, რომელიც გინდა, დააყენო (Numpadპლიუსი გამოკლებისთვის, Numpadდახრილიხაზი გაყოფისთვის და Numpadვარსკვლავი გამრავლებისთვის).
შერწყმა ტიპის ავტომატური აღმოჩენით
ავტომატური შერწყმის ფუნქციები ადგენს, რა ტიპის "შერევის" კვანძი უნდა იქნას გამოყენებული შესარწყმელი გამონატანების ტიპებზე. თუ გამონატანი ფერია, კვანძ "შერევას" გამოიყენებს, თუ ორივე გამონატანი მნიშვნელობის ტიპისაა – მათემატიკის კვანძს. კონკრეტულ შემთხვევებში "იერფერის დამატების", "იერფერთა შერევისა" და "გეომეტრიის შეერთების" კვანძებიც გამოიყენება.
- რეჟიმები (Modes)
- დამატება (Add) Ctrl-=, Ctrl-Numpadპლიუსი
შერწყი 'შერევის", ან "მათემატიკის" კვანძებში, შემდეგ შეზავების რეჟიმი, ან მათემატიკური ოპერაცია შეკრებაზე დააყენე. თუ გამონატანები იერფერებია, ამათ ნაცვლად კვანძი "იერფერის დამატება" იქნება გამოყენებული.
- გამრავლება (Multiply) Ctrl-8, Ctrl-Numpadვარსკვლავი
შერწყი შერევის, ან მათემატიკის კვანძში, შემდეგ შეზავების რეჟიმი, ან მათემატიკური ოპერაცია გამრავლებაზე დააყენე.
- გამოკლება (Subtract) Ctrl-მინუსი, Ctrl-Numpadმინუსი
შერწყი შერევის, ან მათემატიკის კვანძი, შემდეგ შეზავების რეჟიმი, ან მათემატიკური ოპერაცია გამოკლებაზე დააყენე.
- გაყოფა (Divide) Ctrl-დახრილიხაზი, Ctrl-Numpadდახრილიხაზი
შერწყი შერევის, ან მათემატიკის კვანძში, შემდეგ შეზავების რეჟიმი, ან მათემატიკური ოპერაცია გაყოფაზე დააყენე.
- შერევა (Mix) Ctrl-0, Ctrl-Numpad0
შერწყი შერევის კვანძში, შემდეგ შეზავების რეჟიმი შერევაზე დააყენე. თუ გამონატანები იერფერებია, ამის ნაცვლად კვანძი "იერფერთა შერევა" იქნება გამოყენებული, ხოლო თუ გეომეტრიის სახისაა – კვანძი "გეომეტრიის შეერთება".
შერწყმა შერევის კვანძის გამოყენებით
მითითება
- მენიუ:
()
შერწყმისთვის შერევის კვანძები გამოიყენე, მიუხედავად მონიშნული კვანძებისა. კვანძის რეჟიმის არჩევა მენიუდან შეგიძლია. შეგიძლია, ზოგიერთი ოპერაცია სწრაფად დააყენო შესაბამისი მალსახმობების გამოყენებით.
შეკრება (Add): Ctrl-Alt-=, Ctrl-Alt-=
გამოკლება (Subtract): Ctrl-Alt-მინუსი, Ctrl-Alt-Numpadმინუსი
გამოკლება (Multiply): Ctrl-Alt-8, Ctrl-Alt-Numpadვარსკვლავი
გაყოფა (Divide): Ctrl-Alt-დახრილიხაზი, Ctrl-Alt-Numpadდახრილიხაზი
შერწყმა მათემატიკის კვანძის გამოყენებით
მითითება
- მენიუ:
()
შერწყმისთვის მათემატიკური კვანძები გამოიყენე, მიუხედავად მონიშნული კვანძებისა. კვანძის რეჟიმის არჩევა მენიუდან შეგიძლია. შეგიძლია, ზოგიერთი ოპერაცია სწრაფად დააყენო შესაბამისი მალსახმობების გამოყენებით.
შეკრება (Add): Shift-Ctrl-=, Shift-Ctrl-=
გამოკლება (Subtract): Shift-Ctrl-მინუსი, Shift-Ctrl-Numpadმინუსი
გამრავლება (Multiply): Shift-Ctrl-8, Shift-Ctrl-Numpadვარსკვლავი
გაყოფა (Divide): Shift-Ctrl-დახრილიხაზი, Shift-Ctrl-Numpadდახრილიხაზი
მეტი, ვიდრე (Greater than): Ctrl-მძიმე
ნაკლები, ვიდრე (Less than): Ctrl-წერტილი
შერწყმა Z-კომბინირების კვანძის გამოყენებით
კომპოზიტორი
მითითება
- მენიუ:
()
- მალსახმობი:
Ctrl-Numpadწერტილი
შერწყმისთვის Z-კომბინირების კვანძები გამოიყენე. თუ შესაძლებელია, გამოსახულებისა და Z-სიღრმის გამონატანები დაკავშირდება. თუ კვანძების მიმდინარე რედაქტორი კომპოზიტორი არაა, ავტომატური შერწყმა შერევის ფუნქციას გაუშვებს.
შერწყმა ალფა ზემოდან კვანძის გამოყენებით
კომპოზიტორი
მითითება
- მენიუ:
()
- მალსახმობი:
Ctrl-Alt-0
შერწყმისთვის "ალფა ზემოდან" კვანძები გამოიყენე. თუ კვანძების მიმდინარე რედაქტორი კომპოზიტორი არაა, ავტომატური შერწყმა შერევის ფუნქციას გაუშვებს.
შეზავების რეჟიმის პაკეტური ცვლილება / მათემატიკური ოპერაცია
მითითება
- მენიუ:
()
ერთდროულად შეცვალე შერევისა და მათემატიკის კვანძების შეზავების რეჟიმი, ან მათემატიკური ოპერაცია. შეგიძლია, Alt-ზევით, ან Alt-ქვევით გამოიყენო, რათა ციკლურად გადაინაცვლო წინა, ან მომდევნო შეზავების რეჟიმებზე, ან მათემატიკურ ოპერაციებზე. აგრეთვე, შეგიძლია, სწრაფად დააყენო ზოგიერთი ოპერაცია შესაბამისი მალსახმობების გამოყენებით.
შეკრება (Add): Alt-=, Alt-=
გამოკლება (Subtract): Alt-მინუსი, Alt-Numpadმინუსი
გამრავლება (Multiply): Alt-8, Alt-NumpadAsterisk
გაყოფა (Divide): Alt-დახრილიხაზი, Alt-Numpadდახრილიხაზი
მეტი, ვიდრე (Greater than): Alt-მძიმე
ნაკლები, ვიდრე (Less than): Alt-წერტილი
შერევის კოეფიციენტის შეცვლა
მითითება
- მალსახმობი:
Alt-მარცხნივ, Shift-Alt-მარცხნივ, Alt-მარჯვნივ, Shift-Alt-მარჯვნივ, Shift-Ctrl-Alt-მარცხნივ, Shift-Ctrl-Alt-0, Shift-Ctrl-Alt-მარჯვნივ, Shift-Ctrl-Alt-1
შეცვალე არჩეული შერევისა და იერფერთა შერევის კვანძების კოეფიციენტის (Factor) მნიშვნელობა მალსახმობების მეშვეობით.
გაზარდე კოეფიციენტი 0.1-ით: Alt-მარჯვნივ
შეამცირე კოეფიციენტი 0.1-ით: Alt-მარცხნივ
გაზარდე კოეფიციენტი 0.01-ით: Shift-Alt-მარჯვნივ
შეამცირე კოეფიციენტი 0.01-ით: Shift-Alt-მარცხნივ
დააყენე კოეფიციენტი 0.0-ზე: Shift-Ctrl-Alt-მარცხნივ, Shift-Ctrl-Alt-0
დააყენე კოეფიციენტი 1.0-ზე: Shift-Ctrl-Alt-მარჯვნივ, Shift-Ctrl-Alt-1
გამოუყენებელი კვანძების წაშლა (Delete Unused Nodes)
მითითება
- მენიუ:
()
- მალსახმობი:
Alt-X
გაასუფთავე შენი კვანძოვანი ხე. წაშალე ყველა კვანძი, რომელსაც საბოლოო შედეგის მიღებაში წვლილი არ მიუძღვის.
ბმულების გაცვლა (Swap Links)
მითითება
- მენიუ:
()
- მალსახმობი:
Alt-S
როცა ორი კვანძია მონიშნული, ეს ფუნქცია მათ გამომავალ კავშირებს ერთმანეთთან უცვლის ადგილებს. გაითვალისწინე, რომ, თუ ორ კვანძს სხვადასხვა რაოდენობის დაკავშირებული გამონატანი აქვს, ზოგი კავშირი შეიძლება, დაიკარგოს.
როცა ერთი კვანძია მონიშნული, თუ კვანძს ერთი დაკავშირებული გამონატანი აქვს, მისი ბმული ციკლურად გადაინაცვლებს ხელმისაწვდომ შემავალ ბუდეებში. თუ კვანძს ორი დაკავშირებული გამონატანი აქვს, მის ორ ბმულს ადგილებს უცვლის. თუ ორზე მეტი გამონატანია დაკავშირებული, ერთნაირი ტიპის ორ შენატანს ცვლის ერთმანეთში (მაგალითად, შერევის (Mix) კვანძის ორ ფერის (Color) კვანძს).

გაცვლა სხვადასხვანაირად მუშაობს და მონიშნულ კვანძებსა და მათ ბმა-კავშირებზეა დამოკიდებული.
უკანა პლანის პირველსახე (Reset Backdrop)
კომპოზიტორი
მითითება
- მენიუ:
()
- მალსახმობი:
Z
დააბრუნე უკანა პლანის პოზიცია და მასშტაბი საწყის მდგომარეობაში.
ატრიბუტის კვანძის დამატება
იერფერი
მითითება
- მენიუ:
დაამატე ატრიბუტის (Attribute) კვანძი არჩეული ატრიბუტით.
კვანძის გამონატანის გადახედვა
იერფერი გეომეტრიის კვანძები
მითითება
- მალსახმობი:
Shift-Ctrl-მარცხ.ღ. იერფერისთვის, Shift-Alt-მარცხ.ღ. for გეომეტრიის კვანძებისთვის
დააკავშირე მონიშნული კვანძის გამონატანი კვანძოვანი ხის საბოლოო შედეგთან (იერფერის შემთხვევაში გამონატან მასალასთან (Material Output), ან გამონატან სამყაროსთან (World Output), ხოლო გეომეტრიის კვანძების შემთხვევაში საბოლოო გამონატან ჯგუფთან), რათა მის შედეგს სარკმელში გადახედო. შეგიძლია, მოდიფიკატორი კლავიშების დაკავებითა და ხელახლა დაწკაპუნებით ციკლურად გადაინაცვლო ხელმისაწვდომ გამონატანებზე.
ასევე იხილეთ
მაშინ, როცა იერფერში ნებისმიერი გამონატანი შეიძლება, საბოლოო გამონატანს დაუკავშირდეს, გეომეტრიის კვანძებში საბოლოო გამონატანს მხოლოდ გეომეტრიული გამონატანი უკავშირდება. გეომეტრიის კვანძებში სხვადასხვა ტიპის გამონატანების წინასწარ გადასახედად მისი საკუთარი მაჩვენებელი კვანძი უნდა გამოიყენო.
ასევე იხილეთ
აგრეთვე, გადახედე გამონატანთან დაკავშირებას (Connect to Output). მსგავსი ფუნქციაა, მაგრამ განსხვავებული ქცევები აქვს. ისიც კვანძების ყველა რედაქტორში მუშაობს.
კვანძების შეერთება (Join Nodes)
მითითება
- მენიუ:
()
- მალსახმობი:
Shift-P
გამოსახულებების ხელახლა ჩატვირთვა (Reload Images)
კომპოზიტორი იერფერი ტექსტურული კვანძები
მითითება
- მენიუ:
()
- მალსახმობი:
Alt-R
გადატვირთე კვანძოვან ხეში გამოყენებული ყველა გამოსახულება. ეს საშუალებას გაძლევს, გამოსახულებები გამოსახულებათა რედაქტორის გარეშე გადატვირთო.
ანაწყობების კოპირება (Copy Settings)
მითითება
- მენიუ:
()
- მალსახმობი:
Shift-C
გადააკოპირე აქტიური კვანძის ყველა ანაწყობი იმავე ტიპის ყველა მონიშნულ კვანძზე.
კვანძების პირველსახის დაბრუნება (Reset Nodes)
მითითება
- მალსახმობი:
ბექსფეისი
დააბრუნე მონიშნულ კვანძთა ანაწყობები ნაგულისხმებ მდგომარეობაში და ამასთან ერთად, შეინარჩუნე კავშირები.
ჭდის კოპირება (Copy Label)
მითითება
- მენიუ:
()
- მალსახმობი:
Shift-V, Shift-C
გადააკოპირე მორგებული ჭდეები ყველა მონიშნულ კვანძზე. მათი კოპირება შეგიძლია აქტიური კვანძიდან (Shift-V), მონიშნულ კვანძებთან დაკავშირებული კვანძებიდან, ან იმ ბუდეების სახელებიდან, რომლებთანაც მონიშნული კვანძებია დაკავშირებული. Shift-C ხელმისაწვდომი ვარიანტების ქვემენიუს გამოიტანს.
ჭდის გასუფთავება (Clear Label)
მითითება
- მენიუ:
()
- მალსახმობი:
Alt-L
გაასუფთავე მონიშნულ კვანძების მორგებული ჭდეები და დააბრუნე კვანძთა ნაგულისხმები სახელები.
ჭდეების მოდიფიცირება (Modify Labels)
მითითება
- მენიუ:
()
- მალსახმობი:
Shift-Alt-L
პაკეტურად გადაარქვი სახელები მონიშნულ კვანძთა მორგებულ ჭდეებს. შეგიძლია, დასაწყისსა და დასასრულში ტექსტი დაამატო და არსებული ტექსტის ნაწილები ჩაანაცვლო.
ტექსტურის წყობის დამატება (Add Texture Setup)
იერფერი
მითითება
- მენიუ:
()
- მალსახმობი:
Ctrl-T
დაამატე ტექსტურის კვანძის, ტექსტურის კოორდინატისა (Texture Coordinate) და დატანის (Mapping) კვანძები ნებისმიერ იერფერის კვანძს. თუ ტექსტურის კვანძს მონიშნავ, მხოლოდ ტექსტურის კოორდინატისა და დატანის კვანძებს დაამატებს. ფონის იერფერის შემთხვევაში დაამატებს გარემოს ტექსტურის (Environment Texture) კვანძს.
პრინციპული ტექსტურის წყობის დამატება (Add Principled Texture Setup)
იერფერი
მითითება
- მენიუ:
()
- მალსახმობი:
Shift-Ctrl-T
დაამატე პრინციპული ტექსტურის წყობა მონიშნული ტექსტურის ფაილიდან. მონიშნე პრინციპული BSDF-ის კვანძი, სწრაფი წვდომის მენიუდან აირჩიე პრინციპული ტექსტურის წყობის დამატება (Add Principled Texture Setup) (ან დააჭირე Shift-Ctrl-T) და აირჩიე ტექსტურული ფაილები. ტექსტურული გამოსახულების კვანძთა დამატების, გამოსახულებათა ჩატვირთვის, შესაფერისი ფერითი სივრცის (Color Space) არჩევისა და მათი გამონატანების პრინციპული BSDF-ის კვანძთან დაკავშირების პროცესი ავტომატიზირდება.
ეს მეთოდი ფაილების სახელების მიხედვით ადგენს ტექსტურების ტიპს. ამ პროცესისთვის გამოყენებული ტეგების რედაქტირება დანამატების სასურველ პარამეტრებში შეგიძლია.

ამ ტექსტურების აწყობას შეიძლება, ათეულობით დაწკაპუნება დაჭირდეს, კვანძების რენგლერის ხელსაწყოებითაც კი. პრინციპული ტექსტურის წყობის საშუალებით შეგიძლია, ეს რაოდენობა სულ რამოდენიმე დაწკაპუნებაზე ჩამოიყვანო.
გადამისამართების დამატება გამონატანებზე
მითითება
- მენიუ:
()
- მალსახმობი:
დახრილიხაზი
დაამატე მონიშნულ კვანძთა თითოეულ გამონატანს გადამამისამართებელი კვანძები.
აქტიურის მონიშნულთან დაკავშირება (Link Active to Selected)
მითითება
- მენიუ:
()
- მალსახმობი:
უკანდახრილიხაზი
სხვადასხვა კრიტერიუმების საფუძველზე დაუკავშირე აქტიური კვანძი მონიშნულ კვანძებს.
- ყველა მონიშნულთან (To All Selected)
დააკავშირე აქტიური კვანძი ყველა მონიშნულ კვანძთან (K). შეგიძლია, აიძულო, ჩაანაცვლოს არსებული კავშირები. (Shift-K)
- კვანძის სახელის/ჭდის გამოყენება (Use Node Name/Label)
დააკავშირე მხოლოდ იმ მონიშნულ კვანძებთან, რომლებსაც იგივე ჭდე აქვთ, რაც აქტიურ კვანძს ('). შეგიძლია, აიძულო, ჩაანაცვლოს არსებული კავშირები. (Shift-')
- გამონატანის სახელების გამოყენება (Use Output Names)
დააკავშირე მხოლოდ მაშინ, როცა გამონატანების სახელი ემთხვევა მონიშნულ კვანძთა სახელს, ან ჭდეს (;). შეგიძლია, აიძულო, ჩაანაცვლოს არსებული კავშირები (Shift-;). მოსახერხებელია წყაროების ერთდროუოლად ჩანაცვლების დროს. (მაგალითად, კომპოზიტორში რენდერის შრიდან (Render Layer) გამონატანების გამოსახულებასთან (მრავალშრიან EXR-თან) დაკავშირების დროს.)
კვანძების ჩამწკრივება (Align Nodes)
მითითება
- მენიუ:
()
- მალსახმობი:
Shift-=
გაამწკრივე მონიშნული კვანძები თარაზულად, ან შვეულად. ეს ეფექტი კვანძების ღერძზე მასშტაბირებას ჰგავს (S X 0 ან S Y 0), ოღონდ კვანძებს თანაბარ დაშორებაზე ათავსებს.
Select within Frame (Parent/Children)
] -- Select all direct child nodes of the selected frame.
[ -- Select the direct parent frame node of the selected nodes.
Detach Outputs
მითითება
- მენიუ:
- მალსახმობი:
Shift-Alt-D
Detach the selected node's outputs while leaving linked inputs intact.
დაკავშირება გამონატანთან (Connect to Output)
მითითება
- მენიუ:
- მალსახმობი:
O
Connect the output of the selected node to the final output of the node tree (Composite in Compositor, Material Output or World Output in Shader, the final Group Output in Geometry Nodes, Output in Texture Nodes), or, if the node is inside a group, to the Group Output.
Add Multiple Images
კომპოზიტორი იერფერი
მითითება
- მენიუ:
for Compositor, or for Shader
Select multiple images and add a node for each image. (Useful for importing multiple render passes or renders for image stacking.)
Add Image Sequence
კომპოზიტორი იერფერი
მითითება
- მენიუ:
for Compositor, or for Shader
Add an Image Sequence by only selecting one image from a sequence of image files. It will automatically detect the length of the sequence and set the node appropriately.
მითითება
- Category:
კვანძი (Node)
- აღწერა (Description):
Various tools to enhance and speed up node-based workflow.
- Location:
or see the shortcuts of individual tools.
- File:
node_wrangler.py
- Author:
Bartek Skorupa, Greg Zaal, Sebastian Koenig, Christian Brinkmann, Florian Meyer
- ლიცენზია:
GPL
- Note:
This add-on is bundled with Blender.