View Regions
Clipping Region
Reference
- Mode:
모든 모드
- Menu:
- 단축키(hotkey):
Alt-B
클리핑(clipping) 영역을 정의하여 3D 뷰포트 표시를 3D 공간의 일부로 제한할 수 있어요. 이 것을 활용하면 복잡한 모델 및 씬 작업 프로세스를 더 편하게 할 수 있답니다.
Once activated, you have to draw a rectangle with the mouse. It becomes a clipping volume of four planes:
A right-angled parallelepiped (of infinite length) if your view is orthographic.
A rectangular-based pyramid (of infinite height) if your view is in perspective.
Once clipping is used, you will only see what’s inside the volume you defined. Tools such as paint, sculpt, selection, transform snapping, etc. will also ignore geometry outside the clipping bounds.
클리핑을 삭제하려면, Alt-B 를 다시 누르세요.
Example
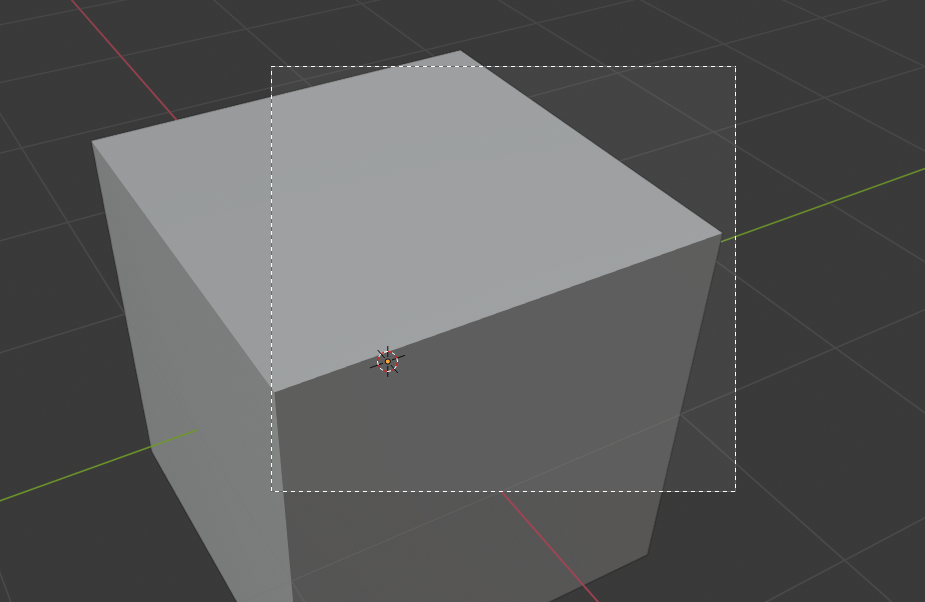

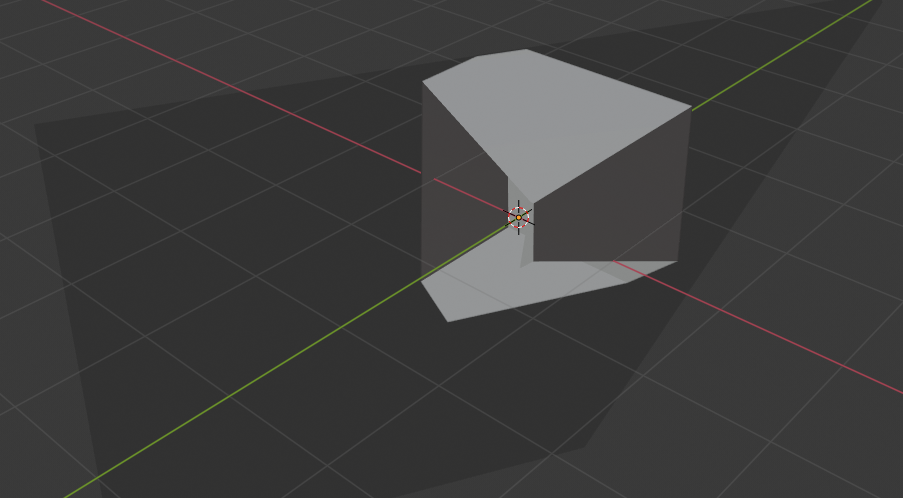
The Region/Volume clipping image shows an example of using the clipping tool with a cube. Start by activating the tool with Alt-B. This will generate a dashed cross-hair cursor. Click with the LMB and drag out a rectangular region. Now clipping is applied against that region in 3D space. Use the MMB to rotate the view and you will see that only what is inside the clipping volume is visible. All the editing tools still function as normal, but only within the clipping volume.
진한 회색 영역은 클리핑 볼륨 자체입니다. 다른 Alt-B 로 클리핑을 비활성화하면 모든 3D 공간이 다시 표시돼요.
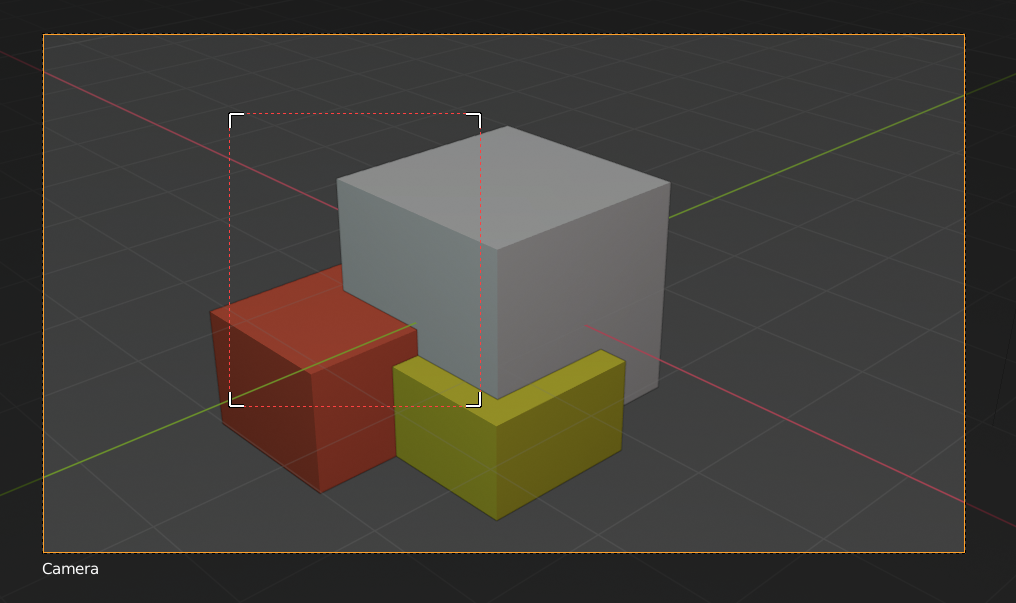
Render Region
Reference
- Mode:
모든 모드
- Menu:
- 단축키(hotkey):
Mark: Ctrl-B Clear: Ctrl-Alt-B
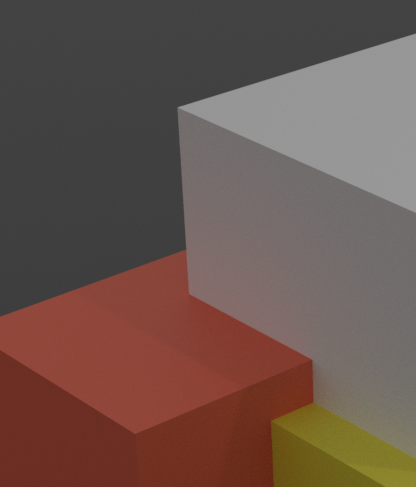
Allows you to limit rendering to a 2D rectangular area. If you’re busy tweaking just a small part of the scene, it can be quite wasteful to have the whole viewport in Rendered shading mode or make full-frame renders, so this feature lets you save time.
You can define Render Regions in two different contexts:
If you define one while in Camera View, it will apply not just to the viewport, but also to the final render. If you want to temporarily disable this region rather than clearing it entirely, you can do so in the Output tab of the Properties editor.
If you define one while not in Camera View, it will only apply to the viewport. If you want to temporarily disable this region rather than clearing it entirely, you can do so in the Sidebar.
Both Render Regions can exist at the same time.
|
|
참고
Render regions only apply to the viewport when using Cycles, not when using EEVEE. However, they always affect the final render.
더 보기