3D Cursor

The 3D Cursor.
The 3D Cursor is a point in 3D space that has both a location and a rotation. It serves as a reference for many operations in Blender.
By default, newly added objects appear at the Cursor location. The Cursor can also define the pivot for transformations, control the orientation of tools, and act as a target for snapping and placement operations.
Some modeling and transformation tools, such as Bend, use the Cursor as their center of influence.
The Cursor’s position and orientation can also be used as the Pivot Point or as a Transform Orientation.
Placement
There are several ways to position the 3D Cursor depending on the level of precision required.
Direct Placement with the Mouse
Reference
- Mode:
Object, Edit, and Pose Mode
- Tool:
Cursor
- Shortcut:
Shift-RMB
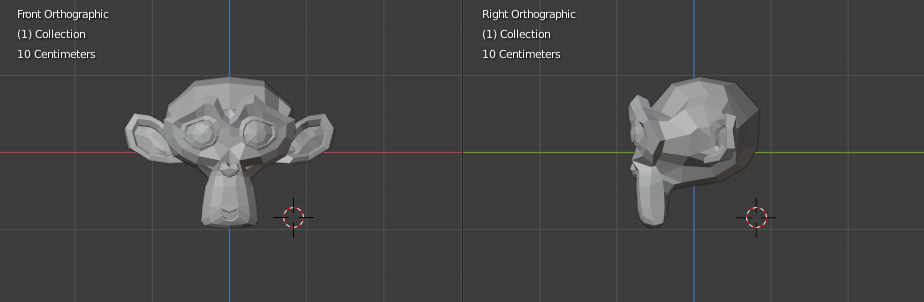
Positioning the 3D Cursor with two orthogonal views.
The Cursor tool provides the most flexible way to place the Cursor. Select the tool in the Toolbar and click a location in the scene with LMB to position the Cursor.
The tool settings allow controlling how the Cursor is oriented:
View – The Cursor aligns with the current view orientation.
Surface – The Cursor aligns with the surface normal of the geometry under the mouse pointer.
Transform Orientation – The Cursor uses the currently selected transform orientation.
Alternatively, press Shift-RMB while any tool is active to place the Cursor quickly. In this case, the Cursor always aligns with the view orientation.
For precise placement it is often helpful to use two perpendicular orthographic views, such as a combination of:
Top Numpad7
Front Numpad1
Right Numpad3
This allows controlling the Cursor position on two axes in one view while adjusting depth in the other.
By default, the Cursor is projected onto the surface under the mouse. This behavior can be disabled using the Cursor Surface Project option in the Preferences.
Sidebar
Reference
- Mode:
All Modes
- Panel:
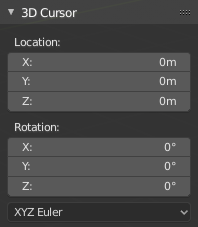
The 3D Cursor panel in the Sidebar.
The Cursor position and rotation can be edited numerically in the Sidebar. This allows precise placement by entering coordinates directly.
Both the Location and Rotation values can be adjusted, making it possible to orient tools or transformations relative to the Cursor.
Snapping
Another way to position the 3D Cursor is through snapping options.
Several operators are available for aligning the Cursor with different elements in the scene, such as:
Cursor to Selected – moves the Cursor to the selected objects.
Cursor to World Origin – moves the Cursor to the world origin.
Cursor to Grid – moves the Cursor to the nearest grid overlay point.
Cursor to Active – moves the Cursor at the origin of the active object.
These snapping operations are useful for precisely aligning the Cursor with existing geometry or scene elements.
Usage
The 3D Cursor serves as a flexible reference point within the scene. Unlike most scene elements, it stores both a position and an orientation, allowing it to act as a temporary coordinate system for many operations.
Because of this, the Cursor is frequently used as a placement guide, a transformation reference, or a target location for tools and operators.
Object Placement
By default, newly created objects are placed at the location of the 3D Cursor. This makes it useful for precisely positioning new geometry, lights, cameras, or other scene elements before they are created.
Artists commonly move the Cursor first, then add objects so they appear exactly where needed.
Transform Reference
The Cursor can also serve as a pivot or orientation reference for transformations. When the Transform Pivot Point is set to 3D Cursor, transform operations such as rotate or scale occur relative to the Cursor’s location.
Similarly, the Cursor’s rotation can be used to define Transform Orientation for transformations, allowing objects to align to custom directions.
Modeling Workflows
Many modeling operations use the Cursor as a center or reference point. For example, it can define the center of spin, mirror, or other tools that rely on a user-defined origin.
The Cursor is also commonly used together with snapping tools to precisely place geometry or align objects relative to existing scene elements.
Cursor-Based Operators
Several operators use the Cursor as a target location:
Selection to Cursor Moves selected objects to the Cursor’s position and orientation.
Center Cursor and Frame All Moves the Cursor to the world origin and frames the entire scene.
Because the Cursor is lightweight and easy to reposition, it acts as a convenient temporary reference for many tasks throughout Blender.