Asset Browser
The Asset Browser is the main interface for organizing and using assets. To access it, create a new area, click the Editor Type button in its top left corner, and choose Asset Browser.
Katso myös
- Asset Libraries
For general information on Blender’s asset library system, including how to create and edit assets, and design choices.
- Asset Catalogs
For organizing assets.
- Pose Library
Built on top of the Asset Browser.
Interface
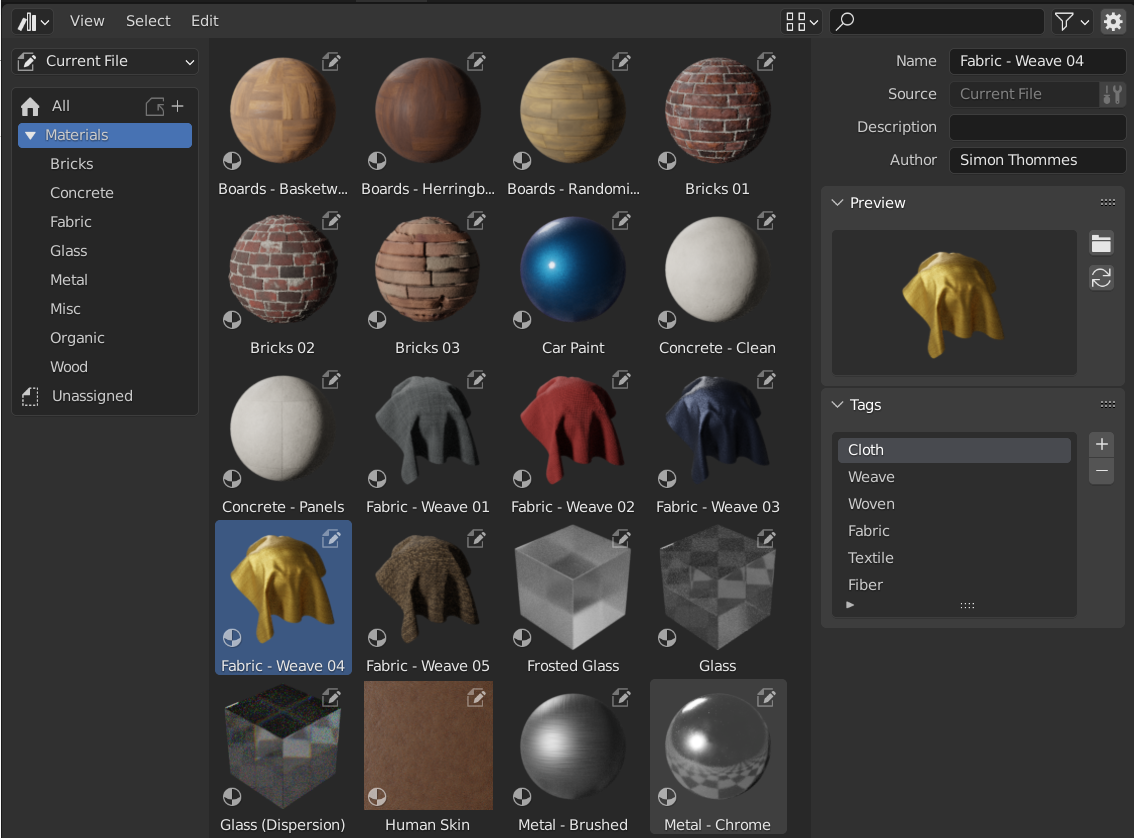
Asset Browser, showing materials in an asset library.
Header
Import Settings
- Import Method
Determines how data is managed when an asset is imported. This option can be found in the center of the Asset Browser header (when an asset library other than Current File or Essentials is selected):
- Follow Asset or Preferences:
Use the import method set in the File Path Preferences.
- Link:
The asset will be linked to the current blend-file, and thus be read-only. Later changes to the asset file will be reflected in all files that link it.
- Append:
The asset and all its dependencies will be Appended (copied) into the current file. Dragging a material into the scene three times will result in three independent copies. Dragging an object into the scene three times will also result in three independent copies.
”Dependencies” in this case means everything the asset refers to. For an object, this can be its mesh and materials, but also other objects used by modifiers, constraints, or drivers.
Since the file now has its own copy of the asset, later changes to the asset file will not be reflected in the file it’s appended from.
- Pack:
Imports the asset as linked data and immediately packs it into the current blend-file. This ensures that the asset remains available even if the original library data is modified or becomes unavailable.
Useful for maintaining self-contained files that do not rely on external asset library paths.
- Instance Collections – When Linking/Appending
Mimics the Instance Collections option when appending from the file browser
Some asset types such as collections can be created as an instanced collection. This is done by enabling the Instance option after dragging collection assets into the 3D Viewport. By enabling these options, an empty object is added that uses an instance of the collection. If this option is disabled, the full collection hierarchy will be added to the scene.
Collection Assets from the current file will always be instanced.
Display Settings
Adjusts how assets are displayed in the asset list.
- Display Mode
Control how files are displayed.
- Horizontal List:
Displays files and folders in a horizontal list.
- Thumbnails:
Shows previews.
- Preview Size Horizontal List
Change the size of thumbnails in list views.
- Column Size Horizontal List
The width of columns in horizontal list views.
- Size Thumbnails
Changes the size of the preview thumbnails.
- Sort By
- Name:
Sort the asset list alphabetically.
- Asset Catalog:
Sort the asset list so that assets in the same catalog are kept together. Within a single catalog, assets are ordered by name. The catalogs are in order of the flattened catalog hierarchy.
Filter
Controls which asset types are displayed when browsing an asset library.
- Access
Filters assets based on whether they are available locally or must be downloaded from an online asset library.
- Online and Offline:
Shows both downloaded assets and assets that are available online.
- Online Only:
Shows only assets that are available online and have not yet been downloaded.
- Offline Only:
Shows only assets that are already available locally, either from local asset libraries or previously downloaded online assets.
Main Region
The center region of the Asset Browser lists the assets contained in the selected catalog.
Click LMB to select a single asset. Additionally hold Ctrl to add/remove that asset to/from the selection, or Shift to select a range of assets. You can also drag LMB to perform a box select.
The region has a context menu with the following operations:
- Refresh Asset Library R
Refreshes the list.
- Clear Asset
See Removing Assets.
- Clear Asset (Set Fake User)
See Removing Assets.
- Open Blend File
Opens the blend-file containing the asset.
- Display Size
Changes the size of the preview thumbnails.
Asset Library Region
The region on the left lets you select an asset library and shows its catalogs. You can show/hide this region by pressing T.
- Asset Library
The asset library whose catalogs to show.
- All Libraries:
Show catalogs from all available libraries.
- Current File:
Show the catalogs in the current blend-file (even if that file is not yet part of an asset library). See The Current File Asset Library for more information.
- Essentials:
Show the catalogs that come bundled with Blender.
Any libraries that you added in the File Path Preferences are listed here too.
- Copy Bundle to Asset Library
Shown when Asset Library is set to Current File and the current blend-file is an asset bundle that’s not yet part of an asset library.
Lets you select a target asset library, then opens a File Browser in that library’s root folder so you can save the current blend-file there. Once saved, the assets in the blend-file become available as part of the library.
- Catalogs
Tree View that shows the catalogs of the selected asset library. A catalog is a group of assets; when you select one, only the assets in that catalog and its child catalogs will be listed.
You can rename a catalog by double-clicking it, or assign it to a different parent catalog by dragging and dropping.
Add-ons and features like the Pose Library can show custom panels here.
Asset Details Region
The region on the right shows the metadata of the active asset. You can show/hide this region by pressing N or clicking the gear icon in the header.
Only metadata of assets contained in the current blend-file can be edited.
- Name
The asset’s name. Unique for the asset data type within the same blend-file.
- Source
The full path of the blend-file that contains the asset.
- Open Blend File
Opens the blend-file that contains the asset in a new Blender instance. When this instance is closed, the Asset Browser will be automatically refreshed.
- License
Optional name of the license under which this asset is distributed. Not used by Blender itself.
- Copyright
Optional copyright notice. Not used by Blender itself.
- Description
Optional asset description. Not used by Blender itself.
- Author
Optional field for the asset author. Not used by Blender itself.
Preview
Shows the preview image of the asset. See Asset Previews.
- Load Custom Preview
Opens a File Browser where you can select a new image for the asset preview.
- Generate Preview
Autogenerate a new preview for the asset.
- Preview
Menu of additional preview operators.
- Render Active Object
Generates a preview based on the 3D Viewport’s Active object. This is useful for node groups, which cannot automatically generate their own preview.
- Remove Preview
Remove the preview of the asset.
- Capture Screenshot Preview
Drag-select a rectangle over an area of Blender to capture it as the preview image of the asset. See Screenshot Capture for Previews.
Import
- Preferred Method
Uses the asset’s preferred import method when Follow Asset or Preferences is selected in the Asset Browser.
This allows assets to specify the import method that best suits their intended use. For example, a base mesh for sculpting can specify that it should always be appended so it is immediately editable after import.
Using Assets
As a general rule, an asset can be used by dragging it from the Asset Browser to the desired location. Objects and worlds can be dragged from the Asset Browser into the scene. Materials can be dragged onto the object that should use them. Geometry nodes can also be dragged onto objects to add a Geometry Nodes Modifier. The use of pose assets is different, and is described in Pose Library.
When you drag a collection, it will be added as an instance – that is, a single object representing the entire collection, meaning the contents aren’t visible in the Outliner and can’t be edited. You can change this in the following ways:
Use Make Instances Real to replace the object by the collection contents.
Alternatively: delete the object, find the collection in the Outliner’s Blender File Display Mode, and click in its context menu.
There are several things that can happen when an asset is used, depending on the Import Method.
Note that all regular Blender operations are available after the asset has been added to the current file. For example, you could choose to link an object to the scene; this will also link its mesh and its materials. Then you can make the object itself local (), while keeping the mesh and materials linked to the asset files. This will result in a local, and thus editable, object, and keep the mesh and materials automatically up to date with any changes in the asset library.
Asset Previews
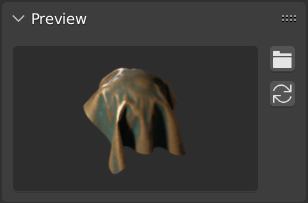
Preview panel in the Asset Browser.
Preview images are typically generated automatically when you mark a data-block as an asset. Objects are captured from their local -Y axis, while collections are captured from the global -Y axis (as these don’t have a local axis).
If the auto-generated preview image isn’t sufficient, you can replace it by a custom one.
For previews of pose assets, see Controlling the Look of Preview Images.
Screenshot Capture for Previews
In case a specific preview is needed, a fast way to create it is with a screenshot. The operator to do so is located under the Preview popover, see Capture Screenshot Preview. It is only possible to take screenshots for editable assets, so assets in the Current File and Asset System Files.
Once started, you can click and drag a rectangular area over any part of Blender to capture a preview image. During dragging it is possible to move the whole capture area or to unlock the aspect ratio. See the shortcut help in the status bar for information on which keys to press.
On a re-run of the operator, the previously captured area will be remembered. Simply clicking allows you to easily take the same screenshot again.
Muista
Selecting an area that is completely within a single 3D viewport will actually do a background render of that section. This allows the background to be transparent, but also means that UI elements can not be captured.
Asset Bundles
Asset bundles are blend-files that do not reference any other file,
and whose name ends in _bundle.blend. Any textures and other external
files need to be packed into the current blend-file.
Asset bundles can be copied to an asset library via the Asset Browser:
Open the asset bundle blend-file.
Switch its Asset Browser to Current File (if it’s not set to that already).
Click on Copy Bundle to Asset Library.
Choose the asset library to copy it to.
A File Browser will open at the root folder of the selected asset library. Choose the desired location of the blend-file, and click the Copy to Asset Library button.
The blend-file will be saved at the chosen location, and any catalogs of the asset bundle will be merged into the target asset library.
Muista
Both the word ”asset” and the word ”bundle” are commonly used, and not necessarily with the same meaning as described here. Not everything that’s presented as an ”asset bundle” will have the Copy to Asset Library functionality available; for that, the bundle file needs to adhere to the definition above.