Viewport
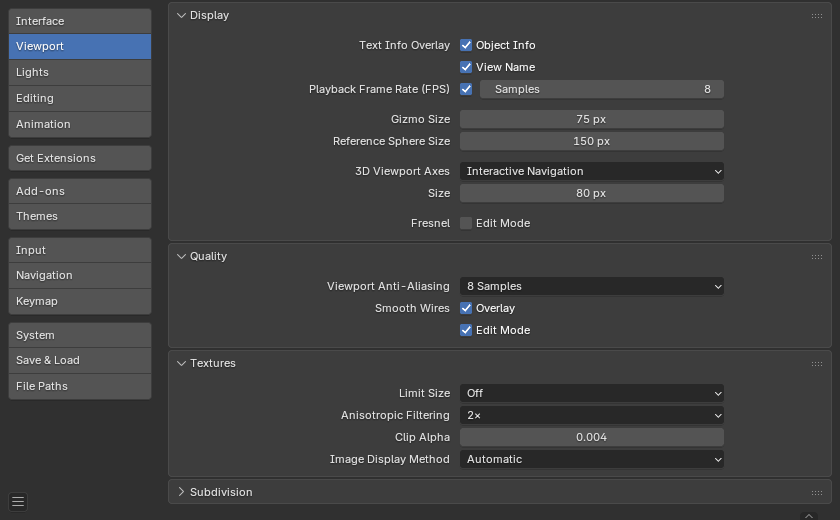
Blender Preferences Viewport section.
Display
- Text Info Overlay
- Object Info
Display the active Object name and frame number at the top left of the 3D Viewport.
- View Name
Display the name and type of the current view in the top left corner of the 3D Viewport. For example: ”User Perspective” or ”Top Orthographic”.
- Playback Frame Rate (FPS)
Show the frames per second screen refresh rate while an animation is played back. It appears in the top left of the 3D Viewport, displaying red if the frame rate set cannot be reached.
- Frame Rate Samples
Calculate the FPS displayed in the viewport based on an average of the current and previously displayed frames. A value of zero uses the number of frames in 1.0 second.
More samples represent the average FPS over a longer period of time, however sudden changes to performance result in a more gradual increase/decrease over time.
Fewer samples shows an FPS which more closely matches the actual performance, however the value may jitter - making the FPS difficult to comprehend.
- Gizmo Size
Diameter of the gizmo.
- HDRI Preview Size
Diameter of the HDRI sphere overlay.
- 3D Viewport Axes
- Interactive Navigation:
Display the axis as an interactive gizmo. Click sets the viewport to display along this axis and dragging orbits the view.
- Simple Axes:
Display simple, less intrusive axis in the viewport.
- Brightness
How vivid the colors of the simple axis are.
- Off:
Disables the viewport axis.
- Fresnel – Edit Mode
Enable a fresnel effect on edit mesh overlays. It improves shape readability of very dense meshes, but increases eye fatigue when modeling lower poly.
Quality
- Viewport Anti-Aliasing
Control the Anti-Aliasing for higher quality rendering.
- Smooth Wires
- Overlay
Display overlays with smooth wire, without this wires will be rendered aliased. To increase the visibility you can disable this for Edit Mode specificity (see below), since edges do not blend into other shaded regions.
- Edit Mode
Display smooth wire in Edit Mode, without this wires will be rendered aliased.
Textures
- Limit Size
Limit the maximum resolution for pictures used in textured display to save memory. The limit options are specified in a square of pixels (e.g: the option 256 means a texture of 256×256 pixels). This is useful for game engineers, whereas the texture limit matches paging blocks of the textures in the target graphic card memory.
- Anisotropic Filtering
Quality of anisotropic filtering used when sampling textures at oblique viewing angles.
Higher values improve the sharpness of textures viewed at a grazing angle, such as floors, roads, and other surfaces that extend into the distance. Increasing the setting may have a small impact on performance.
- Off:
Turn off anisotropic filtering.
- 2×:
Use 2 samples for anisotropic filtering.
- 4×:
Use 4 samples for anisotropic filtering.
- 8×:
Use 8 samples for anisotropic filtering.
- 16×:
Use 16 samples for anisotropic filtering.
- Clip Alpha
Clip alpha below this threshold in the 3D Viewport. Note that, the default is set to a low value to prevent issues on some GPUs.
Subdivision
- GPU Subdivision
Under certain circumstances, the GPU will be used to subdivide a mesh with a Subdivision Surface modifier. This typically results in increased subdivision performance.
Muista
When enabled, normals and tangents are interpolated instead of being recomputed after smoothing. This can result in a change in shading compared to the CPU implementation.
Muista
This feature is not supported on Qualcomm GPUs on Windows