Data-Block Menu
Lets you select a Data-Block (such as a material) in order to link it to something else (such as an object).
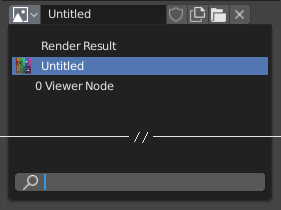
A data-block menu with a search field.
- Type
Shows an icon indicating the data-block type. Clicking the image or the down arrow opens the popup menu. Dragging the image lets you apply the data-block to something else. (For example, you can drag a material onto an object in the 3D Viewport to assign it. Dragging onto Data ID fields is also possible.)
- List
Lists the data-blocks available in the current blend-file, or provides a link to select an item from.
The menu may display preview images, a search field, and state icons to indicate whether a data-block is linked from another blend-file, is a library override, or is marked as an asset. These icons make it easier to distinguish data-blocks with the same name. Collection entries may also display their assigned color tag.
Note
Data-blocks with names that begin with
.are hidden from the list, unless a string that also starts with.is entered into the search field, or the Show Hidden Files/Data-Blocks user preference is enabled.
- Name
Displays, and allows editing of, the name of the selected data-block.
- User Count
Displays the number of users of the data (if there's more than one user). Clicking it will create a single-user copy.
As an example, if three separate objects referenced the same material, the material's user count would be 3. Changing the material would affect all three objects. If you now selected an object and clicked the user count, the object would receive its very own copy of the material, which can be modified independently of the original that's still used by the other two.
- Fake User (shield icon)
If a data-block has no real users, it'll normally be cleaned up (deleted) when saving the blend-file. To prevent this, you can give it a fake user; that way, it's guaranteed to "survive." Data-blocks with a fake user have an "F" prefix in the drop-down list.
The Outliner can show an overview of all data-blocks without real users in the blend-file. Simply change its Display Mode to Orphan Data.
- New/Add (files icon)
Creates a new data-block (or duplicates the current one) and selects it.
- Open File (folder icon)
Opens the File Browser, for importing an image for example.
- Unpack File (bin icon)
Unpack the file packed into the current blend-file to an external one.
- (Unlink Data-block)
Clears the link. Shift-LMB to set the users to zero allowing the data to be fully deleted from the blend-file.
Sometimes there is a list of applied data-blocks (such as a list of materials used on the object).
See also
Data-blocks are discussed further in the Data System chapter.
預覽
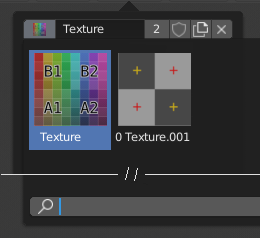
A Data-Block menu with preview.
Some data-block menus have large preview images in their drop-down instead of just icons and names.
Data ID
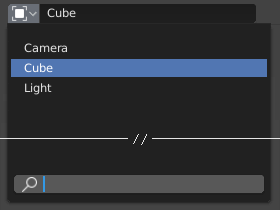
A Data ID field.
A Data ID field is similar to a Data Block Menu, but is only for selecting (and not for other features like creating new data or managing users).
It can show the following elements:
- Type
The icon on the left specifies the accepted data-block type.
- Name
The text field functions as a search field by matching elements in the list. Press Tab to auto-complete names up to the level where a match is found. If more than one match exists, you have to continue typing. If you type an invalid name, the value will remain unchanged.
- List
Lets you select the data-block directly.
Like the Data-Block Menu, entries may display state icons indicating whether a data-block is linked, a library override, or an asset.
- Eyedropper
In some Data IDs there is an Eyedropper available through the pipette icon on the right side.
- (Clear Button String)
Click the button on the right to clear the reference.
ID Sub-Data
Related types of ID sub-data may become available to select, depending on the data-block type and its intended usage.
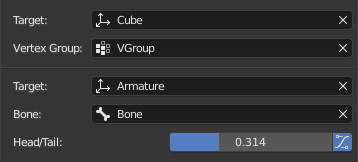
Sub-data Example.
- 頂點組
If the selected Object in the Target field is a mesh or a lattice, an additional field may be displayed to select one of its vertex groups.
- Bone
If the selected Object in the Target field is an armature, an additional field may be displayed to select one of its bones.
- Head/Tail
Once a bone is selected, a numeric field may become available for specifying a point along the bone. A value of 0.0 corresponds to the bone's head, while a value of 1.0 corresponds to its tail. Any values between these will result in linear interpolation (so a value of 0.5 matches the bone's center).
- Use B-Bone Shape
If the bone is a bendy bone, clicking on this button will make the point follow the curvature of the B-spline between head and tail, rather than simply going in a straight line.