Bevel Modifier 倒角修改器

The Bevel modifier.
The Bevel modifier bevels the edges of the mesh it is applied to, with some control of how and where the bevel is applied to the mesh.
倒角修改器與編輯模式下的 倒角 相比,具有非破壞性。

選項
- 影響
- 頂點:
Only the areas near vertices are beveled, the edges remain unchanged.
- Edges:
Bevel the edges, creating intersections at vertices.
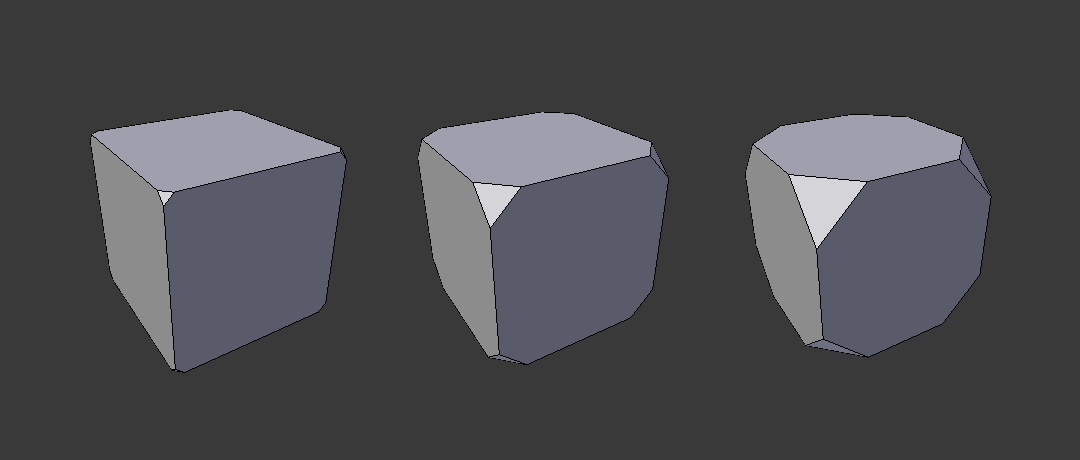
Three cubes with 0.1, 0.3 and 0.5 bevel widths, with Vertices option selected.
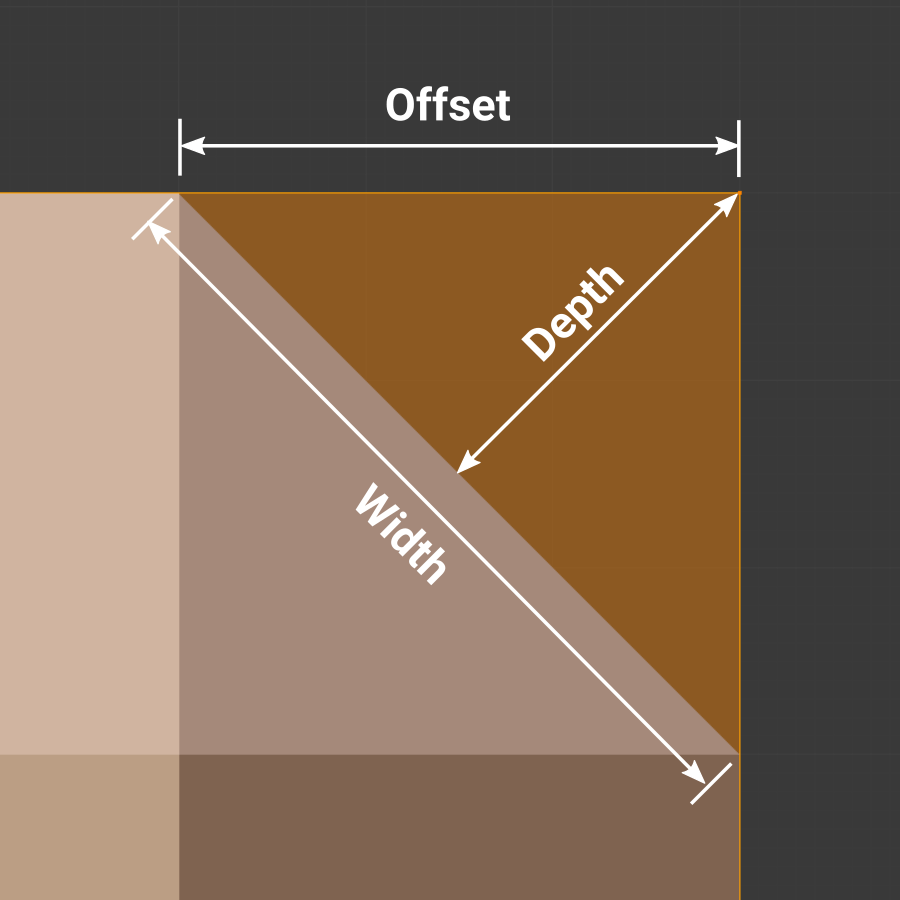
- Width Type
Defines how Width will be interpreted to determine the amount of bevel.
- 偏移:
The distance from the new edge to the original.
- 寬度:
The distance between the two new edges formed by the bevel (or the edges on either side of the bevel if there is more than one segment).
- 深度:
其值是從原始邊線到新的倒角面之間的垂直距離。
- 百分比值(Percent):
The percentage of the length of adjacent edge length that the new edges slide along.
- 絕對:
The exact distance along edges adjacent to the beveled edge. A difference from Offset is visible when the unbeveled edges attached to beveled edges meet at an angle besides a right angle.
- 寬度
The size of the bevel effect. See Width Method below.
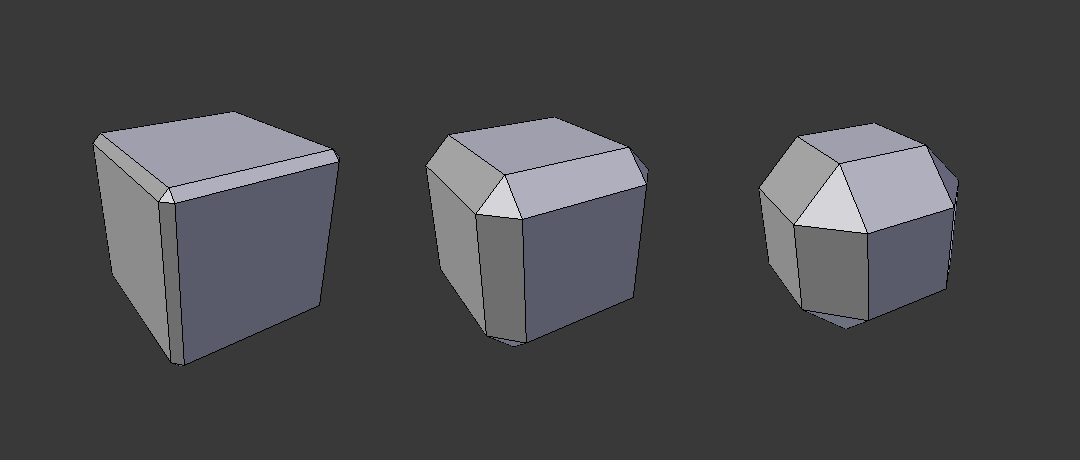
Three Cubes with 0.1, 0.3 and 0.5 bevel widths.
- 段
沿著倒角的麵所添加邊環的數量。
- 限制方法
用來控制倒角應用到網面哪裡。
- 無:
無限制,所有的邊線將會被倒角。
- 角度:
Only bevels edges whose angle of adjacent face normals plus the defined Angle is less than 180 degrees. Intended to allow you to bevel only the sharp edges of an object without affecting its smooth surfaces.
- 權重:
Use an attribute to determine the width of a bevel. When the bevel weight is 0.0, no bevel is applied.
Any attribute on the input mesh can be chosen. By default the
bevel_weight_edgeandbevel_weight_vertattributes adjusted in edit mode are used. For convenience, the modifier lists the attributes from the original mesh in the dropdown, but attributes created by previous modifiers can also be used. Attributes with non-matching domains or types will be automatically interpolated to the correct type.- 頂點組:
用一個頂點組的權重,來確定該斜面的寬度。當倒角權重取
0.0時,不會應用倒角。兩個頂點都在頂點組的稜才會倒角。請參考 這裡 關於調整頂點組的權重。- Invert
Inverts the influence of the selected vertex group, meaning that the group now represents vertices that will not be deformed by the modifier.
The setting reverses the weight values of the group.
外形
Superellipse
Creates a bevel with a uniform concave or convex curve.
- Shape
倒角的形狀,從凹到凸——如果 段 少於
2則無效果。
Custom Profile
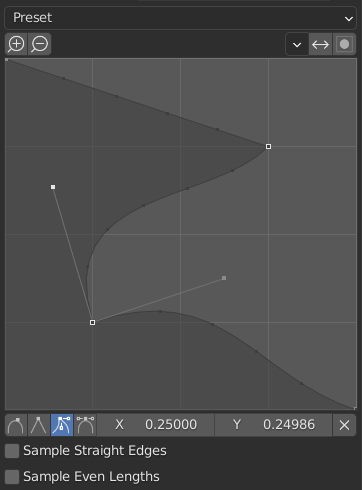
The custom profile widget.
This widget allows the creation of a user-defined profile with more complexity than with the single profile parameter. The modal tool allows toggling the custom profile, but the shape of the profile is only editable in the options panel after the operation is confirmed.
The profile starts at the bottom right of the widget and ends at the top left, as if it were between two edges meeting at a right angle. Control points are created in the widget and then the path is sampled with the number of segments from the Bevel modifier.
- Miter Shape
The shape of the miter patterns, from concave to convex. It has no effect if Segments is less than 2.
Note
The Miter Shape slider stays active when miters are enabled because it still controls the shape of the miter profiles.
- Presets
The Support Loops and Steps presets are built dynamically depending on the number of segments in the bevel. If the number of segments is changed, the preset will have to be re-applied.
- Sampling
Samples will first be added to each control point, then if there are enough samples, they will be divided evenly between the edges. The Sample Straight Edges option toggles whether the samples are added to edges with sharp control points on either side. If there aren't enough samples to give each edge the same number of samples, they will just be added to the most curved edges, so it is recommended to use at least as many segments as there are control points.
Geometry
- Miter Inner/Outer
A miter is formed when two beveled edges meet at an angle. On the side where the angle is greater than 180 degrees, if any, it is called an outer miter. If it is less than 180 degrees, then it is called an inner miter. The outer and inner miters can each be set to one of these patterns:
- Sharp:
Edges meet at a sharp point, with no extra vertices introduced on the edges.
- 補丁:
Edges meet at a sharp point but in addition, two extra vertices are introduced near the point so that the edges and faces at the vertex may be less pinched together than what occurs in the Sharp case. This pattern makes no sense for inner miters, so it behaves like Arc for them.
- Arc:
Two vertices are introduced near the meeting point, and a curved arc joins them together.
The Spread slider controls how far the new vertices are from the meeting point.
The Profile curve widget controls the shape of the arc.
- Spread
The value used to spread extra vertices apart for non-sharp miters. This option is available when Miter Inner is set to Arc.
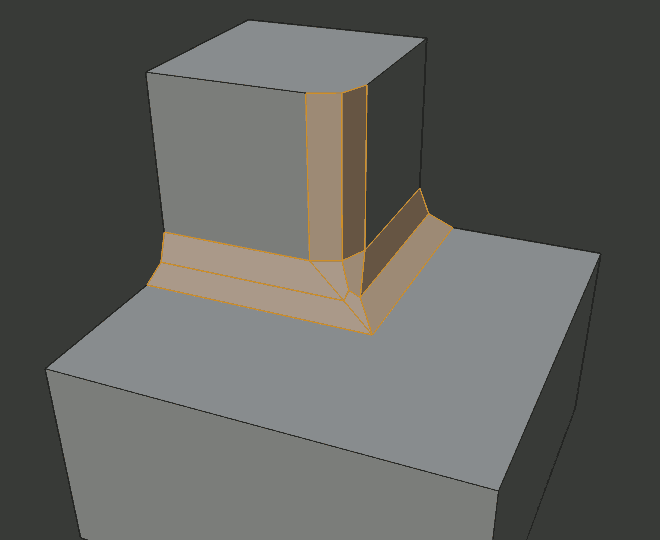
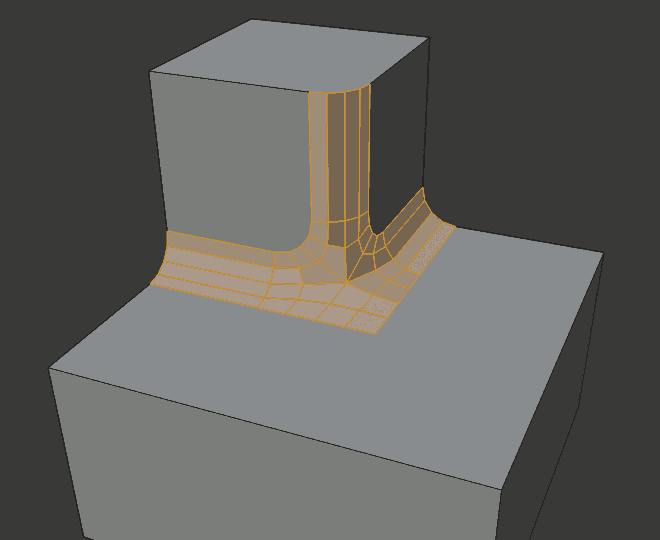
- Intersections
When more than two beveled edges meet at a vertex, a mesh is created as a way to complete the intersection between the generated geometry. This option controls the method used to create that mesh.
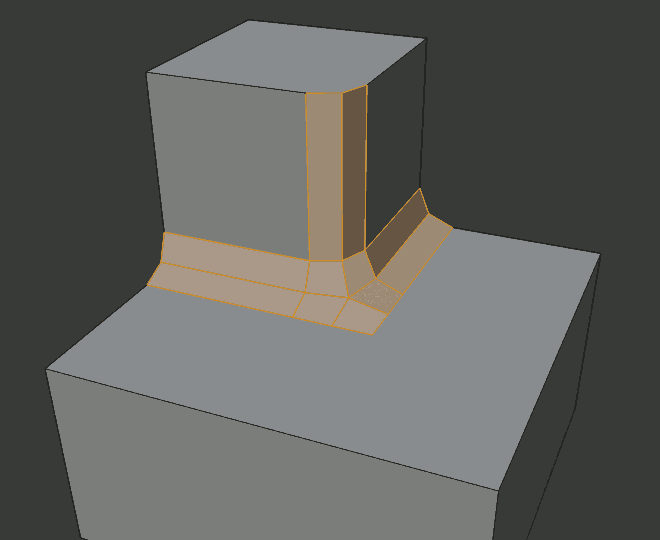
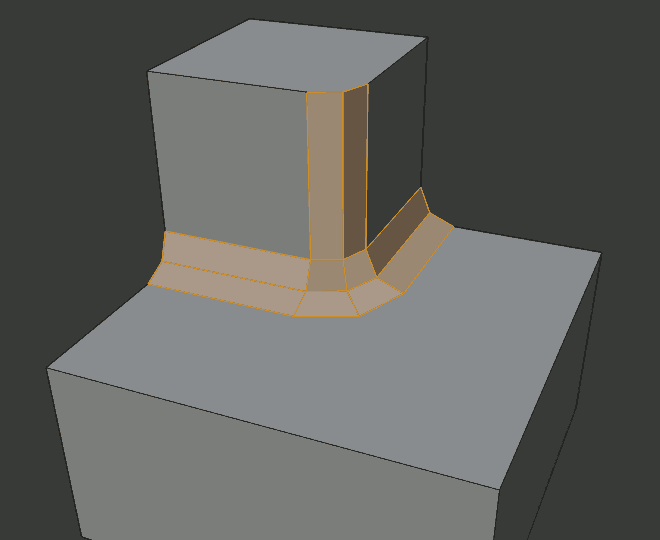
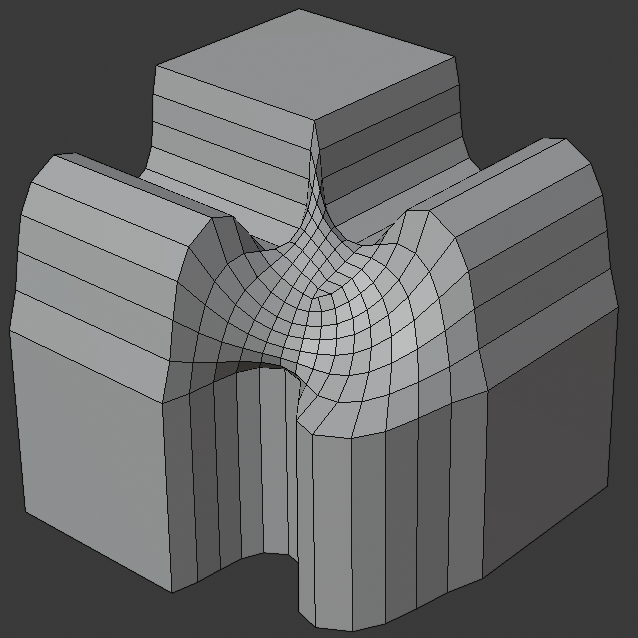
- Grid Fill:
The default method for building intersections, useful when a smooth continuation of the bevel profile is desired. Without Custom Profile enabled, the curve of the profile continues through the intersection, but with a custom profile it just creates a smooth grid within the boundary of the intersection.
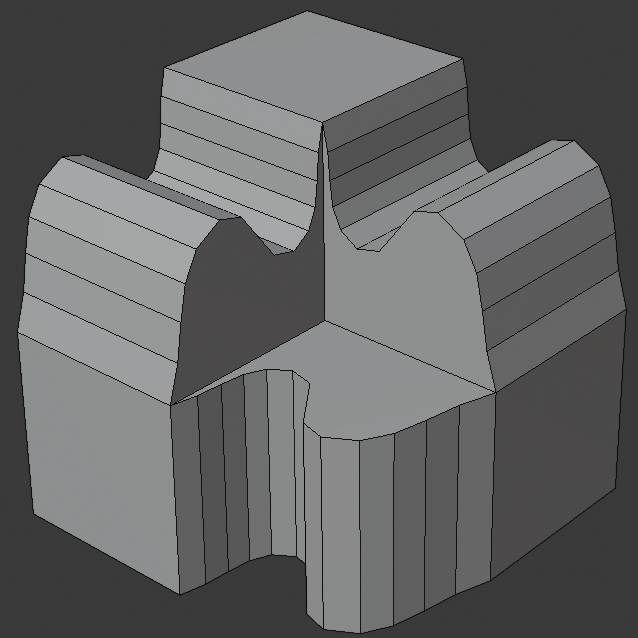
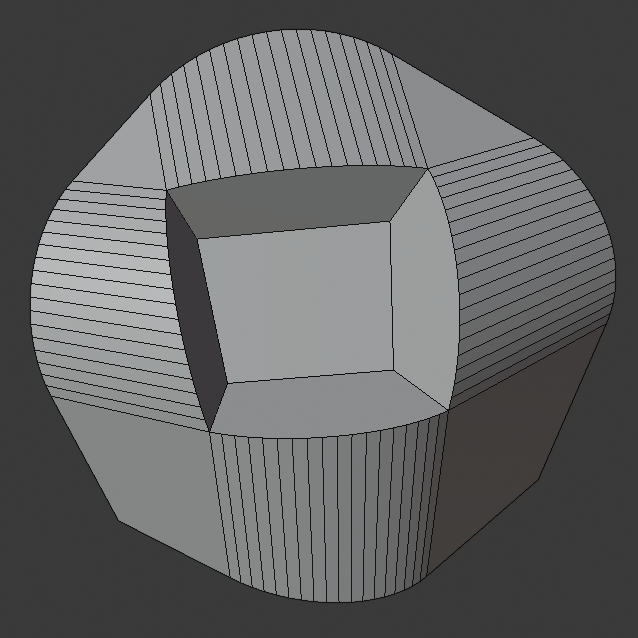
- Cutoff:
Creates a cutoff face at the end of each beveled edge coming into the vertex. This is most useful for custom profiles when the new intersection is too complex for a smooth grid fill.
With a three way intersection, when the inner corners of the cutoff profiles faces meet at the same location, no center face is created.
The direction of the cutoff faces depends on the original vertex's normal.
- 夾鉗重疊
Limits the width of each beveled edge so that edges cannot cause overlapping intersections with other geometry.
- Loop Slide
If there are unbeveled edges along with beveled edges into a vertex, the bevel tries to slide along those edges when possible. Turning the option off can lead to more even bevel widths.

Shading
- Harden Normals
When enabled, the per-vertex face normals of the bevel faces are adjusted to match the surrounding faces, and the normals of the surrounding faces are not affected. This will keep the surrounding faces flat (if they were before), with the bevel faces shading smoothly into them. For this effect to work, a mesh must have a custom split normals attribute. As a convenience, a
custom_normalattribute will be created if one does not already exist.- Mark
- Seam
If a seam edge crosses a non-seam one and you bevel all of them, this option will maintain the expected propagation of seams.
- Sharp
Similar to Mark Seams, but for sharp edges.
- Material Index
用來倒角的材質槽的索引。當設置為
-1時,將採用最靠近原始面的材質。- Face Strength
Set Face Strength on the faces involved in the bevel, according to the mode specified here. This can be used in conjunction with a following Weighted Normals modifier (with the Face Influence option checked).
- 無:
Do not set face strength.
- New:
Set the face strength of new faces along edges to Medium, and the face strength of new faces at vertices to Weak.
- Affected:
In addition to those set for the New case, also set the faces adjacent to new faces to have strength Strong.
- All:
In addition to those set for the Affected case, also set all the rest of the faces of the model to have strength Strong.