Transform Modal Map
During a transformation, some hotkeys can change the behavior of the operation.
You can check editing the keys of these modal modifiers in (at the bottom of the keymap).
約束
When moving, rotating or scaling, if you only want certain axes to be affected, you can restrict the transformation to those axes.
By default the constraint keys are X, Y and Z. This constraint can be restricted to a plane if Shift is pressed or automatically detected if MMB is pressed.
It is worth noting that if you press the same constraint hotkey a second time, you change the orientation from Local to Global or vice versa. Pressing a third time disables the constraint.
Snapping
Transform operations use the snapping settings set in the scene. However, some options can be changed during the transformation.
Snap Invert
Even if the magnetic icon is disabled, you can still enable snapping during a transformation. The default hotkey in this case is Ctrl.
Set Snap Base
The Snap Base is automatically determined based on the Snap Base options. However, this automatic snap detection point of origin may not always align with the user's intentions. Therefore, transform operations include a utility to set a new snap origin point during the transformation. The new Snap Base will correspond to the snap point whose target is defined by the Snap Target.
By default the hotkey is B.
Note
If only Snap to Increment is enabled as Snap Target, the targets Vertex, Edge, Face and Edge Center will be used instead.
Add Snap Point
While you're transforming a selection with snapping enabled, you can press A whenever there's a highlighted snap target to mark it. With multiple such targets marked, the selection will then be snapped to their average location.
Marking a target more than once will give it more weight.
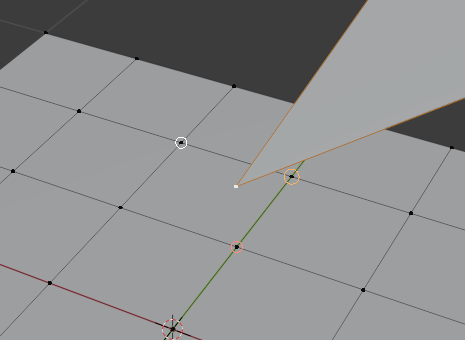
Multiple snapping targets.