曲線
Transform
Reference
- Mode:
編輯模式
- 選單:
A curves objects can be edited by transforming the locations of control points.
- Move, Rotate, Scale
Like other elements in Blender, control points can be moved, rotated, or scaled as described in Basic Transformations.
- To Sphere, Shear, Bend, Push/Pull
The transform tools are described in the Transformations sections.
Radius
Reference
- Mode:
編輯模式
- Tool:
- 選單:
- Shortcut:
Alt-S
The Radius allows you to directly control the width of the extrusion along the "spinal" curve. The radius will be interpolated from point to point (you can check it with the normals). The Radius of the points is set using the Radius transform tool. Or in the Sidebar Transform panel.
One control point radius set to zero.
Duplicate
Reference
- Mode:
編輯模式
- 選單:
- Shortcut:
Shift-D
This operator duplicates the selected control points, along with the curve segments implicitly selected (if any). .. If only a handle is selected, the full point will be duplicated too. The copy is selected so you can move it to another place.
Delete
Reference
- Mode:
編輯模式
- 選單:
- Shortcut:
X
The Delete operator can remove Control Points or Segments. Deleting can be used to make curves shorter or simplify segments by deleting control points in the mid section of a segment.
Toggle Cyclic
Reference
- Mode:
編輯模式
- 選單:
- Shortcut:
Alt-C
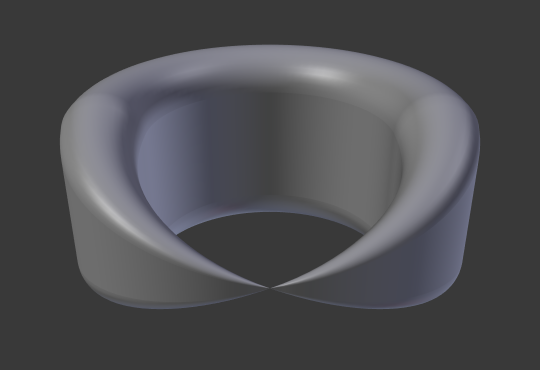
Toggles between an open curve and closed curve (Cyclic). Only curves with at least one selected control point will be closed/open. The shape of the closing segment is based on the start and end handles for Bézier curves, and as usual on adjacent control points for NURBS. The only time a handle is adjusted after closing is if the handle is an Auto one. Fig. Open and Closed curves. is the same Bézier curve open and closed.
This action only works on the original starting control point or the last control point added. Deleting a segment(s) does not change how the action applies; it still operates only on the starting and last control points. This means that Alt-C may actually join two curves instead of closing a single curve! Remember that when a 2D curve is closed, it creates a renderable flat face.
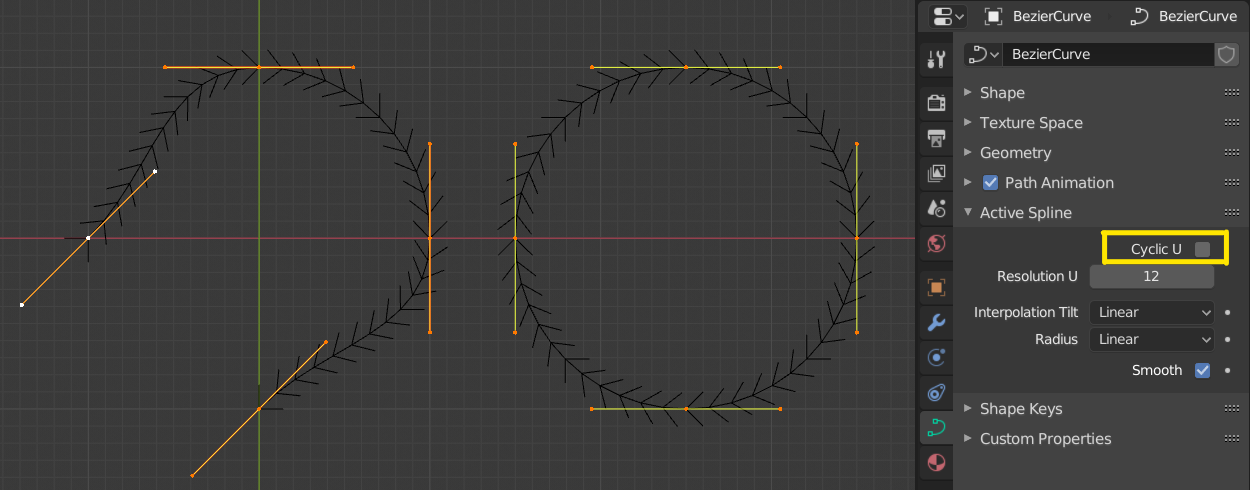
Open and Closed curves.
Set Curve Type
Reference
- Mode:
編輯模式
- 選單:
- Shortcut:
V
Converts splines in a curve object between Bézier, NURBS, Poly, and Catmull Rom types. This is a basic conversion, meaning Blender does not preserve the exact shape or the number of control points. For example, converting a NURBS spline to a Bézier spline maps each group of three NURBS control points to a single Bézier control point with two handles.
- Type
Specifies the target spline type. For more details on spline types, see the Spline Types documentation.
- Bézier:
Converts the spline to a Bézier type. - Poly splines are converted with vector handles. - NURBS or Catmull Rom splines are converted with automatic handles.
Note
When converting a NURBS spline to Bézier, at least six points are required. If the number of points is not a multiple of three, the spline will be truncated.
- NURBS:
Converts the spline to a NURBS type.
- Poly:
Converts the spline to a poly type.
- Catmull Rom:
Converts the spline to a Catmull Rom type.
- Handles
Includes handle information during the conversion process.