Loop Cut and Slide
Reference
- Mode:
編輯模式
- 選單:
- Shortcut:
Ctrl-R
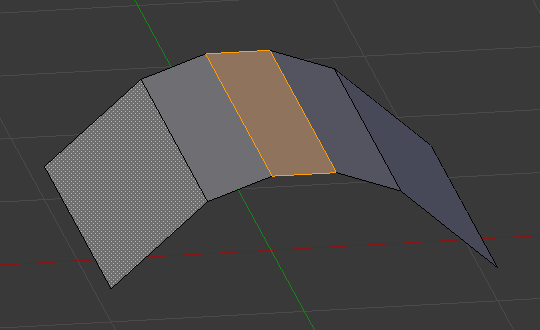
Loop Cut and Slide splits a loop of faces into two or more parallel loops. The new edges are created in the middle by default, but you can also slide them closer to a side.
Usage
The tool is interactive and has two steps:
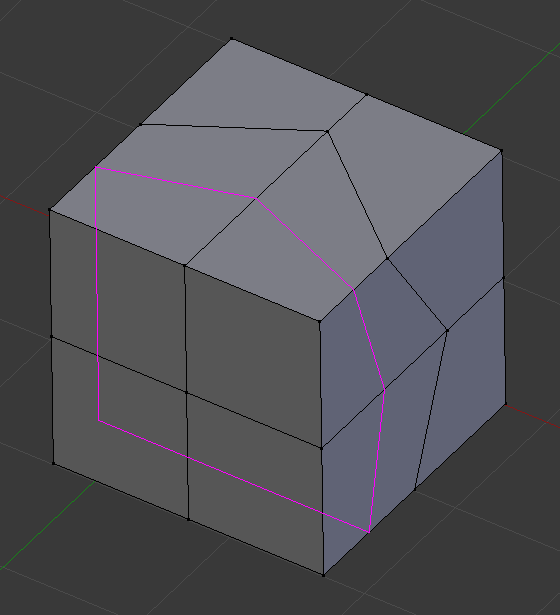
Choose the face loop to cut
After activating the tool, move the cursor over an edge through which the cut should pass (that is, an edge that's perpendicular to the cutting direction). Blender shows a yellow line previewing the cut that will be made. Click LMB to confirm and move to the next step, or RMB to abort.
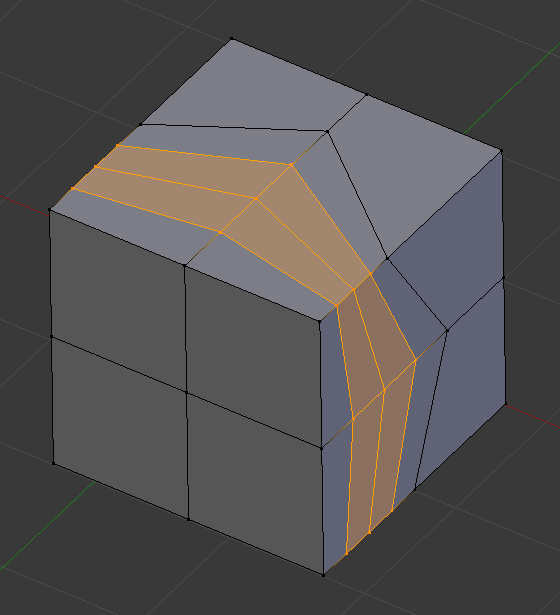
Slide the new edge loop(s)
You can now move the mouse to change the position of the new edge loop. Click LMB to create the cut at the chosen location, or RMB to create it at the center.


See also
The Edge Slide tool for sliding existing edge loops.
選項
These options are available while the tool is in use, and later in the Adjust Last Operation panel.
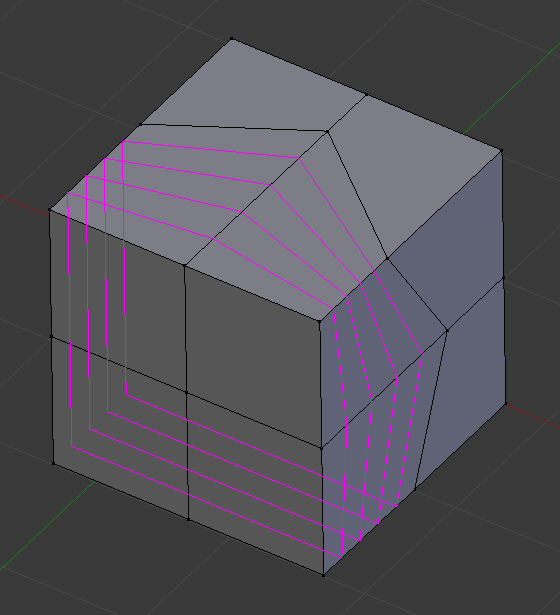
- Number of Cuts Wheel
During the first step, you can change the number of cuts to create by scrolling Wheel, typing a number, or pressing PageUp/PageDown.
- Smoothness
How much to offset the newly created edges along their normals to maintain surface curvature. You can change this in the first step using Alt-Wheel, but because the smoothness isn't previewed at that stage, it's typically better to change it afterwards in the Adjust Last Operation panel.
- Falloff
Falloff type for Smoothness. Changes the shape of the profile.
- 係數
Position of the edge loop relative to the surrounding ones.
- Even E
Makes the new edge loop have an even distance to an existing adjacent one (instead of a distance that's proportional to the length of each perpendicular edge it crosses). You can press E during the second step to toggle it.
- Flipped F
Keep an Even distance to the other adjacent edge. You can press F during the second step to toggle it.
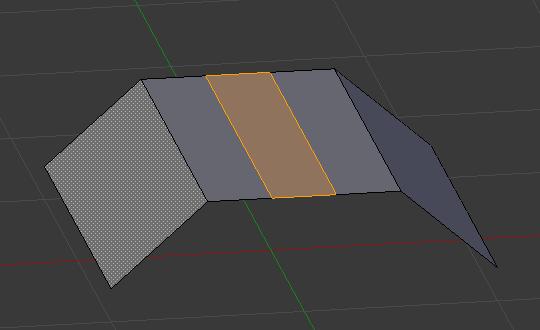
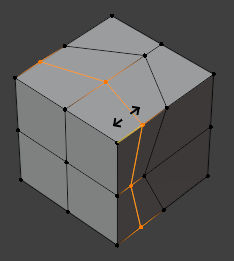
Cut with Even disabled.¶ |
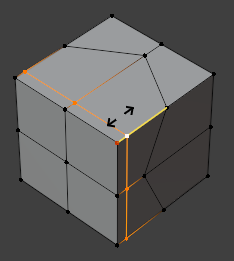
Cut with Even enabled. The red dot shows the side to which an even distance is kept.¶ |
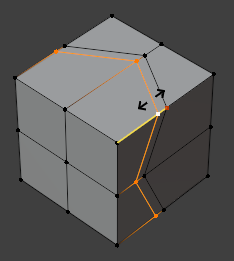
Cut with Even and Flipped enabled.¶ |
- Clamp C
When unchecked, the new edge loop can go outside the face loop's boundary edges. You can press C or hold Alt during the second step to toggle it.
- Mirror Editing
When checked, sliding the newly created edges will also slide any existing edges on the other side of the mesh. Mesh Symmetry needs to be enabled for this to work.
- Correct UVs
When unchecked, the faces in the UV map will be split uniformly even if the cut was placed off-center on the 3D mesh.