Extrude
Referenz
- Modus:
Edit Mode
- Menü:
- Tastenkürzel:
E, Shift-E
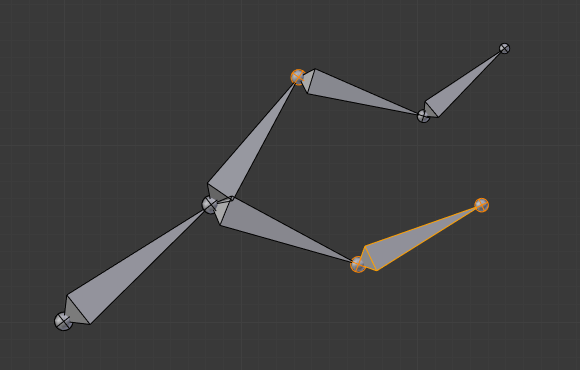
When you press E, for each selected tip (either explicitly or implicitly), a new bone is created. This bone will be the child of „its“ tip owner, and connected to it. As usual, once extrusion is done, only the new bones‘ tips are selected, and in select mode, so you can place them to your liking. See Fig. Extrusion example..
You also can use the rotating/scaling extrusions, as with meshes, by pressing respectively E R and E S – as well as locked extrusion along a global or local axis.
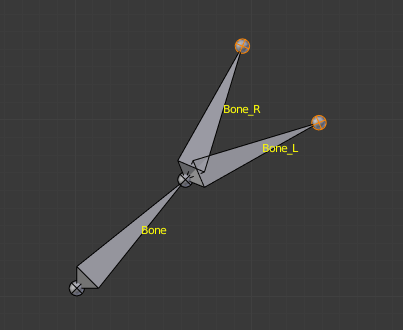
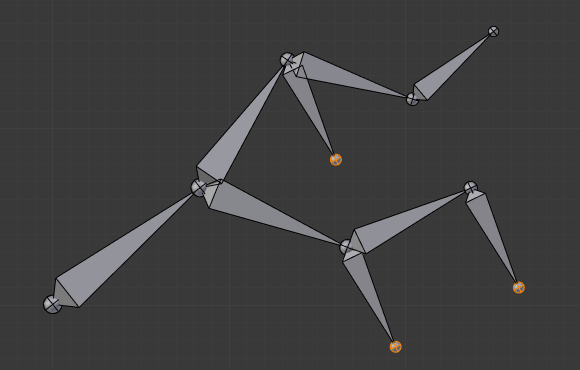
Bones have an extra „mirror extruding“ tool, called by pressing Shift-E. By default, it behaves exactly like the standard extrusion. But once you have enabled X-Axis Mirror editing option, each extruded tip will produce two new bones, having the same name except for the „_L“/ „_R“ suffix (for left/right, see the naming conventions). The „_L“ bone behaves like the single one produced by the default extrusion – you can move, rotate or scale it exactly the same way. The „_R“ bone is its mirror counterpart (along the armature’s local X axis), see Fig. Mirror extrusion example..
Wichtig
Canceling the extrude action causes the newly created bones to snap back to the source position, (creating zero length bones). These will be removed when exiting Edit Mode, however, they can cause confusion and it’s unlikely you want to keep them. If you realize the problem immediately, undo the extrude action.
In case you are wondering, you cannot just press X to solve this as you would in mesh editing, because extrusion selects the newly created tips, and as explained below the Delete tool ignores bones‘ joints. To get rid of these extruded bones without undoing, you would have to move the tips, then select the bones and delete them.
Mouse Clicks
Referenz
- Modus:
Edit Mode
- Tastenkürzel:
Ctrl-RMB
Wenn wenigstens ein Knochen ausgewählt ist, fügt Ctrl-RMB einen neuen Knochen hinzu.
Über die neue Knochen-Spitze:
Nachdem du :kbd:`Ctrl-RMB`gedrückt hast, wird es das aktive Element in dem Knochen-System. Es erscheint dort, wo du hingeklickt hast, aber auf der jener Ebene parallel zur Blickebene, auf welcher auch der 3D Cursor liegt.
Die Position der Wurzel des neuen Knochens und seine Parentierung hängen vom aktiven Element ab:
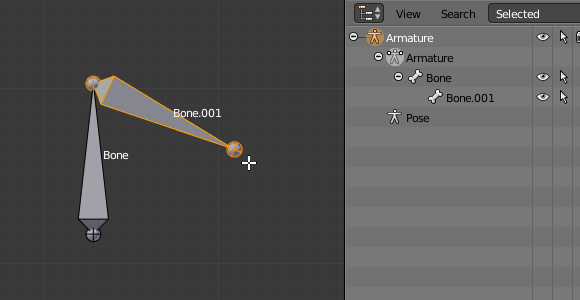
Ctrl-klicken, wenn das aktive Element ein Knochen ist .
Wenn das aktive Element ein Knochen ist:
Des neuen Knochen Wurzel wird auf des aktiven Knochen Spitze platziert.
Der neue Knochen wurde parentiert und mit dem aktiven Knochen verbunden (beachte den Outliner im Bild Ctrl-klicken, wenn das aktive Element eine Spitze ist.).
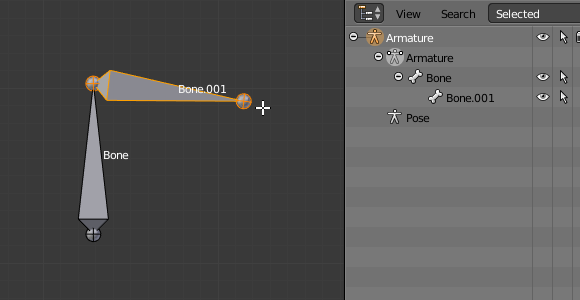
Ctrl-klicken, wenn das aktive Element eine Spitze ist.
Wenn das aktive Element eine Spitze ist:
Die neue Knochen-Wurzel wird auf der aktiven Spitze platziert.
Der neue Knochen ist parentiert und verbunden mit dem Knochen, dem die aktive Spitze gehört (siehe den Outliner im Bild Ctrl-klicken, wenn das aktive Element eine Spitze ist.).
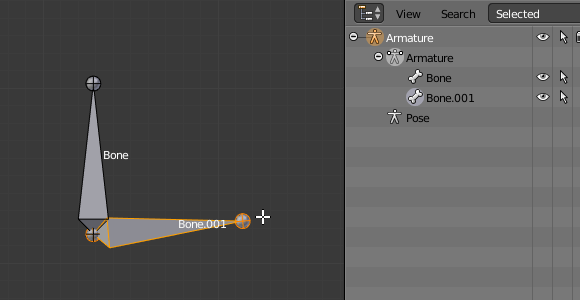
Ctrl-klicken, wenn das aktive Element eine freie Knochen-Wurzel ist.
Wenn das aktive Element eine freie Knochen-Wurzel ist:
Des neuen Knochen Wurzel wird auf des aktiven Knochen Wurzel platziert.
Der neue Knochen ist nicht parentiert mit dem Knochen, dem die aktive Wurzel gehört (siehe den Outliner im Bild Ctrl-klicken, wenn das aktive Element eine freie Knochen-Wurzel ist.).
Und daher wird der neue Knochen mit keinem anderen Knochen verbunden.
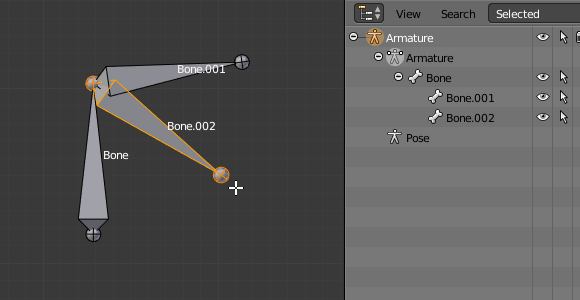
Ctrl-klicken, wenn das aktive Element eine unfreie Knochen-Wurzel ist.
Wenn das aktive Element eine unfreie Knochen-Wurzel ist:
Des neuen Knochen Wurzel wird auf des aktiven Knochen Wurzel platziert.
Der neue Knochen ist mit dem Elterling jenes Knochens parentiert und verbunden, dem die aktive Knochen-Wurzel gehört (siehe den Outliner im Bild Ctrl-klicken, wenn das aktive Element eine unfreie Knochen-Wurzel ist.).
Dies sollte leicht nachvollziehbar sein, denn die aktive Knochen-Wurzel ist ja auch die aktive Wurzel-Spitze seines Elterlings - was bereits im zweiten Fall geregelt ist.
Da die Spitze des neuen Knochens zum aktiven Element wird, kannst du durch wiederholtes Ctrl-RMB klicken fortlaufend Knochen an das Ende der Kette anfügen.