Using UV Maps
Sooner or later, you may want to use an image texture on your model. The UV Editor allows you to map textures directly to the mesh faces. The 3D Viewport shows you the object being textured. If you set the 3D Viewport into Textured viewport shading, you will immediately see any changes made in the UV Editor, and vice versa. This is because no real rendering is taking place; it is all just viewport shading. If you were to apply an image to UVs then render, the texture would not show up by default. So to render an image, you must:
Create a Material for the object.
Tell Blender to use the UV textures on faces when rendering.
To create a Material, you have to click Add New Material in the Shading context.
There are two ways to tell Blender to use the UV texture when rendering; the quick way and the proper way.
The quick way is to use generated UV coordinates. Generated coordinates is used by default by all Texture nodes, with the exception of Image textures that use UV coordinates by default. To use generated coordinates for images as well use the Generated output of the Texture Coordinate node.
The proper way is to use UV Unwrapping to manually generate UV coordinates. To use UV mapping, use the Texture Coordinate node (UV output) or the UV Map node and select the UV map to use, „UVMap“ by default.
Full details of using Image textures are on the Image Textures page.
Bemerkung
Material is Required for Rendering
You can perform UV texturing on a mesh within Blender without assigning a material, and you will even see it in your 3D Viewport in textured viewport mode. However, when you render, you will just get a default gray if the object does not have a Material assigned. You will get a black if you do not load an image. If you do not create a texture that uses the image, your object will render according to the procedural material settings.
Using the Test Grid
If your image is a base uniform pattern and you want the application of that image to your model to look like cloth, you do not want any stretching (unless you want the cloth to look like spandex). You may also need to test your UV mapping with a test image:
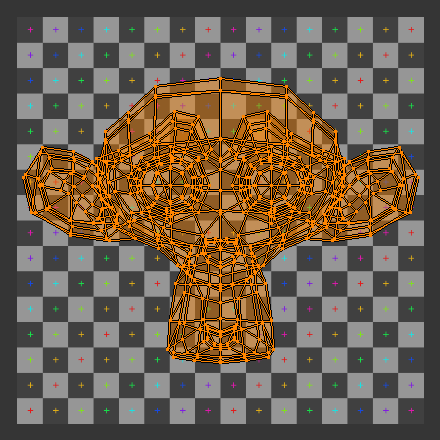
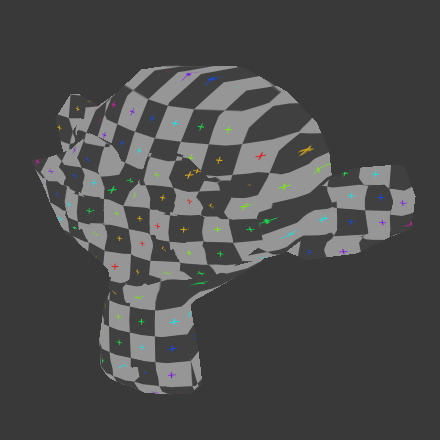
When you render, the mesh will have the test grid as its colors, and the UV texture will be the size image you specified. Note that Blender has a built-in test image. To use it, press the New button of the data-block menu in the Image editor header and change the Generated Type to UV Grid.
Modifying Your Image Texture
Siehe auch
The advantage to saving as a separate file is that you can easily switch textures just by copying other image files over it, and you can use external editing programs to work on it. The advantage of packing is that your whole project is kept in the blend-file, and that you only have to manage one file.