Inset Faces
Referenz
- Modus:
Edit Mode
- Werkzeug:
- Menü:
- Tastenkürzel:
I
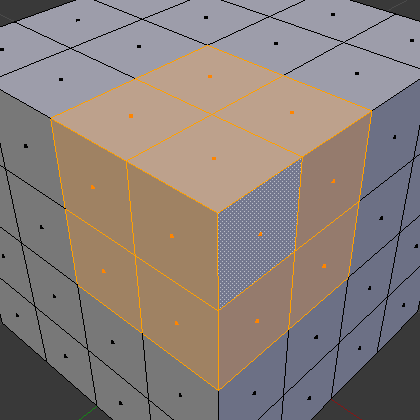
This tool creates a border of faces around the selected faces, then allows adjusting the thickness of that border by moving the mouse. As the border becomes thicker, the outermost selected faces become thinner (while the inner ones stay the same).
While insetting, it’s also possible to adjust the depth of the inset by holding Ctrl. Just like Extrude Faces Along Normals, this moves each selected vertex along its normal and can result in all faces changing their size.
Once the inset looks good, press LMB or Return to confirm. Alternatively, press RMB or Esc to cancel.
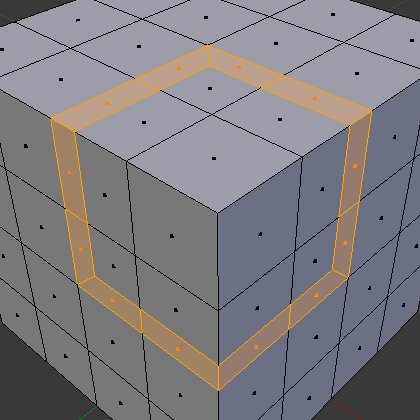

It’s also possible to inset multiple disjoint „patches“ of faces in one go.
Options
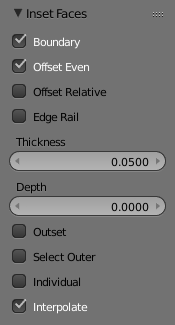
Inset operator options.
The keyboard shortcuts listed below can be used while insetting and are also shown in the status bar.
- Boundary B
Also create border faces at boundary edges (that is, edges that are only part of one face instead of two).
- Offset Even
Maintain an even border width along the edges. When disabled, the border width will be even at the corners instead.


- Offset Relative
Scale the Thickness and Depth offset of each border vertex by the average length of its two neighboring border edges.
- Edge Rail
Align the new edges between the border faces to the existing edges between the inset faces.


- Thickness
The thickness of the newly created border faces.
- Depth Ctrl
The distance to raise or lower the inset faces.
- Outset O
Make the newly created border grow outward instead of inward.
- Select Outer
Switch the selection to the newly created border faces.
- Individual I
Inset each face individually (instead of insetting each patch of faces as a connected whole).
- Interpolate
Interpolate mesh data for the newly created border vertices: UVs, Color Attributes, vertex group weights, etc.