Einführung
An armature in Blender can be thought of as similar to the armature of a real skeleton, and just like a real skeleton an armature can consist of many bones. These bones can be moved around and anything that they are attached to or associated with will move and deform in a similar way.
An „armature“ is a type of object used for rigging. A rig is the controls and strings that move a marionette (puppet). Armature object borrows many ideas from real-world skeletons.
Your First Armature
In order to see what we are talking about, let us try to add the default armature in Blender.
(Note that armature editing details are explained in the armatures editing section.)
Open a default scene, then:
Delete all objects in the scene.
Make sure the cursor is in the world origin with Shift-C.
Press Numpad1 to see the world in Front view.
Add a Single Bone ().
Press NumpadPeriod to see the armature at maximum zoom.
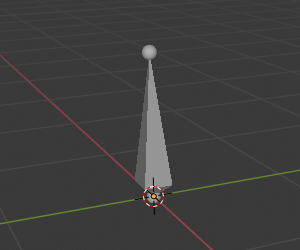
The default armature.
The Armature Object
As you can see, an armature is like any other object type in Blender:
It has an origin, a position, a rotation and a scale factor.
It has an Object Data data-block, that can be edited in Edit Mode.
It can be linked to other scenes, and the same armature data can be reused on multiple objects.
All animation you do in Object Mode is only working on the whole object, not the armature’s bones (use the Pose Mode to do this).
As armatures are designed to be posed, either for a static or animated scene, they have a specific state, called „rest position“. This is the armature’s default „shape“, the default position/rotation/scale of its bones, as set in Edit Mode.
In Edit Mode, you will always see your armature in rest position, whereas in Object Mode and Pose Mode, you usually get the current „pose“ of the armature (unless you enable the Rest Position button of the Armature panel).