Introduction
The Dope Sheet offers a bird’s-eye view of the keyframes inside the scene. It’s inspired by classical hand-drawn animation, where animators make use of a chart showing exactly when each drawing, sound, and camera move will occur, and for how long. It is also possible to show Playback Controls to control the playhead.
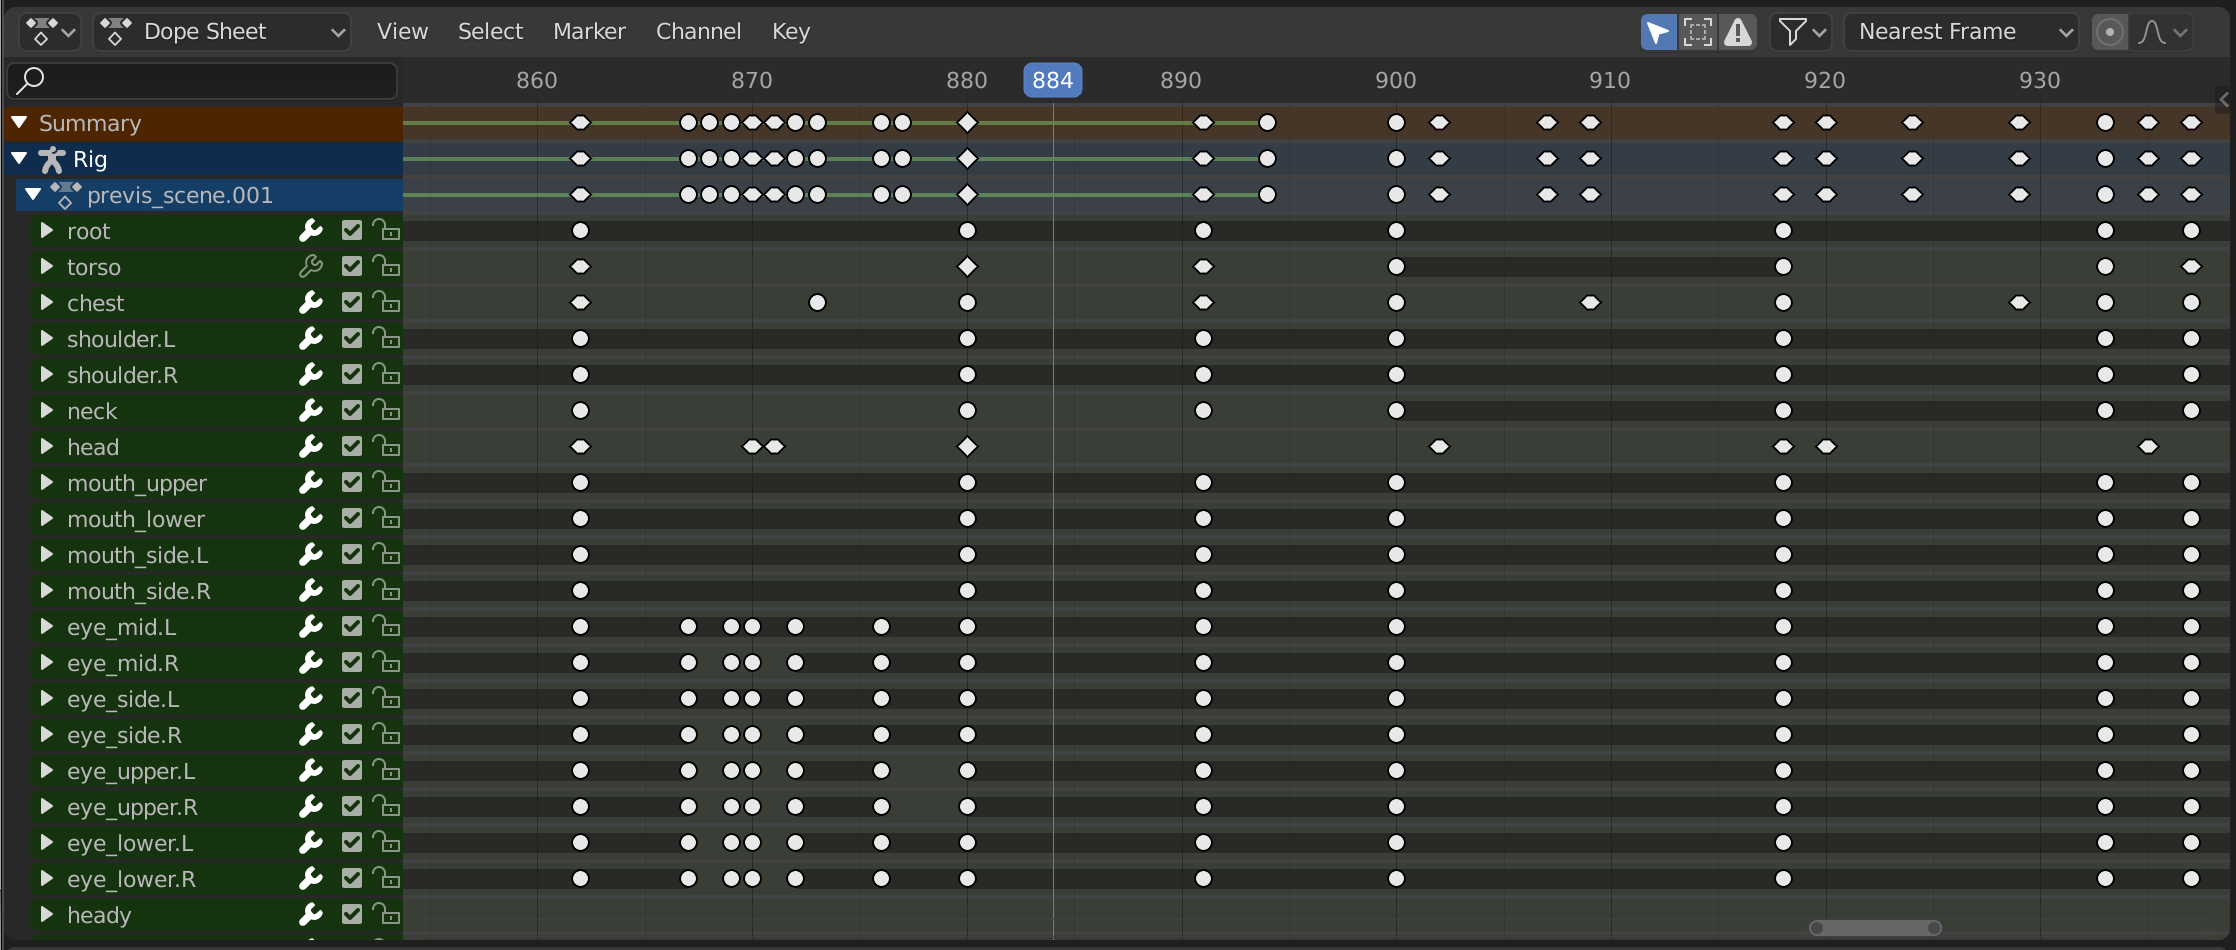
The Dope Sheet.
Dope Sheet Modes
The editor has several different modes that can be selected from a dropdown in the header. The default Dope Sheet mode gives an overview of most types of animatable data. For others, such as masks, you need to switch to a more specific mode.
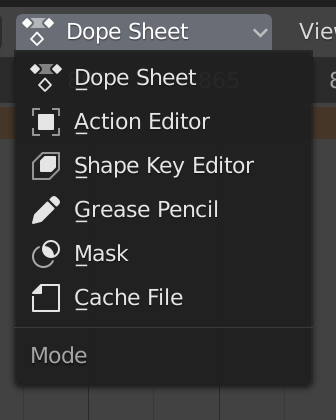
Dope Sheet modes.
The modes are as follows:
Dope Sheet
Cache File: originally meant to show the baked animation data in Alembic files, but never implemented.
Main Region
The Dope Sheet Editor shows a stack of channels (animatable properties), and for each channel, a series of keyframes laid out along the time axis.
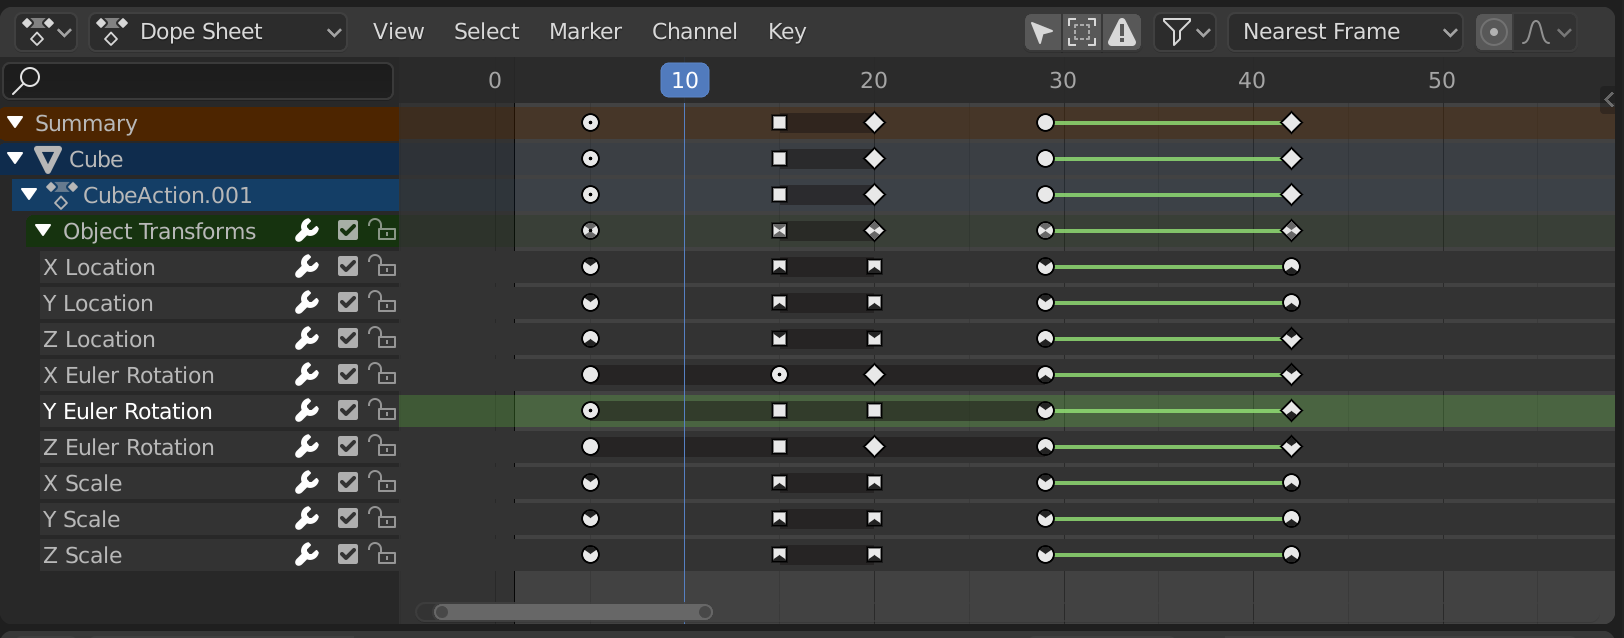
The Dope Sheet Editor with object channels.
Keyframes can take on various colors and shapes:
Gray |
Unselected |
Yellow |
Selected |
Other colors |
Custom keyframe tag set by the user () |
Diamond |
Free Keyframe Handle () |
Round |
Auto-Clamped Keyframe Handle |
Circle |
Automatic Keyframe Handle |
Square |
Vector Keyframe Handle |
Rhombus |
Aligned Keyframe Handle |
Gray bar between keys |
Held key (the two keyframes are identical) |
Green line between keys |
The curve segment uses custom interpolation () |
Upwards arrow |
Local maximum in curve (visible if is enabled) |
Downwards arrow |
Local minimum in curve |
Keyframes can be selected by clicking and moved by dragging. See the Select and Key menus for more options.