Introduction
The Texture Node Editor allows creating custom textures by combining colors, procedural patterns, and images in various ways. This is a step up from the built-in textures, where you can select a type from a list and not much more.
Note
Textures – both built-in ones and node-based ones – are a legacy feature. For their original main purpose, which was of course texturing objects, they have been replaced by Materials which are set up in the Shader Editor.
Today, the use of Textures is limited to:
The Displace Modifier.
Influencing size, density etc. of particle systems.
Influencing emission locations of fire/smoke simulations.
In addition, the Displace modifier and fire/smoke simulations don’t support node-based textures, instead only working with the built-in ones.
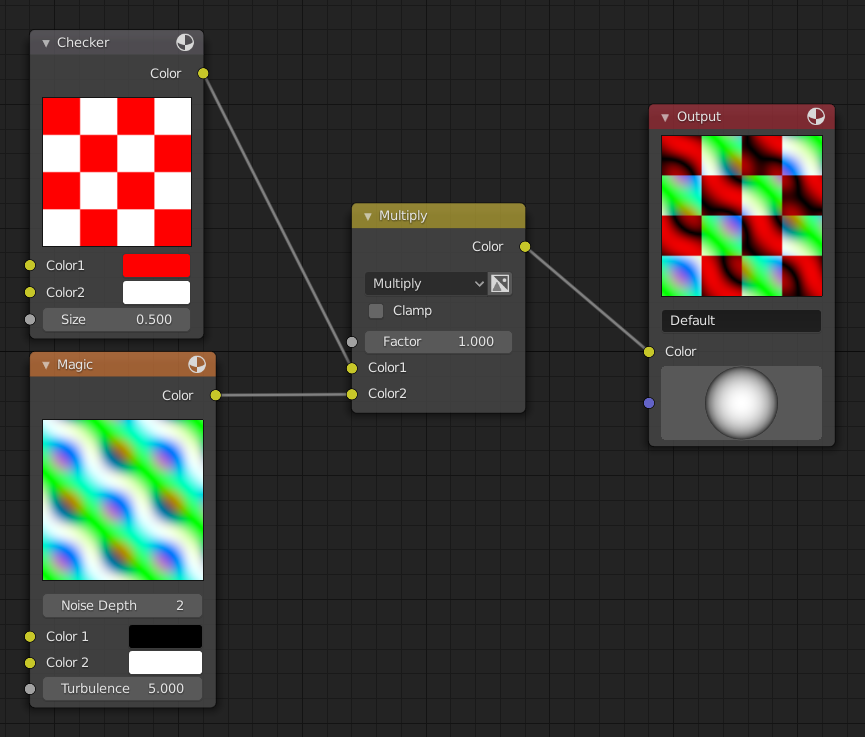
Combined textures based on nodes.
Using Texture Nodes
The default Blender layout has no workspace containing the Texture Node Editor. You need to manually open it in an area of choice.
Once the editor is open, you first need to set the empty Texture Type selector to Brush, after which you can use the Data-Block Menu to start creating textures. Note that you need to enable Use Nodes in the header before you can add nodes.
Header
See Nodes for the header items common to all node editors.
- Texture Type
- World
Deprecated – the scene’s World Environment is now defined using a Material rather than a Texture.
- Brush
Show brush Textures in the data-block menu. Because the other two types are deprecated, this effectively shows all Textures.
- Line Style
Deprecated – Line Styles for the Freestyle renderer are now defined using Materials rather than Textures.