Skin Modifier
The Skin modifier uses vertices and edges to create a skinned surface, using a per-vertex radius to better define the shape. The output is mostly quads, although some triangles will appear around intersections.
It is a quick way to generate base meshes for sculpting and/or smooth organic shapes with arbitrary topology.
Note
Faces in the original geometry are ignored.
Options
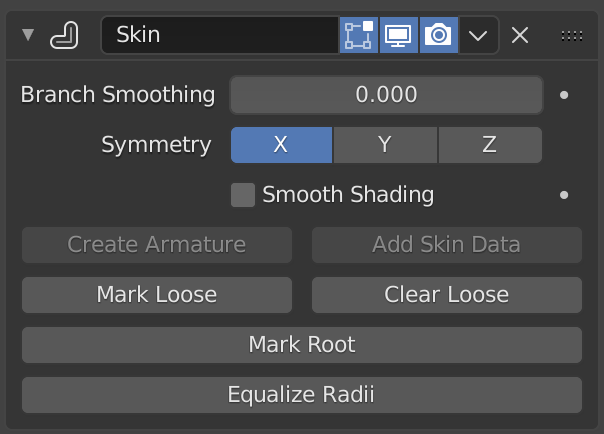
The Skin modifier.
- Branch Smoothing
A branch point is a vertex with three or more connected edges. These areas tend to produce more complicated topology, some of which may overlap. This setting relaxes the surface around these points, with the side effect of shrinking it.
- Symmetry
These checkboxes are used to keep the output topology symmetrical in their respective axes. In other words, using it avoids merging triangles across an axis unless the triangles form a symmetric quad.
Note
They do not add geometry flipped across an axis. For that, the Mirror modifier should be used, typically placed above the Skin one.
- Smooth Shading
Output faces with smooth shading rather than flat shading. The smooth/flat shading of the input geometry is not preserved.
- Create Armature
Create an armature on top of the object. Each edge becomes a bone.
Note
If the root vertex has more than one adjacent edge, an extra bone will be created to serve as the root.
This tool does the following:
A new armature object is added with bones matching the input mesh. The active selection is switched to the new armature.
Weight groups are added to the input mesh. The Skin modifier propagates these weights to the output as well.
An Armature modifier is added directly below the Skin one. Note that the Armature modifier is being applied after the Skin one because it should only deform the output, whereas if it were above, it might change the resulting topology.
- Add Skin Data
This modifier uses a custom set of data in the mesh, that is generated automatically when you add the modifier the first time.
However, you may remove that data, or lose it some way or the other. That operator will generate it again.
- Mark/Clear Loose
By default, a branch vertex (vertex with three or more connected edges) will generate extra edge loops along adjacent edges in order to keep the output tight. Branches can be made loose by clicking Mark Loose, which will allow the output to stretch between all adjacent vertices. This can be disabled again by clicking Clear Loose.
- Mark Root
Marking a vertex as root causes that vertex to be used for calculating rotations for connected limbs. Root vertices also affect the armature output, they will be used as the origin for the root bones.
Each set of connected vertices should have one root node (one is selected by default if you do not assign any manually). Mark Root enforces the one-root per set rule, so it is not necessary to manually unmark roots.
- Equalize Radii
Makes the skin radii of selected vertices equal on each axis.
Skin Mesh Data
That modifier needs a set of specific data in the original mesh to work properly. This data allows you to define the root vertices of each tree, which ones are loose, and the size (radius) of the skin at each vertex. The radii of input vertices can be individually scaled in Edit Mode with the Skin Resize.
Examples
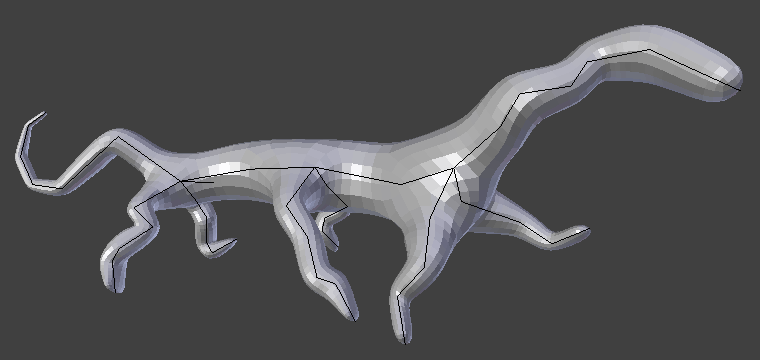
Simple creature, made with only the Skin and Subdivision Surface modifiers.
External Links
Skin Modifier Development at Blender Nation – An early demonstration of the Skin Modifier by Nicholas Bishop (March 2011).
Ji, Zhongping; Liu, Ligang; Wang, Yigang (2010). B-Mesh: A Fast Modeling System for Base Meshes of 3D Articulated Shapes, Computer Graphics Forum 29(7), pp. 2169-2178. – The work this modifier is based on (DOI 10.1111/j.1467-8659.2010.01805.x).