Vertex Weight Proximity Modifier
This modifier sets the weights of the given vertex group, based on the distance between the object (or its vertices), and another target object (or its geometry).
Warning
This modifier does implicit clamping of weight values in the standard (0.0 to 1.0) range. All values below 0.0 will be set to 0.0, and all values above 1.0 will be set to 1.0.
Note
You can view the modified weights in Weight Paint Mode. This also implies that you will have to disable the Vertex Weight Proximity modifier if you want to see the original weights of the vertex group you are editing.
Options
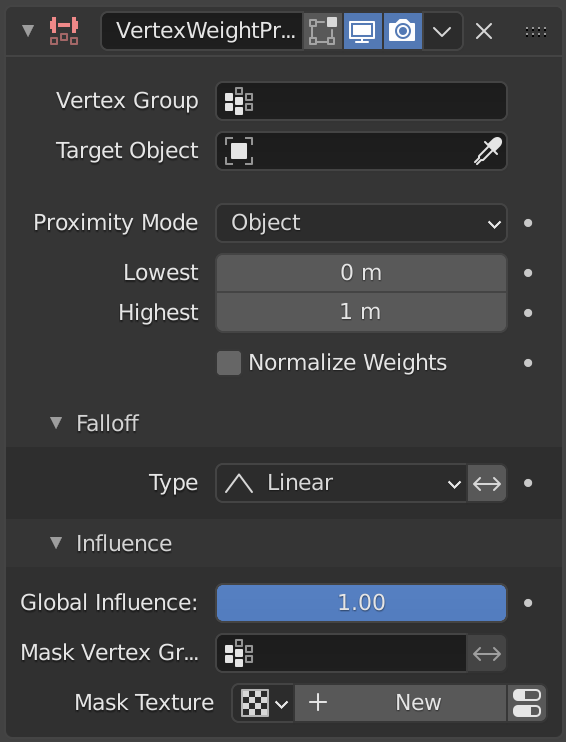
The Vertex Weight Proximity modifier panel.
- Vertex Group
The vertex group to affect.
- Target Object
The object from which to compute distances.
- Proximity Mode
Defines how distances are measured.
- Object:
Uses the distance between the modified object origin and the target object origin.
All affected vertices receive the same weight value.
- Geometry:
Uses the distance between each vertex and the target object’s geometry.
- Geometry Geometry Mode
Defines which geometric elements of the target object are used when computing distances.
- Vertex:
Uses the distance to the nearest vertex of the target object.
- Edge:
Uses the distance to the nearest edge of the target object.
- Face:
Uses the distance to the nearest face of the target object.
Note
When multiple geometry types are enabled, the shortest distance is used.
If the target object has no geometry, such as an empty or camera, the object origin is used instead.
- Lowest
Distance value mapped to a weight of
0.0.- Highest
Distance value mapped to a weight of
1.0.
Tip
Lowest can be set above Highest to reverse the mapping.
- Normalize Weights
Scale the weights in the vertex group to keep the relative weight but the lowest and highest values follow the full 0 - 1 range.
Falloff
- Type
Defines how distances are converted into weight values.
- Linear:
Uses a direct linear mapping.
- Custom Curve:
Uses a user-defined curve for the mapping.
- Sharp:
Creates a sharper transition.
- Smooth:
Creates a smoother transition.
- Root:
Biases the mapping toward higher values.
- Sphere:
Creates a rounded spherical-style falloff.
- Random:
Assigns random weights to vertices.
- Median Step:
Produces binary weights of either
0.0or1.0, using0.5as the threshold.
- Invert
Inverts the falloff.
Influence
Those settings are the same for the three Vertex Weight modifiers, see the Vertex Weight Edit modifier page.
Example
This example shows the usage of distance from a target object to dynamically control a Wave modifier with a modified vertex group:
The blend-file, TEST_1 scene.