Curve Guide
Riferimento
- Pannello:
- Tipo:
Curve Guide
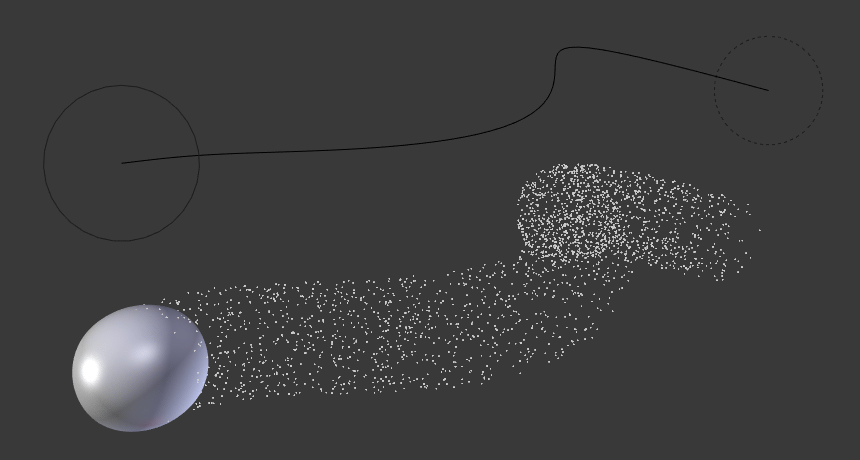
The Curve Guide is used to force particles to follow a certain path defined by a Curve Object. A typical scenario would be to move a red blood cell inside a vein, or to animate the particle flow in a motor. You can also use Curve Guide to shape certain hair strands.
Nota
You can also use the Particle Edit Mode to define a path.
Since you can animate curves as a soft body or any other usual way, you may build very complex animations while keeping great control and keeping the simulation time to a minimum.
To make particles point in the direction of the curve, you need to set their Orientation Axis to Velocity / Hair, enable Dynamic, and set their Angular Velocity Axis to Velocity, all in the the Rotazione settings of the particle system. The Follow Path Constraint and the curve’s legacy Follow option won’t work for this.
A Curve Guide force affects all particles on the same layer, independently from their distance to the curve. If you have several guides in a layer, their fields add up to each other (the way you may have learned it in your physics course). But you can limit their influence radius by changing the Minimum Distance (see below).
A particle follows a Curve Guide during its lifetime, the velocity depends on its lifetime and the length of the path.
Nota
The Curve Guide does not affect soft bodies.
Opzioni
- Free
Fraction of particle life time, that is not used for the curve.
- Falloff Power
This setting governs the strength of the guide between Min Distance and Max Distance. A falloff of 1 means a linear progression.
- Additive
If you use Additive, the speed of the particles is also evaluated depending on the falloff.
- Weights
Use Curve weights to influence the particle influence along the curve.
- Clumping Amount
The particles come together at the end of the curve (1) or they drift apart (-1).
- Shape
Defines the form in which the particles come together. +0.99: the particles meet at the end of the curve. 0: linear progression along the curve. -0.99: the particles meet at the beginning of the curve.
- Min Distance
The distance from the curve, up to where the force field is effective with full strength. If you have a falloff of 0, this parameter will have no effect, because the field is effective with full strength up to Max Distance (or the infinity). Min Distance is shown with a circle at the endpoints of the curve in the 3D Viewport.
- Max Distance
The maximum influence radius. Shown by an additional circle around the curve object.
Kink
Avvertimento
This feature is broken in the current version, see Bug Report #46776.
- Tipo
Changes the shape that the particles can take.
- None:
Todo.
- Braid:
Braid.
- Curl:
The radius of the influence depends on the distance of the curve to the emitter.
- Radial:
A three-dimensional, standing wave.
- Ruota:
A one-dimensional, standing wave.
- Rotazione:
Todo.
- Wave:
A two-dimensional, standing wave.
It is not so easy to describe the resulting shapes, so have a look at the example below.

Kink options of a curve guide. From left to right: Radial, Wave, Braid, Roll. Animation.
- Asse
Which axis to use for the offset.
- Frequency
The frequency of the offset.
- Shape
Adjust the offset to the beginning/end.
- Amplitude
The Amplitude of the offset.
Esempi

Curve Guide force field.