Editing Nodes
Trasforma
Riferimento
- Menù:
- Scorciatoia:
G, R, S
You can move the selected node(s) by clicking and dragging any empty part of them. Alternatively, press G, move the mouse, and click LMB to confirm.
Dragging a node on top of an existing link will intelligently insert the selected node into the link path. This generally uses the first socket that matches the link type. The automatic node attachment feature can be toggled with Alt. When a node is automatically attached, the surrounding nodes will be offset to the right or left depending on the T toggle; see Auto-Offset for more information.
While dragging nodes, you can press F to toggle their parent Frame:
If the nodes are inside a frame, they will be detached from it.
If the nodes are not inside a frame and there is a frame under the cursor, they will be attached to that frame.
In general, it is recommended to arrange your nodes so that data flows from left to right, top to bottom.
The width of a node can be adjusted by dragging its left or right border. When multiple nodes are selected, resizing one node affects all selected nodes.
Rotating (R) and scaling (S) only apply when multiple nodes are selected, and only affect their positions.
Collegare i Connettori
LMB-click on a socket and drag. «Connect to Output» will see a line coming out of it; this is called a link. Keep dragging and connect the link to an input socket of another node, then release the LMB.
While multiple links can route out of an output socket, typically a single link can be attached to an input socket, that is unless the input is a multi-socket input with looks like a pill shaped socket.
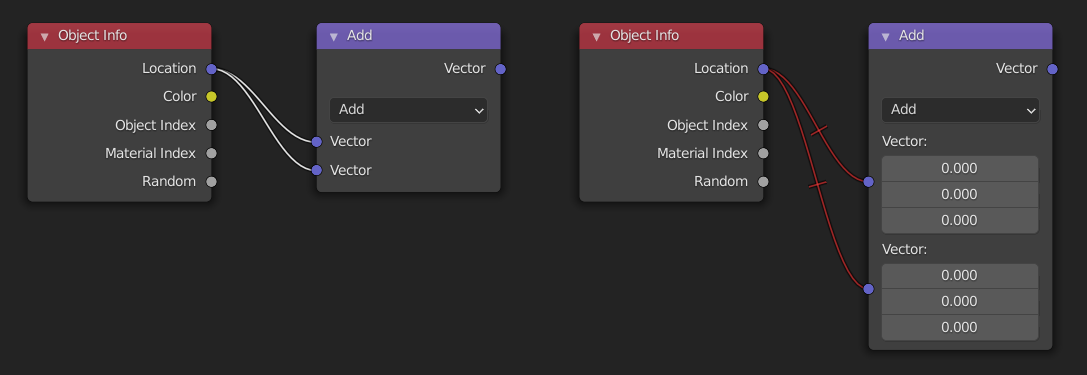
To swap multiple links of a similar type, press and hold Alt while moving a link. This feature also works when adding a new link into a pre-existing socket.
Per riposizionare le connessioni in uscita di un nodo, anziché aggiungerne una nuova, tieni premuto Ctrl mentre trascini da un connettore d’uscita. Questo funziona sia per singole che per più connessioni in uscita.
Nodes that have no connections can be inserted on a link by just moving the node over the link and release when the link is highlighted.
- Make Links J
Selezionare più nodi con connettori aperti, quindi utilizzare Crea connessioni per creare connessioni tra di essi. Utilizzare di nuovo Crea connessioni se sono presenti altri nodi che possono essere collegati.
- Make and Replace Links Shift-J
Crea e sostituisci connessioni funziona in modo simile a Crea connessioni, ma sostituirà eventuali connessioni esistenti.
Scollega i Connettori
Interattivamente
Drag the link away from its input socket and let it go, keeping it unconnected.
Mute Links
Riferimento
- Menù:
- Scorciatoia:
Ctrl-Alt-RMB
Activate the menu item or hold the key combination, then draw a line across one or more links to mute/unmute them. A muted link acts as though it’s no longer there; this also means the input fields for specifying fixed values become visible again.
When muting links on the input side of a reroute node, the links on its output side will be muted too.
Taglia Connessioni
Riferimento
- Menù:
- Scorciatoia:
Ctrl-RMB
Activate the menu item or hold the key combination, then draw a line across one or more links to delete them.
Nota
The key combination is normally reserved for Lasso Select. In node editors, lasso selection is instead performed with Ctrl-Alt-LMB.
- Detach Links Alt-LMB drag
Use Detach Links to cut all the links attached to the selected nodes and move the nodes to a new location.
Cut/Copy/Paste
Riferimento
- Menù:
, ,
- Scorciatoia:
Ctrl-C, Ctrl-V
These operators allow transferring nodes within a node tree, between different node trees, or even between Blender instances.
- Cut
Removes the selected nodes and places them on the clipboard. When possible, links are automatically reconnected to preserve the node flow.
- Copy Ctrl-C
Copies the selected nodes to the clipboard, including the connections between them.
- Paste Ctrl-V
Inserts the nodes from the clipboard into the node tree.
Nota
Pasted nodes are placed at the same coordinates as when they were copied. The same considerations as duplicating nodes apply.
Suggerimento
Nodes can be copied and pasted between Blender instances. This also works across different node editors, provided the node types are supported by the destination editor.
Duplica
Riferimento
- Menù:
- Scorciatoia:
Shift-D
Select one or more nodes, activate the menu item or press the key combination, then move the mouse to a new location and click LMB (or press Return) to place the duplicated node(s).
Nota
Quando si duplica un nodo, il nuovo nodo verrà posizionato esattamente sopra il nodo duplicato. Se lo lasci lì (ed è abbastanza facile farlo), non puoi facilmente dire che ci sono due nodi lì! In caso di dubbio, selezionare un nodo e spostarlo leggermente per vedere se qualcosa è nascosto sotto.
Duplicate Linked
Riferimento
- Menù:
- Scorciatoia:
Alt-D
Duplicate selected nodes, but not their node trees (in the case of group nodes), and move them.
Cancella
Riferimento
- Menù:
- Scorciatoia:
X, Delete
Cancella il/i nodo(i) selezionato(i).
Delete with Reconnect
Riferimento
- Menù:
- Scorciatoia:
Ctrl-Delete
Deletes the selected node(s), then creates new links connecting their former input nodes to their former output nodes.
Swap
Riferimento
- Menù:
- Scorciatoia:
Shift-S
The Swap operator replaces the selected node with another node type chosen from the menu.
All existing links are automatically reconnected where possible, matching input and output sockets by name and type. If a connection cannot be matched, it is left unconnected.
Mostra/Nascondi
Disattiva
Riferimento
- Menù:
- Scorciatoia:
M
Muting a node removes its contribution to the node tree, and makes all links pass through it without change. Links will appear red as an indicator of passing through the muted node.
Suggerimento
Individual node links can be muted with Mute Links.
Node Preview
Riferimento
- Menù:
- Scorciatoia:
Shift-H
Mostra/Nasconde un’area di anteprima sul nodo che visualizza il frame dopo l’applicazione dell’operazione di quel nodo. Questo può anche essere attivato facendo clic sull’icona della sfera materiale nell’intestazione del nodo.
Nota
This operator are only available in the Compositor.
Node Options
Riferimento
- Menù:
Mostra/Nasconde tutte le proprietà del nodo.
Unconnected Sockets
Riferimento
- Menù:
- Scorciatoia:
I Connettori (socket) portano e prendono i valori a/da un nodo. Appaiono come piccoli cerchi colorati in ogni alto del nodo. I connettori inutilizzati possono essere nascosti con Ctrl-H. Ci sono connettori di due funzioni: `ingressi`_ e `uscite`_.
Comprimi/Espandi qualsiasi connettore d’ingresso o uscita a cui non sono collegati altri nodi.
Collapse
Riferimento
- Menù:
- Scorciatoia:
H
Collapses the node so only the node header is visible. This can also be toggled by clicking the triangle on the left of the node header.
Comprime e nasconde i connettori non utilizzati
Riferimento
- Menù:
- Scorciatoia:
H
Applies both the Unconnected Sockets and Collapse operations.
Read View Layers
Riferimento
- Menù:
- Scorciatoia:
Trova Nodo Ctrl-F
Reads all the current scene’s render layers from cache, as needed. This can be used to save RAM while rendering because the render layers do not have to be saved in RAM. And also for recovering some information from a failed render. For this to work, Cache Result must be enabled.
Nota
This operator are only available in the Compositor.
Connect to Output
Riferimento
- Scorciatoia:
Shift-Alt-LMB
Connect the output of the selected node to the final output of the node tree (Material Output or World Output in Shader, the final Group Output in Geometry Nodes and Compositor, Output in Texture Nodes), or, if the node is inside a group, to the Group Output.