Vista Telecamera
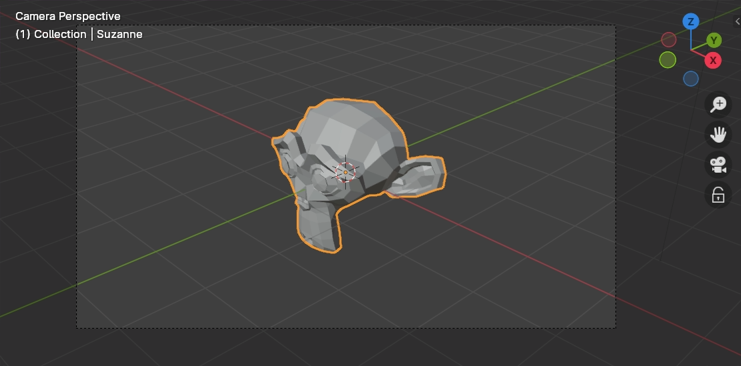
Dimostrazione della vista della telecamera.
The Camera view shows the current scene from the active camera’s viewpoint.
The Camera view can be used to virtually compose shots and preview how the scene will look when rendered. The rendered image will contain everything within the dashed frame.
Vedi anche
Camera Settings for details on how camera settings are used for display and rendering.
Suggerimento
While in camera view, you can select the camera by clicking the dashed frame (assuming the camera object isn’t hidden).
Visualizzazione della Telecamera Attiva
Riferimento
- Modalità:
Tutte le Modalità
- Menù:
,
- Scorciatoia:
Numpad0
This switches the view to the active camera.
Impostazione della Telecamera Attiva
Riferimento
- Modalità:
Modalità Oggetto
- Menù:
- Scorciatoia:
Ctrl-Numpad0
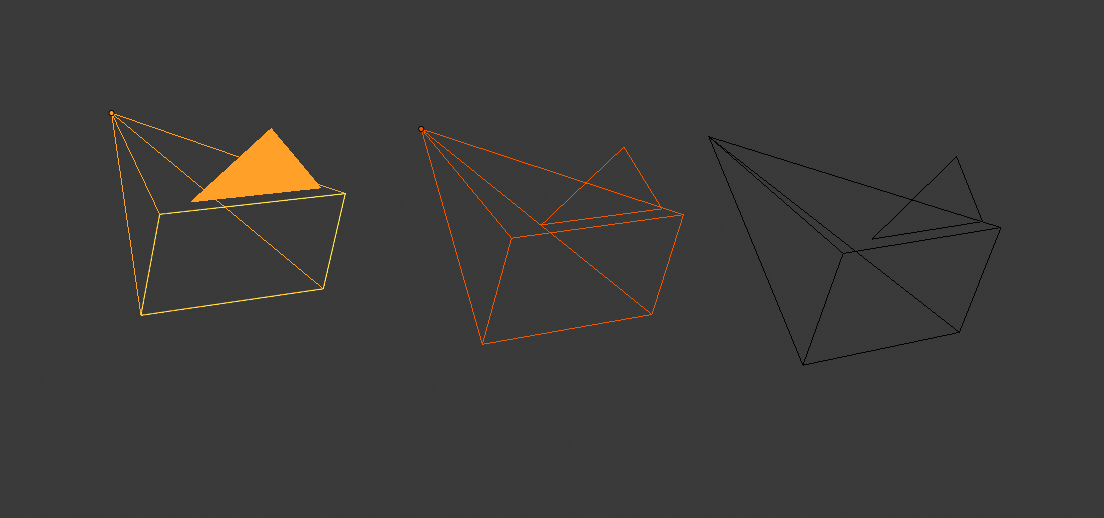
Telecamera attiva (a sinistra) visualizzata con un triangolo solido sopra di essa.
This sets the current active object as the active camera and switches to the camera view.
The active camera is the one that will be used for rendering, and which you’ll look through when choosing camera view.
Another way of setting the active camera is through the Scene tab of the Properties.
Nota
The active camera is normally defined on the scene level, so that it’s the same across all 3D Viewports. However, it’s also possible to make a camera the active one within one Viewport only. See Local Camera.
Cambio Telecamera Animata
While a scene contains only one camera by default, it’s possible to have multiple. You can then bind the cameras to specific time points in your animation to create jump cuts showing different viewpoints. See Animating Cameras.
Frame Camera Bounds
Riferimento
- Modalità:
Tutte le Modalità
- Menù:
- Scorciatoia:
Home
Centers the camera view inside the 3D Viewport’s screen area and resizes the view to fit within the area’s bounds.
Zoom Camera 1:1
Riferimento
- Modalità:
Tutte le Modalità
- Menù:
Zooms the view so that the camera frame has the exact same size as the output resolution. This allows you to preview exactly how large objects will be in the rendered image/animation.
Camera Positioning
There are several ways to position a camera in a scene. These tools allow aligning the camera to the viewport, navigating the scene while controlling the camera, or performing traditional cinematography-style camera moves.
Suggerimento
The active «camera» can be any object used as the scene camera. These techniques can also be used to position and aim other objects, such as lights.
Align Active Camera to View
See Align Active Camera to View.
This operator aligns the active camera to match the current 3D View. It is useful when you have framed a composition in the viewport and want to place the camera exactly at that viewpoint.
Ruota, Panoramica, Sposta, e Traccia
To perform these camera moves, the camera must first be selected so transform operations apply to it. The following actions also assume that you are in camera view. Having done so, you can now manipulate the camera using the same tools that are used to transform any object:
- Ruota
Press R to enter object rotation mode. The default will be to rotate the camera along its local Z axis (the axis orthogonal to the camera view), which is the definition of a camera «roll».
- Panoramica Verticale o Inclinazione
This is just a rotation along the local X axis. Press R to enter object rotation mode, then X twice. (The first press selects the global axis, the second the local axis. This works with any axis; see Axis Locking).
- Pan Orizzontale o Imbardata
This corresponds to a rotation around the camera’s local Y axis. Press R, then Y twice.
- Sposta
Per spostare la telecamera, premere G quindi MMB (o Z due volte).
- Tracciamento Laterale
Press G and move the mouse (you can use X or Y twice to get purely horizontal or vertical tracking).