Trasforma
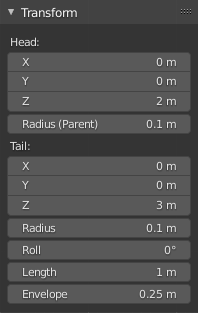
The Transform panel for armatures in Edit Mode.
We will not detail here the various transformations of bones, nor things like axis locking, pivot points, and so on, as they are common to most object editing, and already described in the mesh section. The same goes for mirroring, as it is nearly the same as with mesh editing. Just keep in mind that bones” roots and tips behave more or less like meshes” vertices, and bones themselves act like edges in a mesh.
As you know, bones can have two types of relationships: They can be parented, and in addition connected. Parented bones behave in Edit Mode exactly as if they had no relations. They can be moved, rotated, scaled, etc. without affecting their descendants. However, connected bones must always have parent’s tips connected to child’s roots, so by transforming a bone, you will affect all its connected parent/children/siblings.
While with other transform tools, the «local axes» means the object’s axes, here they are the bone’s own axes (when you lock to a local axis, by pressing the relevant key twice, the constraint is applied along the selected bone’s local axis, not the armature object’s axis).
Finally, you can edit in the Transform panel in the Sidebar region the positions and radius of both joints of the active selected bone, as well as its roll rotation.
Scale Radius
Riferimento
- Modalità:
Modalità Modifica
- Menù:
- Scorciatoia:
Alt-S
You can alter the radius that a bone has by selecting the head, body or tail of a bone, and then press Alt-S and move the mouse left or right. If the body is selected the mean radius will be scaled. And as usual, with connected bones, you scale at the same time the radius of the parent’s tip and of the children’s roots.
You can also alter the bone radius by selecting the tail or head of the bone you wish to alter, then navigate to and entering new values for the Tail and Head number fields.

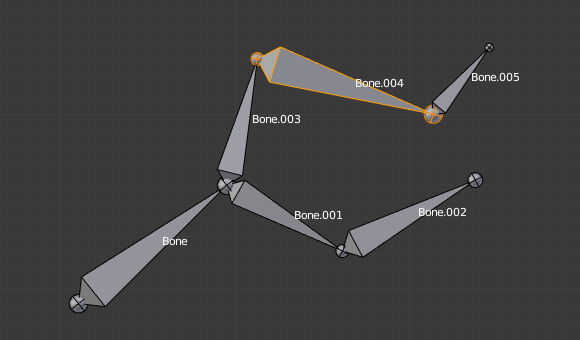
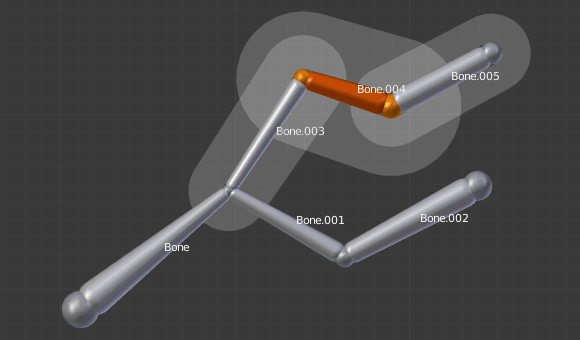
A single selected bone in Octahedron visualization.¶ |
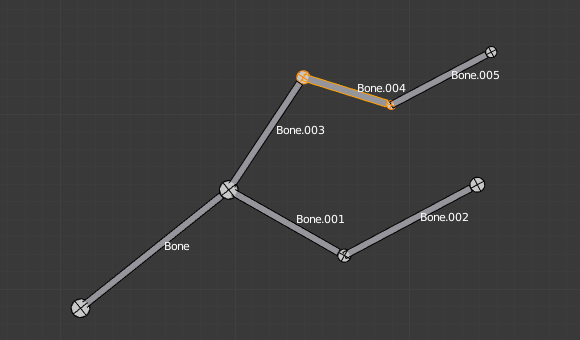
After normal scale.¶ |
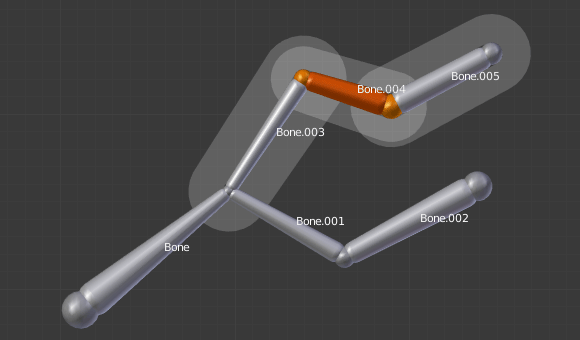
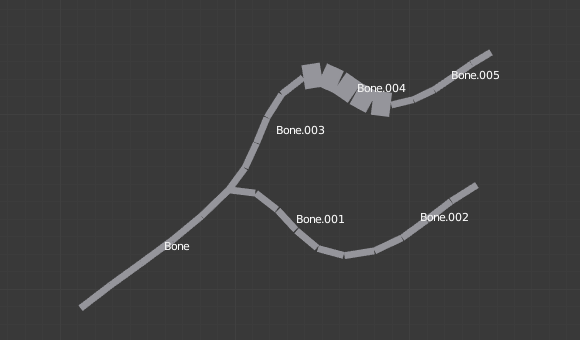
A single selected bone in Envelope visualization.¶ |
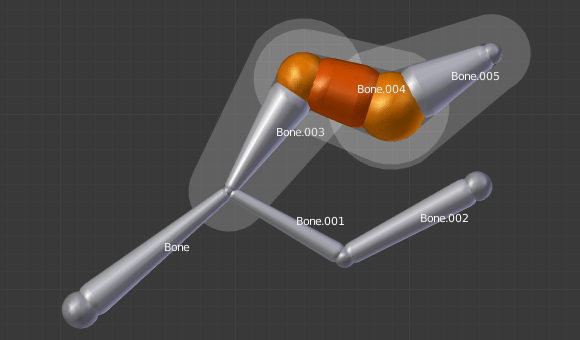
After Scaled Radius. Its length remains the same, but its joints” radius are bigger.¶ |
Note that, when you resize a bone (either by directly scaling it, or by moving one of its joints), Blender automatically adjusts the end-radii of its envelope proportionally to the size of the modification. Therefore, it is advisable to place all the bones first, and only then edit their properties.
Scale Envelope Distance
Riferimento
- Modalità:
Edit Mode and Pose Mode
- Menù:
- Scorciatoia:
Ctrl-Alt-S
You can alter the size of the Bone Envelope volume by clicking on the body of the bone you want to alter, Ctrl-Alt-S then drag your mouse left or right and the Bone Envelope volume will alter accordingly.
You can also alter the Bone Envelope volume by selecting the Bone you wish to alter and then navigate to then enter a new value into it.
Altering the Bone Envelope volume does not alter the size of the bone just the range within which it can influence vertices of child objects.

Align Bones
Riferimento
- Modalità:
Modalità Modifica
- Menù:
- Scorciatoia:
Ctrl-Alt-A
Rotates the selected bones to achieve the same orientation as the active one.